!
WARNING !
ANY ALTERATIONS TO THIS MACHINE WILL
VOID MANUFACTURER’S WARRANTY
AND MAY RESULT IN INJURY OR DEATH.
NEVER ALTER THIS EQUIPMENT IN ANY WAY
DANGER !
DISCONNECT POWER BEFORE SERVICING
OR REMOVING ICE BLOCK HOUSING BOLTS
SAFETY !
KEEP HANDS AND FOREIGN OBJECTS
OUT OF THE ICE LOADING
AND BLADE HOUSING AREA
DO NOT handle machine recklessly or carelessly. The owner
is responsible for all machine usage and all operator actions.
NOTE: Snowie LLC does not assume any liability for any kind of harm or injury caused dur-
ing or by the operation of this equipment. The equipment owner is responsible for all actions
by anyone using the equipment. Ensure all operators are properly trained prior to use. All
rights reserved to make changes or updates without notice at the discretion of Snowie LLC.
SAFETY PRECAUTIONS
Read all safety precautions and instructions before any setup, opera-
tion, or use of the machine. Serious injury may occur for inappropri-
ate machine usage. Always disconnect power before any service.
2
Snowie Block Shaver
Blade Life
The Snowie Block
Shaver blade design
allows for blade ro-
tation to refresh the
cutting surface before
replacement.
After the blade rota-
tion has been com-
pleted for the full
surface, the blade will
need to be replaced
with a new blade and
the process repeated.
Clean stored blade
and tools thoroughly
before use to ensure
sanitary conditions.
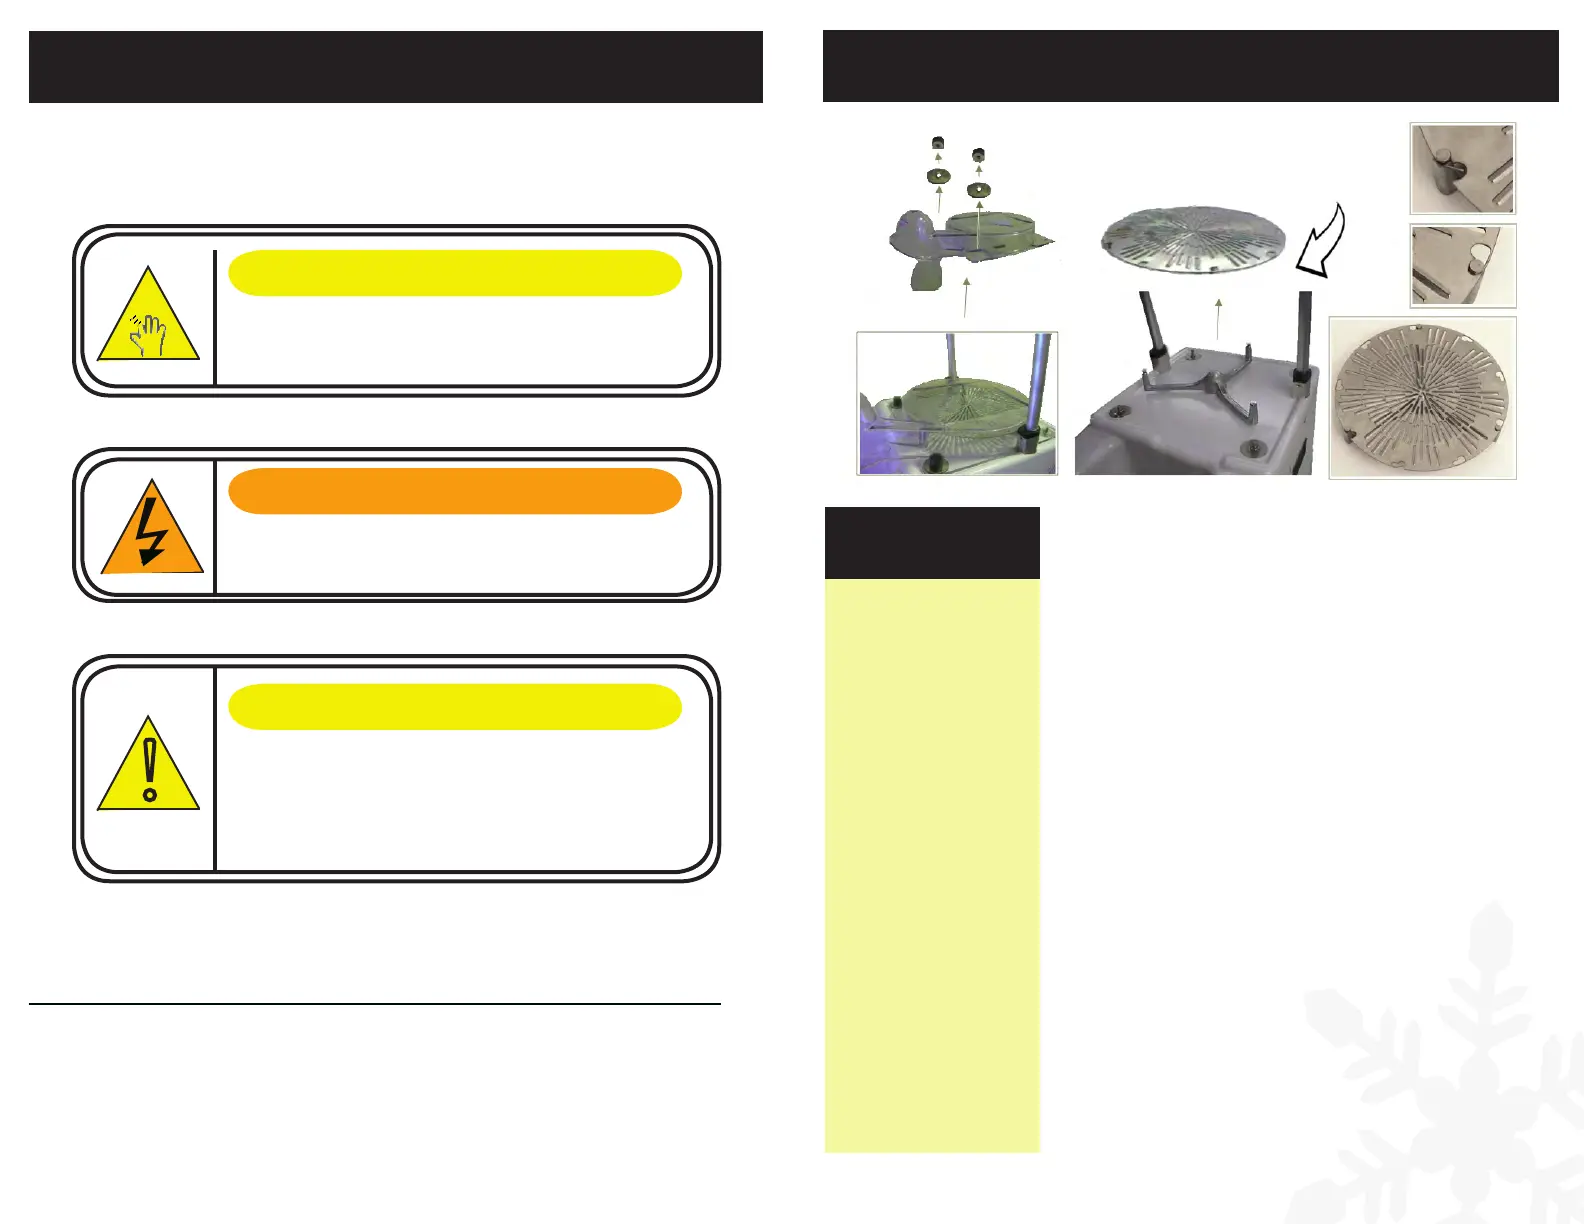
BLADE CHANGE INSTRUCTIONS
Raise Ice Foot to the top using front switch
Disconnect Block Shaver from power
Unfasten Ice Cabinet housing wing nuts
Lift Ice Cabinet cover over actuators
Remove both rubber stoppers and blade housing
Unlock blade hole tab (bend out or clip)
Rotate blade clockwise and lift off Paddle Wheel
Replace blade if needed or rotate to next hole
Secure blade by counter-clockwise rotation until
firmly seated in all blade holes (narrow sides)
Bend blade hole tab firmly across hole opening
Check for loose or foreign objects on top of unit
Replace blade housing and Rubber Stoppers
Slide Ice Cabinet housing down over blade
Secure cabinet housing wing nuts
Power up Block Shaver and test
1.
2.
3.
4.
5.
6.
7.
8.
9.
10.
11.
12.
13.
14.
15.
Items Required: 5/16” Wrench, clean rag, and
extra Blade (if needed)
Steps:
11
Snowie Block Shaver
 Loading...