Do you have a question about the SNOWJOE SJ615E and is the answer not in the manual?
Provides essential safety precautions for operating the snow thrower, emphasizing awareness and caution.
Details critical safety measures related to electricity, extension cords, and avoiding shock hazards.
Covers recommended attire, awareness of moving parts, and proper body positioning for safe operation.
Specific safety guidelines for walk-behind models, including inspections, operation, and handling hazards.
Defines and explains the various safety symbols used throughout the manual to convey warnings and precautions.
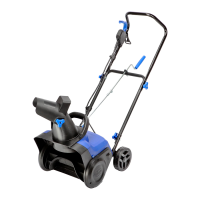
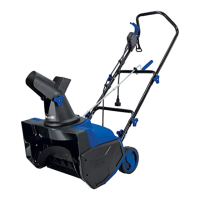
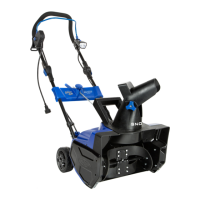
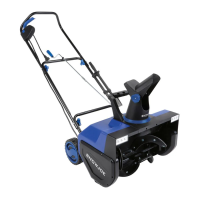
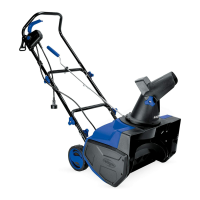
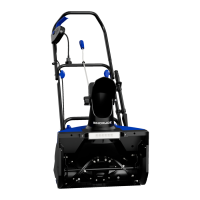
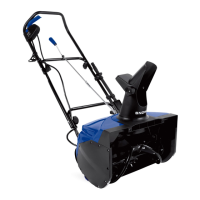
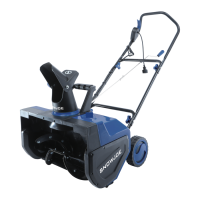
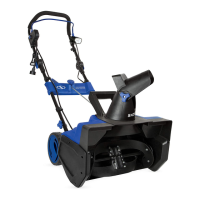
Identifies and explains the various parts and controls of the electric snow thrower.
Details the process of unpacking the snow thrower and lists all expected items from the carton.
Step-by-step instructions for assembling the handle frame of the snow thrower.
Guides the user through the process of assembling the chute crank mechanism for directional control.
Provides instructions for attaching and securing the discharge chute and deflector.
Guidance on using the correct extension cord and securing it to the snow thrower for safe operation.
Instructions on how to safely start and stop the electric snow thrower using the safety switch and lever.
Techniques for safely moving the snow thrower and effective methods for plowing different snow conditions.
Instructions on how to adjust the discharge chute direction and deflector height for optimal snow throwing.
Information regarding the pre-lubricated nature of the motor and auger for lifelong use.
Advice on regular checks, cleaning, and upkeep of the snow thrower for optimal performance and longevity.
Step-by-step guide for removing and installing a new plastic auger, including necessary tools.
Instructions for safely removing and replacing the scraper bar at the base of the snow thrower.
Detailed steps for removing and installing a new belt, including pulley alignment.
Recommendations for safely storing the snow thrower when not in use, including cleaning and location.
Information on how to contact customer service for repairs, maintenance, or assistance.
Guidance on locating and recording the model and serial numbers for service and parts ordering.
Details on available accessories for the snow thrower and how to order them.
Encouragement and instructions for registering your product purchase for warranty and service.
Details on who is eligible to receive warranty coverage for the snow thrower.
Explanation of what aspects of the snow thrower are covered under the manufacturer's warranty.
Information on exclusions from the warranty coverage, including wear parts and misuse.
This document serves as the operator's manual for an electric snow thrower, model SJ615E, designed for residential and personal household use. It provides comprehensive instructions for safe operation, assembly, maintenance, and storage, emphasizing user safety and product longevity.
The electric snow thrower is designed to clear snow from paved surfaces. It operates by using a rotating auger to collect and discharge snow through an adjustable chute. The device is powered by electricity, requiring an extension cord suitable for outdoor use. The snow thrower is intended for clearing light, fluffy snow and is not recommended for use on gravel, stone, or other unpaved surfaces unless specifically adjusted. Its primary function is to efficiently remove snow from driveways, walkways, and other outdoor areas, reducing manual effort.
The snow thrower incorporates several features to ensure safe and effective operation. It requires a UL-, CSA-, or ETL-rated outdoor extension cord, with specific recommendations for cord length and wire gauge to prevent power loss and overheating. The appliance features a polarized plug, which must be correctly inserted into a polarized extension cord to reduce the risk of electric shock. An on-board cord restraint hook is provided to prevent accidental disconnection of the extension cord during operation.
To power on the device, the operator must first depress and hold a safety switch button, then pull the ON/OFF switch lever. This two-step process prevents accidental starting, as the auger begins rotating immediately upon activation. Releasing the ON/OFF switch lever turns off the machine.
When moving the snow thrower, operators are advised to use the wheels as a pivot point, tilting the unit slightly to move it forward or backward. Clearing paths should start near the electrical outlet and work outward, throwing snow in a back-and-forth motion. Operators should be mindful of wind direction to avoid throwing snow against the wind or onto already cleared paths. The manual advises against pushing the snow thrower with excessive force, recommending a gentle and even push in accordance with the unit's throw rate to prevent engine damage. For larger areas, specific patterns of operation are suggested to ensure thorough clearing and avoid re-handling snow. When operating on unpaved surfaces, the scraper bar can be raised to prevent throwing loose material.
The snow discharge chute is adjustable by 180 degrees using a chute crank, allowing the operator to control the direction of the snow stream. The chute deflector on top of the discharge chute can also be adjusted to control the height of the snow stream. These adjustments enable precise snow placement, keeping it away from the operator, bystanders, vehicles, and windows. The manual strongly warns against directing the discharge chute at people or property due to the risk of serious injury from thrown objects.
Regular maintenance is crucial for the snow thrower's safety and longevity. Before each use, a preliminary inspection is recommended to ensure all parts are secure and correctly installed. The work area should be cleared of foreign objects like rocks, broken glass, nails, wire, or string, which could be picked up and thrown by the auger.
The manual emphasizes the importance of turning off the power switch and disconnecting the power cable before making any adjustments, inspections, servicing, changing accessories, or cleaning the unit. This preventative measure reduces the risk of accidental starting. If the snow thrower strikes an object, it must be immediately stopped, unplugged, inspected for damage, and any damaged parts repaired or replaced before restarting.
For general maintenance, operators should frequently check bolts and screws for proper tightness. After each snow removal session, the snow thrower should be run for a few minutes to prevent the collector/impeller from freezing. Residual ice and snow should be wiped off, and the chute crank rotated several times to clear any excess snow. Cleaning should be done with a cloth soaked in hot water and a soft brush; detergents or solvents are explicitly warned against as they can damage plastic parts. For long-term storage, metal parts should be lightly oiled to protect against corrosion. The unit should be stored in a dry, locked area, out of reach of children.
The manual provides detailed instructions for replacing specific worn parts, such as the plastic auger, scraper bar, and belt. When replacing plastic plates, careful attention must be paid to the different types of bolts and nuts and their correct positioning to ensure proper and secure installation. The belt replacement procedure involves specific steps for removal and installation, including turning the auger pulley and pressing the belt onto the drive pulley. It notes that heavy, wet snow can put a strain on belts, potentially requiring more frequent replacement.
The motor and auger are factory-lubricated for lifetime use, meaning additional lubrication by the user is not necessary and could potentially damage the unit. In case of unstable operation, abnormal motor sounds, or any other dangerous conditions, the machine should be stopped immediately, disconnected from power, and an authorized service center contacted. The manual also advises against using the snow thrower if the switch malfunctions or if any parts are frozen, recommending freeing frozen parts before restarting.
| Type | Electric |
|---|---|
| Model | SJ615E |
| Motor Power | 15 Amp |
| Throw Distance | 25 feet |
| Clearing Depth | 8 in. (20 cm) |
| Warranty | 2-year limited warranty |