COMMISSIONING
31
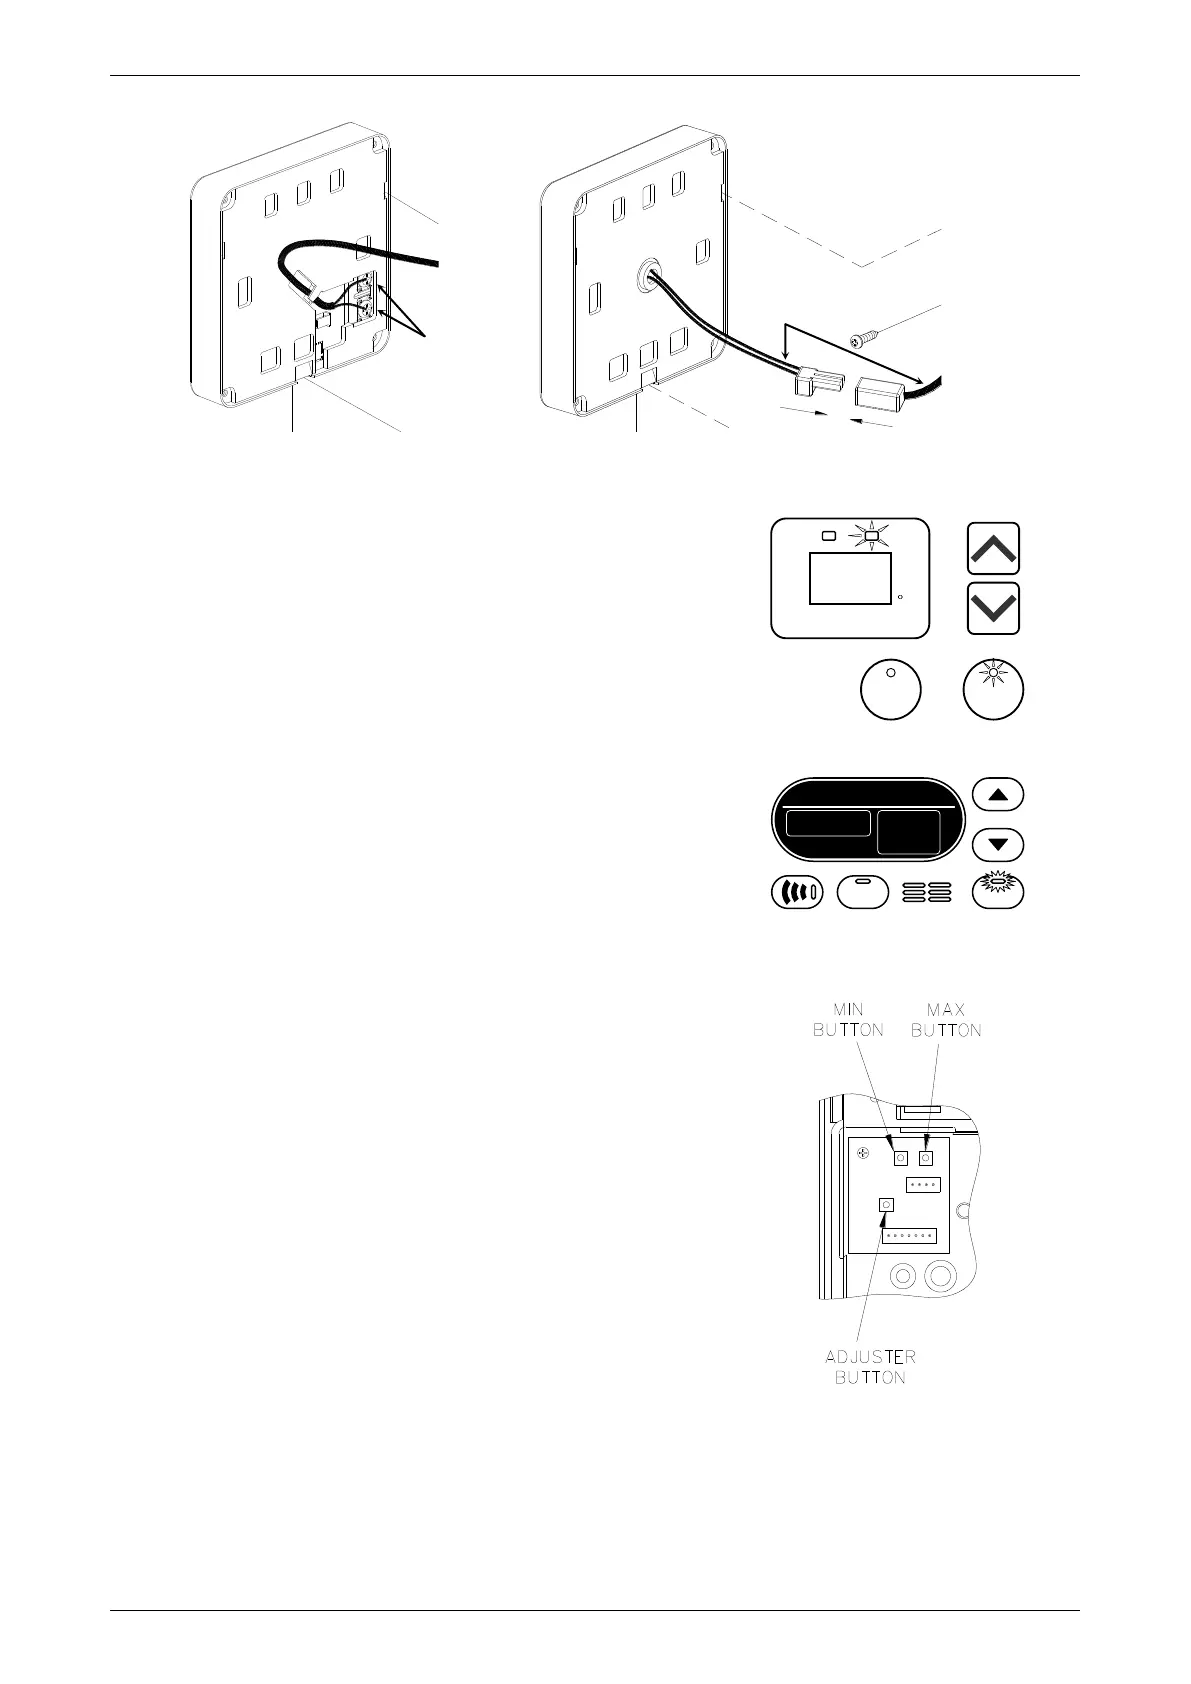
Kitchen controller Bathroom1 contoller
7. Switch on the electrical supply at the power outlet to the
water heater.
8. Turn on the controller by pressing the on / off button.
The priority light (standard controller) or ACTIVE light
(Deluxe controller) and the light in the on / off button will both
glow.
9. Open the gas isolation valve fully at the gas inlet to the water
heater, if not already open.
10. Open a hot tap slowly until the burners ignite.
11. Press and hold down the MIN button (“1L” is shown on the
controller display), and observe the reading on the
manometer.
The red LED will glow and remain solid.
12. Release the MIN button.
The red LED goes out.
If the manometer reading observed in step 9 agrees with the
rating label, no further adjustment is required.
13. To adjust, press and hold down the adjuster button (“LH” is
shown on the controller display).
The red LED will glow and remain solid.
Note: The adjuster button must be held down continuously
through steps 13 to 15.
14. Press the MIN button and observe the reading on the
manometer.
Note: While the MIN button is pressed, the gas pressure will
at first increase then decrease, cycling between an upper
gas pressure limit (39 on the controller display) and a lower
gas pressure limit (01 on the controller display).
15. Release the MIN button when the reading on the manometer agrees with the rating label.
16. Release the adjuster button.
Refer to Notes and “Maximum test point gas pressure” on page 33.
che ck
h ot w at er
te m pe ra tu re
b ef or e u s e