EasyManua.ls Logo

SolarEdge BI-EU3P User Manual

SolarEdge BI-EU3P
2 pages
To Next Page IconTo Next Page
Page #1 background imageLoading...
Page #1 background image
Quick Installation Guide
v. 1.0
SolarEdge Home
Backup Interface, Three
Phase
BI-EU3P
for use with the SolarEdge Home Hub
Inverter, Three Phase
2
1
Mounting the Backup
Interface
1. Select an installation location. Make sure you have enough
space between the Backup Interface and other objects to
securely access all its interfaces.
2. Install the mounting bracket to the wall and secure it with
2-4 screws. If using only 2 screws, use left and right ones.
3. Hang the Backup Interface on the mounting bracket.
4. Hang the lower bracket on the hook behind the bottom
glands, secure it to the wall with a screw.
4
© SolarEdge Technologies, Ltd.
All rights reserved.
Version: 1.0, December 2022
Subject to change without notice.
Support Contact Information
In case of any technical issues with SolarEdge
products, please contact us at:
https://www.solaredge.com/service/support
What’s in the Package
Backup Interface
Mounting bracket
Required Tools
Mounting
screws and wall
plugs
X 3
Level
Pencil
Watchmaker flat
screwdriver
Phillips
screwdriver
Torque
wrench
Drill
CAT6 cable
M4, M5 Allen
keys
Read this entire document before installing or operating the Backup Interface (also referred to as BUI). Failure to do so or to follow any of the
instructions or warnings in this document can result in electrical shock, serious injury, or death, or may damage the Backup Interface and other
property, it can also lead to warranty void.
Do not discard this document! After installation, keep it adjacent to the Backup Interface for future reference!
Before operating the Backup Interface and inverter, ensure that they are properly grounded. The Backup Interface and inverter must be
connected to a grounded, metal, permanent wiring system, or an equipment-grounding conductor must be run with the circuit conductors and
connected to the equipment grounding terminal or lead.
Opening the Backup Interface and repairing or testing under power must be performed only by qualified service personnel familiar with the
Backup Interface.
This symbol on the product or in the accompanying documentation denotes a hazard. It calls attention to a procedure that, if not
correctly performed or adhered to, could result in injury or loss of life. Do not proceed beyond a warning note until the indicated
conditions are fully understood and met.
SAFETY AND HANDLING INSTRUCTIONS
WARNINGS!
This symbol on the product denotes risk of electric shock due to stored energy. Before handling the product, wait for at least 5
seconds after disconnecting it from all sources of energy.
For updates, check:
Removing the covers
1. Using M5 Allen key, release six screws and remove the Backup
Interface front cover.
2. Using M4 Allen key, release two screws and remove the Backup
Interface internal lower cover.
3. Make sure the ON/OFF switch is in the OFF position.
OFF
It is forbidden and dangerous to open the upper section.
Only the lower section is for user interface usage.
WARNING!
DANGER!
Before opening the covers and connecting the grid, please make sure that the main CB and the Inverters are OFF.
Bottom interface of the Backup InterfaceMain connection scheme
Load section
Grid section
1
2
3
4
2
3
Question and Answer IconNeed help?

Do you have a question about the SolarEdge BI-EU3P and is the answer not in the manual?

SolarEdge BI-EU3P Specifications

General IconGeneral
BrandSolarEdge
ModelBI-EU3P
CategoryRecording Equipment
LanguageEnglish

Summary

What's in the Package

Safety and Handling Instructions

General Warnings and Hazards

Highlights risks of electric shock, injury, death, and damage from incorrect procedures. Emphasizes understanding hazards.

Service Personnel Requirement

States that opening, repairing, or testing under power must be done only by qualified service personnel.

Main Connection Scheme

Mounting the Backup Interface

Installation Location and Bracket Mounting

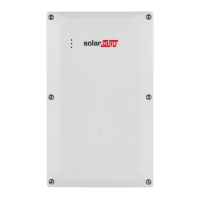
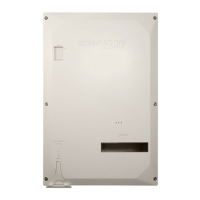
Select an installation location with sufficient space and securely mount the bracket using screws.

Interface Hanging and Securing

Hang the Backup Interface on the mounting bracket and secure the lower bracket to the wall.

Bottom Interface Overview

Removing the Covers

Cover Removal Safety Precautions

Warns against opening the upper section and checking the ON/OFF switch is OFF before handling.

Cover Fastener Removal

Instructions for removing the front cover using an M5 Allen key and the internal lower cover using an M4 Allen key.

Connecting the Backup Interface

Grid and Load Cable Connections

Details on stripping wires, connecting ground, L1, L2, L3, and Neutral for both grid and load cables with torque specs.

Communication Cable Connection

Instructions for connecting a CAT5e/CAT6 cable to the inverter using specific wire assignments.

Internal Meter Configuration

Guidance on configuring the internal meter as import/export or defining an external meter for partial backup.

Closing the Backup Interface

Internal and External Cover Reattachment

Secure the internal lower cover with two screws, then the external front cover with six screws.

Power Restoration

After closing, turn on the main CB and the inverter.

Backup System Checkup

Pre-check Conditions

Ensure inverter operation, battery SoC above 20%, and grid power is available before starting checkup.

Backup Operation Test Steps

Steps to verify backup mode by turning off the main CB, observing load shutdown, and checking LED indications.

LED Indications

Configuring Installation

Commissioning Steps

Run SetApp, scan QR code, and follow on-screen instructions for configuration.

Power Control and Meter Settings

Configure import/export meter settings via SetApp for power control.

Manually Switching to Grid-Connected Mode

Warning for Manual Switching

Only certified installers can perform manual switching; backup is not possible in this mode.

Procedure for Grid Connection

Remove front cover, press 'Bypass On' on the manual control panel, and close the external cover.

Related product manuals