EasyManua.ls Logo

Sonance Visual Performance Series User Manual

Sonance Visual Performance Series
4 pages
To Next Page IconTo Next Page
Page #1 background imageLoading...
Page #1 background image
Introduction
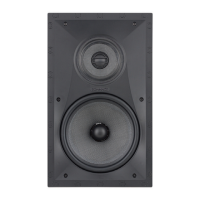
Thank you for purchasing Sonance Visual Performance
®
Series Small rectangle speakers. When properly installed your
new speakers will give you years of entertainment pleasure.
Box Contents
Each Sonance Visual Performance Series Small rectangle speaker
box contains (2) Visual Performance speakers, (2) paint plugs
(installed on the fronts of the speakers), (2) paintable grilles and
(1) mounting cut-out template.
Speaker Placement
Stereo Speaker Placement
• Place the left and right speakers on the same wall, 6 – 10 feet
(1.8m – 3m) apart and 3 – 4 feet (0.9m – 1.2m) from the floor
The main listening position should be as close to midway
between the speakers as possible.
If the listeners will be standing, mount the speakers 5 feet
(1.5m) from the floor to keep them at the listeners’ ear height.
The main listening position should be 4 – 10 feet (1.2m – 3m)
away from the speakers.
Pivoting the tweeter of each speaker directly towards the listen-
ing position will help maximize the stereo soundstage.
Use
Figure 1
as a guide
Home Theater Speaker Placement
Left & Right Channels
Place the left & right speakers on either side of the video screen,
6 – 10 feet (1.8m – 3m) apart and 3 – 4 feet (0.9m – 1.2m) from
the floor (which corresponds to the height of your ears when
you’re seated on a couch or chair). If possible, locate the left and
right speakers at least 18 inches away from the side walls.
The main listening position should be 8 – 12 feet (2.4m – 3.6m)
away from the speakers.
Use
Figure 2
as a guide.
Center Channel
Locate the center speaker as close to the same height as the left
& right channel speakers as possible. If you must place the
center speaker above or below a video screen, we recommend
placing it no more than 2 feet (0.6m) above or below the center
of the left and right speakers. This will help maintain consistent
tonality between all three front channel speakers.
Use
Figure 2
as a guide.
Surround Channels
Left & Right Surround Speakers: Place the left and right
surround speakers directly to the sides of the listening position,
at least 5 feet (1.5m) from the floor.
Surround Back Speakers (7.1-Channel System): Place the
surround back speakers in the rear wall, 3 – 6 feet
(0.9m – 1.8m) apart and at least 5 feet (1.5m) from the floor.
Use
Figure 2
as a guide.
INSTRUCTION MANUAL
VISUAL PERFORMANCE
®
SERIES
SMALL RECTANGLE SPEAKERS
SAFETY WARNING:
THESE SPEAKERS HAVE FASTMOUNT
®
TABS THAT PREVENT THE
SPEAKER FROM FALLING OUT OF THE MOUNTING HOLE DURING THE
INSTALLATION PROCESS
.
THE EDGES OF THE FASTMOUNT TABS ARE VERY SHARP.
U
SE CAUTION WHEN HANDLING THE SPEAKER.
3’ – 4’ (0.9m – 1.2m)
(Seated Listeners)
5‘ (1.5m)
(Standing Listeners)
6‘ – 10’
(1.8m – 3m)
Apart
FIGURE 1: STEREO SPEAKER PLACEMENT
Right Surround
Speaker
Left Surround
Speaker
Left
Front
Speaker
Right
Front
Speaker
Video
Screen
Center
Speaker
Left
Surround Back
Speaker
Right
Surround Back
Speaker
FIGURE 2: 7.1-CHANNEL HOME THEATER SPEAKER PLACEMENT

Other manuals for Sonance Visual Performance Series

Question and Answer IconNeed help?

Do you have a question about the Sonance Visual Performance Series and is the answer not in the manual?

Sonance Visual Performance Series Specifications

General IconGeneral
BrandSonance
ModelVisual Performance Series
CategorySpeakers
LanguageEnglish

Summary

Introduction

SAFETY WARNING

Crucial safety warning about sharp edges on FastMount tabs during handling.

Speaker Placement

Stereo Speaker Placement

Guidance on positioning left and right speakers for optimal stereo soundstage.

Home Theater Speaker Placement

Placement advice for left, right, and surround speakers in home theater systems.

Center Channel

Recommendations for locating the center speaker for consistent tonality.

Surround Channels

Instructions for placing surround back speakers for immersive audio effects.

Before Installation: Retrofit

Mounting space requirements

Specifications for the required cutout size and depth for speaker installation.

Cut the mounting hole

Procedure for cutting the wall opening and running speaker wires.

Before Installation: IR Plug

The IR plug is in the form of a bolt and retaining nut.

Details on the IR plug's components and its function for remote control systems.

Installation

WARNING: THE EDGES OF THE FASTMOUNT TABS ARE VERY SHARP.

Crucial safety warning about sharp edges on FastMount tabs during installation.

Strip speaker wires

Instructions for preparing speaker wires by stripping insulation and preventing shorts.

Connect speaker wires

How to connect speaker wires to the spring-loaded connector posts correctly.

Insert the speaker into the wall

Ensuring Roto-Lock clamps are retracted before inserting the speaker into the wall.

FastMount tabs are designed for one-time use only

Information regarding the one-time use nature of FastMount tabs upon speaker removal.

Speaker Adjustments

Pivoting Tweeter

Guidance on adjusting the pivoting tweeter for optimal sound direction and effect.

LIMITED LIFETIME WARRANTY

EXCLUSIONS

Obtaining Authorized Service

Related product manuals