5
Chapter 3 – PCIe Card Installation and Chassis Setup Steps
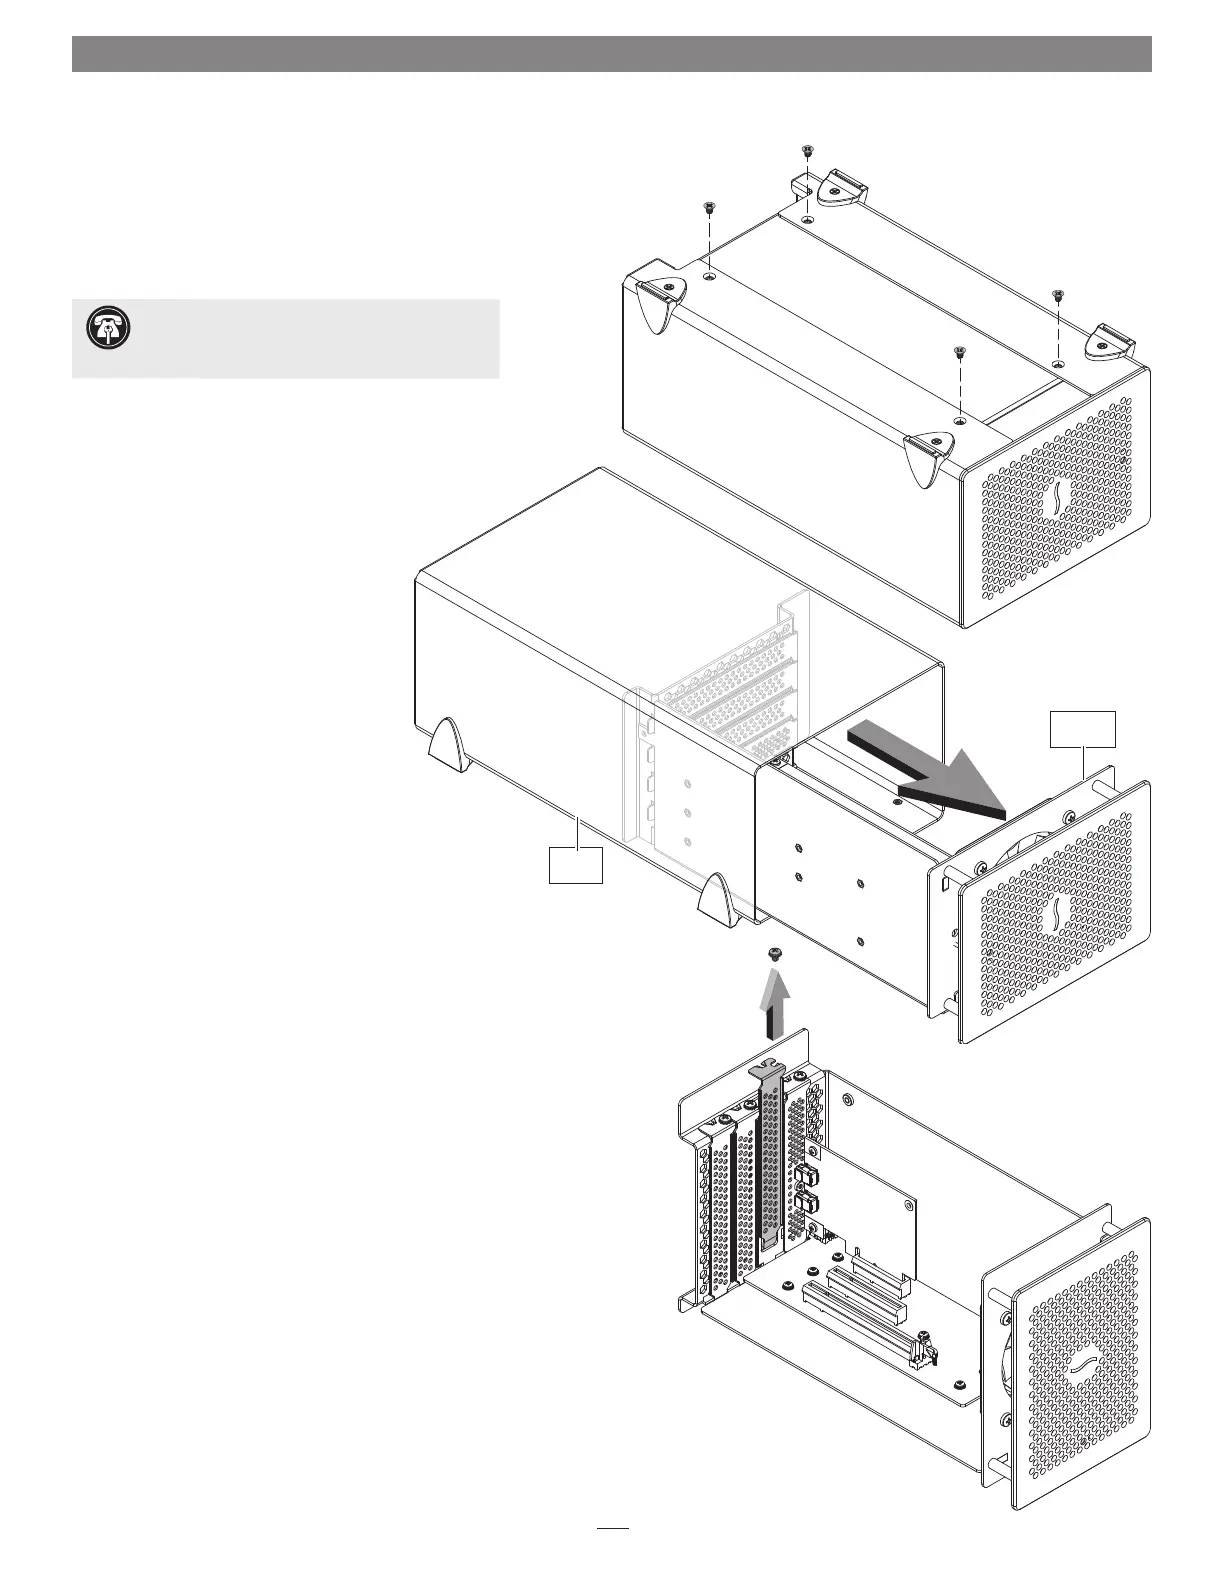
Figure 1
1. Remove the Echo Express SE II chassis from its packaging, and then set
it upside-down on a soft, flat, level surface.
2. Using a Phillips screwdriver, remove and set aside the four screws
securing the outer case to the inner assembly (Figure 1).
3. Flip the Echo chassis over. Place your hand on top of the
outer case. Push the inner assembly into the outer case,
and then gently pull out the inner assembly
(Figure 2). Set aside the outer case.
4. Turn the inner assembly on its side with the PCIe slots facing up.
Remove and set aside the screw securing a port access cover from the
Echo Express SE II chassis’ inner assembly (Figure 3).
5. Remove and set aside the loose port access cover (Figure 3).
6. Repeat steps 4 and 5 as necessary with the remaining port access
covers to install a second card or double-width card.
Support Note: To avoid damaging components
due to static electricity discharge, wear an antistatic
wrist strap while working inside Echo Express SE II.
Figure 2
Figure 3
inner
assembly
outer
case