8
GB
Checking the accessories
Remote (1)
Size AAA batteries (R03 type) (2)
Table-Top Stand (1)*
1
(except KDL-65HX92x)
Fixing screws for Table-Top Stand
(M5 x 16) (3)
(except KDL-65HX92x, KDL-60NX72x)
Assembling screws for Table-Top
Stand (M6 x 14) (4)
(KDL-60/55/46NX72x, KDL-55/46HX92x,
KDL-55/46HX82x only)
Assembling screws for Table-Top
Stand (M6 x 14) (3)
(KDL-40NX72x only)
Hexagon wrench (1)
(except KDL-65HX92x)
AV/Component Adapter (1)
(except KDL-65HX92x)
SCART Adapter (1)
(except KDL-65HX92x)
Camera and Microphone Unit (1)
(KDL-65/55/46HX92x only)
3D Glasses (battery included) (2)
(KDL-65/55/46HX92x only)
Pouch for 3D Glasses (2)
(KDL-65/55/46HX92x only)
Operating Instructions (this manual)
and other documents
*
1
Refer to the supplied Table-Top Stand leaflet to
assemble the Table-Top Stand.
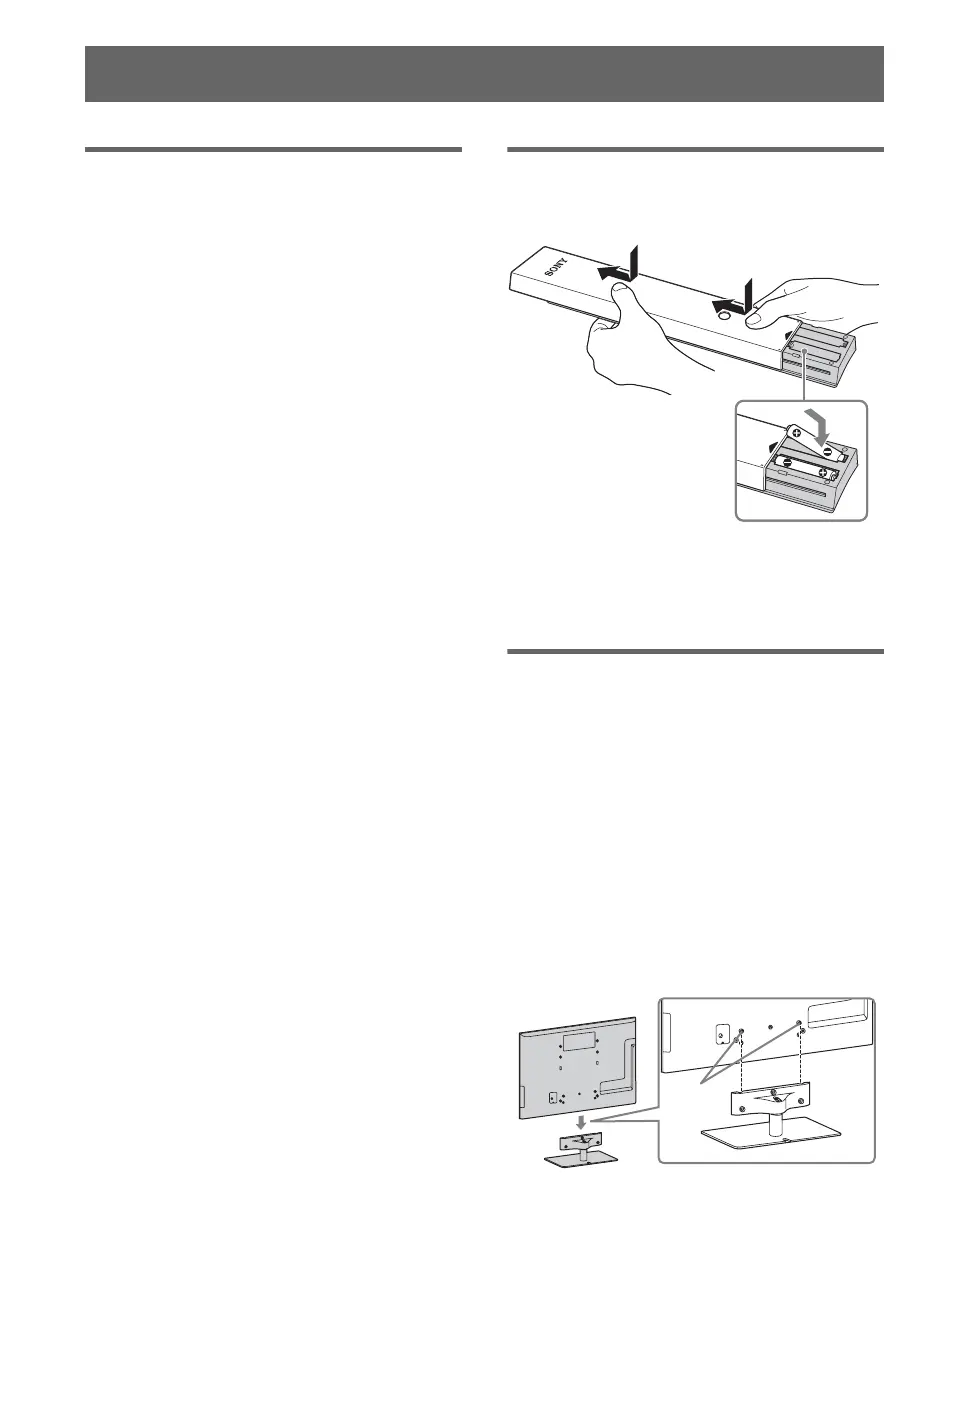
Inserting batteries into the
remote
1 Remove the protection sheet.
2 Push and slide the cover upward.
1: Attaching the Table-Top
Stand (except
KDL-65HX92x)
For KDL-55/46HX92x, KDL-55/46HX82x,
KDL-55/46/40NX72x
1 Refer to the supplied Table-Top Stand
leaflet for proper attachment for some
TV models.
2 Place the TV set on the Table-Top
Stand.
~
• Align the TV from the top, slide it in until the
guide pins cannot be seen.
Getting Started
Guide
pins





 To Next Page