ILCE-7SM3
5-021-320-41(1)
GB
9
C:\Users\gotanda\Desktop\5021320411ILCE7SM3CEC\01GB-ILCE7SM3CEC\020PRE.indd
DTP data saved: 2020/06/25 15:34
PDF file created: 2020/07/01 15:36
GB
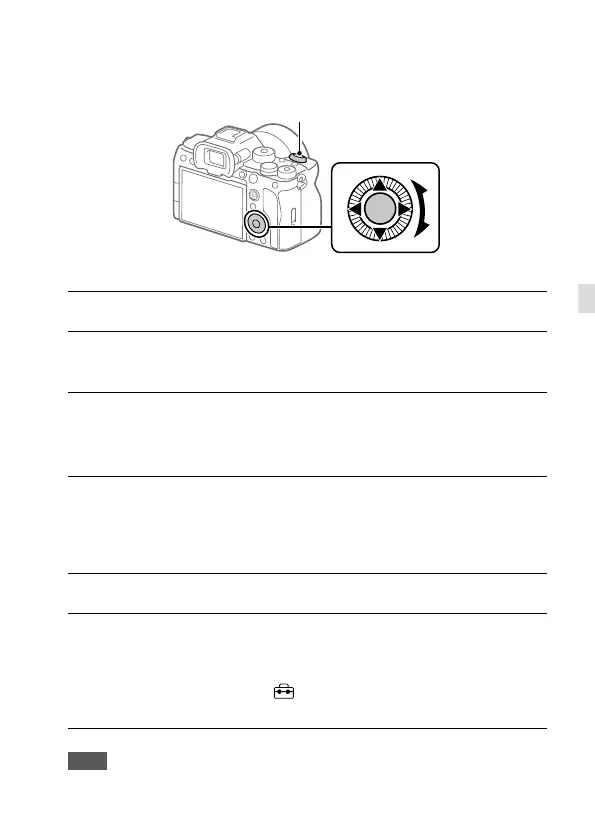
5: Setting the language and the clock
ON/OFF (Power) switch
Control wheel
1
Set the ON/OFF (Power) switch to “ON” to turn on the camera.
2
Select the desired language and then press the center of the
control wheel.
3
Make sure that [Enter] is selected on the area/date/time
confirmation screen, and then press the center of the control
wheel.
4
Select the desired geographic location, set [Daylight Savings],
and then press the center.
• [Daylight Savings] can be switched on/off using the top/bottom of
the control wheel.
5
Set the date format (year/month/day), and press the center.
6
Set the date and time (hour/minute/second), and press the
center.
• To set the date and time or geographic location again at a
later point, select MENU
(Setup) [Area/Date]
[Area/Date/Time Setting].
Note
• The built-in clock of the camera may exhibit time errors. Adjust the time at
regular intervals.