Do you have a question about the Sony Alpha 7R V and is the answer not in the manual?
Details on pairing the camera with your smartphone via the Help Guide URL for connection methods.
Provides essential preparations, basic operations, and detailed information via the web manual.
Lists all items included in the camera package, noting quantities.
Instructions for charging the battery pack and inserting it into the camera.
Guide on inserting CFexpress Type A and SD memory cards into the camera slots.
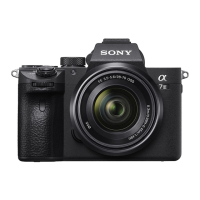
Steps to safely attach a lens to the camera body, aligning mounting indexes.
Guidance on initial camera setup, including smartphone connection via Bluetooth.
Detailed steps for shooting still images, including mode selection and shutter operation.
Instructions for shooting movies, from mode selection to starting and stopping recording.
Important advice on camera handling, exposure to light, magnets, and ear safety.
Information on pixel imperfections and potential eyestrain when using the viewfinder.
Advice on potential screen flashing during continuous shooting and body warming.
Precautions for using memory cards and attaching tripods to prevent damage.
Technical details of the camera, including sensor, viewfinder, monitor, and dimensions.
Details on supported wireless standards, frequency bands, and security protocols.
Guidance on selecting the correct power cord for different regions and safety notes.
This document describes the Sony α7R V, an interchangeable lens digital camera designed for high-resolution still image and movie capture. It emphasizes ease of use through a combination of physical controls and smartphone integration for setup and advanced functionalities.
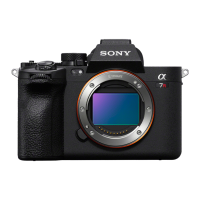
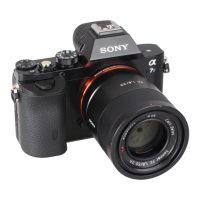
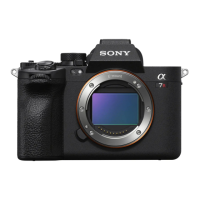
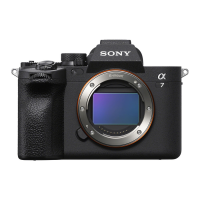
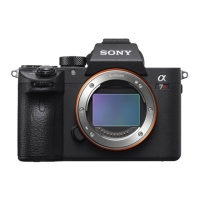
The Sony α7R V is a high-performance interchangeable lens digital camera, part of the α7R series, known for its exceptional resolution. It supports both still image photography and movie recording, including 4K/8K movies. The camera is designed to be dust- and moisture-resistant, making it suitable for various shooting environments. It features a 35mm full-frame CMOS image sensor, delivering a high effective pixel count for detailed imagery. The camera is compatible with Sony E-mount lenses, offering a wide range of optical choices.
For image composition, the α7R V includes both an electronic viewfinder and a large, touch-sensitive TFT monitor. The monitor allows for intuitive control and menu navigation. The camera incorporates advanced connectivity options, including Wi-Fi and Bluetooth, enabling seamless pairing with smartphones for remote control, image transfer, and initial setup.
Power is supplied via a rechargeable battery pack, which can be charged using the provided battery charger. The camera supports both CFexpress Type A and SD memory cards for data storage, with two slots available for flexible media management.
Initial Setup and Connectivity: The camera's initial setup is streamlined through smartphone integration. Users can connect the camera to their smartphone via Bluetooth to configure settings such as date and time. This process requires installing a dedicated smartphone application, which can be updated to its latest version for optimal performance. The application also facilitates connecting the camera with a smartphone later for remote control and other functions, with detailed instructions available in the online Help Guide.
Powering On and Battery Management: To begin, the battery pack must be inserted into the battery charger and connected to a wall outlet. The CHARGE lamp on the charger indicates the charging status. Once charged, the battery pack is inserted into the camera, securing it with a lock lever. The camera is powered on using the ON/OFF switch.
Memory Card Insertion: The α7R V features two memory card slots, both supporting CFexpress Type A and SD cards. Users can open the memory card cover and insert the chosen card into Slot 1 (default setting) or Slot 2. CFexpress Type A cards are inserted with the label facing the monitor, while SD cards are inserted with the terminal facing the monitor, until they click into place. The camera allows users to select which memory card slot to use via the MENU settings. For new memory cards, it is recommended to format them in the camera for stable performance.
Lens Attachment: Attaching a lens involves removing the body cap from the camera and the rear lens cap from the lens. The lens is then mounted by aligning the two white index marks (mounting indexes) on both the lens and camera. While gently pushing the lens towards the camera, it should be turned slowly in the direction of the arrow until it clicks into the locked position, indicating a secure attachment.
Still Image Shooting: To shoot still images, the Still/Movie/S&Q dial on the front of the camera must be turned to the "Still" position while pressing its lock release button. The mode dial, located on top of the camera, is then turned while pressing its lock release button to select the desired shooting mode. Focusing is achieved by pressing the shutter button halfway down, and the image is captured by pressing it all the way down.
Movie Shooting: For movie recording, the Still/Movie/S&Q dial is turned to the "Movie" position while pressing its lock release button. Similar to still image shooting, the mode dial is used to select the desired shooting mode. Recording starts and stops by pressing the dedicated MOVIE (Movie) button. Notably, movie recording can also be initiated from still image shooting mode by pressing the MOVIE button, without needing to switch the shooting mode dial.
Menu Navigation and Settings: The camera's settings, including initial setup configurations, can be accessed and modified through the MENU system. The control wheel is used to select items, and the center button confirms selections. The privacy notice screen, which appears during initial setup, provides information regarding biometrics and can be reviewed via a smartphone link.
Network Functions: The camera's network functions, including Wi-Fi, allow for various connected operations. When using Wi-Fi outdoors, the frequency band should be set to 2.4 GHz. For situations like airplane travel, all wireless network functions can be temporarily disabled using the [Airplane Mode] setting.
Packaging Materials: The camera and its supplied accessories are packaged with environmentally conscious materials. Users should be aware that powder or other residues from these materials may adhere to the camera or accessories. If this occurs, it can be removed with a commercially available blower or cleaning paper. The packaging materials may deteriorate over time, so care should be taken when handling the product by its packaging.
Handling Precautions: The camera is designed to be dust- and moisture-resistant, but not waterproof. It is crucial to avoid exposing the lens or viewfinder to strong light sources like direct sunlight, as this can cause smoke, fire, or malfunction. When storing the camera or when shooting with backlighting, the lens cap should be attached. Laser beams should not be directed at the lens or viewfinder, as they can damage the image sensor or internal components.
Monitor and Viewfinder Care: The monitor and electronic viewfinder are manufactured with high precision, but may exhibit small black or bright dots, which are normal manufacturing imperfections and do not affect recorded images. If the monitor or electronic viewfinder is damaged, discontinue use immediately to prevent harm. When using the viewfinder for extended periods, breaks are recommended to prevent eyestrain or discomfort.
Memory Card Handling: Memory cards may become warm after recording, which is normal. If an overheating warning icon appears, do not remove the memory card immediately. Instead, turn off the camera, wait for a while, and then remove the card to prevent damage or accidental drops.
Tripod Use: When using a tripod, ensure it has a screw less than 5.5 mm (7/32 inches) long to firmly secure the camera and prevent damage.
Data Security and Privacy: Before discarding or transferring the camera or memory cards to others, it is essential to protect private information. For the camera, users should perform a [Setting Reset] → [Initialize] operation. For memory cards, simply formatting or deleting data may not completely erase it. It is recommended to use data deletion software or physically destroy the card before transferring or discarding it. When sharing images or movies with location information linked via the smartphone application, users should deactivate the [Location Information Linkage] function to prevent unintended disclosure of their location.
Network Security: When using network functions, users should be aware that unintended third parties might access the camera depending on the network environment. Sony is not responsible for any loss or damage caused by connecting to such network environments.
Copyright Awareness: Users should be mindful that television programs, films, videotapes, and other materials may be copyrighted. Unauthorized recording of such materials may violate copyright laws.
| Camera Type | Mirrorless |
|---|---|
| Effective Megapixels | 61.0 MP |
| Sensor Resolution | 9504 x 6336 |
| Image Processor | BIONZ XR |
| Continuous Shooting Speed | Up to 10 fps |
| Viewfinder Resolution | 9.44 million dots |
| LCD Screen Size | 3.2 inches |
| LCD Screen Type | Tilting Touchscreen |
| LCD Screen Resolution | 2.1 million dots |
| Image Stabilization | 5-axis in-body stabilization |
| Connectivity | Wi-Fi, Bluetooth |
| Storage Media | Dual CFexpress Type A/SD card slots |
| Dimensions | 131.3 x 96.9 x 82.4 mm |
| Sensor Type | Full-frame CMOS |
| ISO Sensitivity | ISO 100-32000 (expandable to 50-102400) |
| Autofocus Points | 693 phase-detection |
| Viewfinder Type | Electronic |
| Video Recording | 8K 24p, 4K 60p |
| Ports | USB-C, HDMI, Microphone, Headphone |
| Battery Life | Approx. 530 shots (Viewfinder) |
| Weight | 723 g (with battery and memory card) |