Do you have a question about the Sony CDX-4507 and is the answer not in the manual?
Advises against tampering with tuner holes, choosing safe locations, and using supplied hardware.
Specifies the maximum recommended mounting angle for the unit.
Instructions to safely remove the unit's front panel before installation.
Procedure for correctly reattaching the front panel after installation.
Illustrates the typical process of installing the unit into a car dashboard.
Provides specific instructions for installing the unit in Toyota and Nissan vehicles.
Lists and identifies the parts supplied for the unit's installation.
Important safety notes regarding power, earth connections, and speaker wiring.
Explains how to activate the power select function for the ignition key switch.
Details on adjusting the tuning interval switch for different regions.
Instruction to press the reset button after completing installation and connections.
Visual guide showing how to connect power, speakers, and other components.
This document provides comprehensive instructions for the installation, connection, and basic operation of the Sony CDX-4507 FM/AM Compact Disc Player, designed for in-car use. It covers everything from initial setup precautions to detailed wiring diagrams and maintenance tips, ensuring a safe and optimal user experience.
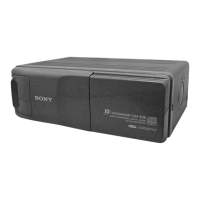
The Sony CDX-4507 is an in-car FM/AM Compact Disc Player, providing audio entertainment on the go. It features a built-in amplifier for driving speakers and includes line-out connections for optional external power amplifiers, offering flexibility in audio system configuration. The unit is designed to integrate into a vehicle's electrical system, drawing power from the car battery and accessory ignition switch. It supports both FM and AM radio reception, with adjustable tuning intervals to accommodate different regional frequency allocation systems. The CD player function allows for playback of compact discs, providing high-quality audio.
The manual details the process of installing the unit into a car's dashboard. It emphasizes the importance of choosing a suitable location that does not interfere with driving and avoids areas prone to dust, excessive vibration, or high temperatures. The unit's mounting angle can be adjusted to less than 60 degrees for optimal viewing and operation. For installation in Japanese cars, specific instructions are provided, including the need to cut off certain claws on the unit for proper fitment in some vehicle models. The document also includes a parts list with diagrams of the supplied mounting hardware, such as brackets and screws, ensuring a secure installation.
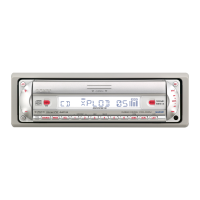
A key feature for security and convenience is the detachable front panel. To detach, the user must first turn off the unit by pressing "OFF," then press "RELEASE," slide the panel slightly to the left, and pull it off. To attach, the user aligns specific parts of the panel with the main unit and pushes until it clicks into place. This feature helps deter theft and allows for easy storage of the panel when the vehicle is unattended.
The CDX-4507 includes a "POWER SELECT" function, which ties the clock display power to the accessory position of the ignition key switch. This feature helps prevent battery drain by ensuring the clock is only displayed when the car's ignition is on. To activate this function, the user presses "OFF" while simultaneously pressing "SOUND." The unit is designed for negative earth 12V DC operation only, and the manual provides crucial warnings about connecting the power input leads correctly to avoid short circuits and ensure proper functionality.
The unit's AM (FM) tuning interval is factory-set to 9K (50k). However, for countries with a 10 kHz (200 kHz) frequency allocation system, the manual instructs the user to set a switch on the bottom of the unit to the 10K (200K) position before making any connections. This ensures accurate radio tuning in different regions.
The manual provides detailed guidance on connecting speakers, stressing the use of speakers with an impedance of 4 to 8 ohms and adequate power handling capacities to prevent damage. It explicitly warns against connecting speaker terminals to the car chassis, connecting right and left speaker terminals together, connecting speakers in parallel, or connecting active speakers (with built-in amplifiers) to the unit's speaker terminals. These precautions are vital for maintaining the integrity of the audio system and preventing damage to the unit or speakers.
The AMP/ANT REM lead (blue/white striped) supplies +12V DC when the unit is turned on, controlling power aerials or aerial booster amplifiers. This ensures that the aerial extends only when the unit is active. The manual clarifies that a power aerial without a relay box cannot be used with this unit and that this lead is not necessary if there is no power aerial or aerial booster.
The unit features a memory hold connection, ensuring that power is always supplied to the memory circuit when the yellow power input lead is connected. This preserves settings and presets even when the ignition key is turned off, providing convenience for the user.
After completing the installation and connections, the user is instructed to press the reset button using a ballpoint pen or similar pointed object. This action initializes the unit, ensuring all settings are properly applied and the system is ready for use.
The manual includes several general precautions to ensure the longevity and proper functioning of the device. It warns against tampering with the four holes on the upper surface of the unit, as these are for tuner adjustments to be made only by service technicians. It also advises against installing the unit in areas subject to dust, dirt, excessive vibration, or high temperatures, such as in direct sunlight or near heater ducts. Users are reminded to use only the supplied mounting hardware for a safe and secure installation.
Critical instructions are provided for wiring, including disconnecting the earth terminal of the car battery before making connections to avoid short circuits. Users are advised to connect the yellow and red power input leads only after all other leads have been connected. All earth wires should be run to a common earth point. The yellow cord should be connected to a free car circuit rated higher than the unit's fuse rating, or directly to the battery if no suitable circuit is available. These steps are crucial for electrical safety and preventing damage to the unit or the vehicle's electrical system.
A specific caution is included regarding handling the bracket, advising users to do so carefully to avoid injuring their fingers. This highlights attention to detail in user safety during the installation process.
The manual provides a link to Sony's online presence (http://www.world.sony.com/), offering a resource for further support, information, or troubleshooting.
| CD-R/RW Playback | Yes |
|---|---|
| Detachable Faceplate | Yes |
| Channels | 4 |
| CD Text | Yes |
| AAC Playback | No |
| Remote Control | Yes |
| Detachable Face | Yes |
| Anti-Theft Protection | Detachable faceplate |
| Frequency Response | 20Hz - 20kHz |
| Dimensions | 178mm x 50mm x 160mm |