EasyManua.ls Logo

Sony Cyber-shot DSC-W50 - User Manual

Sony Cyber-shot DSC-W50
2 pages
Print Icon
To Next Page IconTo Next Page
Loading...
2-667-828-11 (1)© 2006 Sony Corporation Printed in China
Printed on 100% recycled paper using VOC
(Volatile Organic Compound)-free vegetable
oil based ink.
continued on the reverse
Prepare the battery pack
Connect the battery charger to an easily accessible wall outlet (wall socket) close by.
Even if the CHARGE lamp is not lit, the battery charger is not disconnected from the AC power source
(mains) as long as it is connected to the wall outlet (wall socket). If some trouble occurs while using the
battery charger, immediately shut off the power by disconnecting the plug from the wall outlet (wall socket).
When charging is finished, disconnect the power cord (mains lead) from the wall outlet (wall socket), and
remove the battery pack from the battery charger.
The time required to fully charge the battery pack (supplied) from when it is completely discharged at a
temperature of 25°C (77°F) is approximately 330 min., and the practical charging time is approximately
270 min. Charging may take longer under certain circumstances or conditions.
1
1
Battery charger
2 Connect the power
cord (mains lead).
3 To wall outlet
(wall socket)
Power cord (mains lead)
1 Insert the battery pack.
Push the battery pack gently until it clicks into place.
CHARGE lamp
Light on: Charging
Light off: Completed (Practical charge)
If you continue charging the battery pack for about one more hour (until it is fully
charged), the charge will last slightly longer.
4 Insert the charged battery pack.
Open the battery/
“Memory Stick Duo”
cover.
Insert the battery pack while
pressing the battery eject lever
with the tip of the battery.
Close the battery/
“Memory Stick Duo”
cover.
Battery eject lever
Using the AC Adaptor
You can connect the camera to a wall outlet (wall socket) using the AC-LS5K AC Adaptor (not
supplied). t “User’s Guide/Troubleshooting” (page 18).
To check the remaining battery time
Press POWER button to turn on and check the remaining battery on the LCD screen.
It takes about one minute until the correct battery remaining indicator appears.
The displayed battery remaining indicator may not be correct under certain circumstances.
To remove the battery pack
Slide the battery eject lever to pull the battery pack out. Be sure not to drop the battery pack
when pulling it out.
To use your camera abroad — Power sources
You can use your camera, the battery charger, and the AC-LS5K AC Adaptor (not supplied) in
any country or region where the power supply is within 100 V to 240 V AC, 50/60 Hz.
Do not use an electronic transformer (travel converter), as this may cause a
malfunction.
Battery
remaining
indicator
Battery
remaining
guidelines
Sufficient
power
remaining
Battery half full Battery low,
recording/
playback will
stop soon.
Change the battery with
fully charged one, or charge
the battery. (The warning
indicator flashes.)
Battery eject lever
Turn the camera on/set the clock
2
2
1 Select . 2 Press the POWER button.
Lighting
3 Set the clock with the control
button.
1 Select the date display format with v/V, then press
z.
2 Select each item with b/B and set the numeric value
with v/V, then press z.
3 Select [OK] with B, then press z.
To cancel, select [Cancel] and press z.
2006
/:
/
1 1
12 00
AM
OK
Cancel
Clock Set
D/M/Y
M/D/Y
Y/M/D
2006
/:
/
1 1
12 00
AM
OK
Cancel
Clock Set
D/M/Y
M/D/Y
Y/M/D
2006
/:
/
1 1
10 30
AM
OK
Cancel
Clock Set
D/M/Y
M/D/Y
Y/M/D
To change the date and time
Select [Clock Set] in the (Setup) screen and perform the procedure in step 3 above.
t “User’s Guide/Troubleshooting” (pages 46 and 55)
On the clock display
Midnight is indicated as 12:00 AM, and noon as 12:00 PM.
If you selected [D/M/Y] in step 3-1, set the time on a 24-hour cycle.
When turning on the power
Unless you set the clock, the Clock Set screen appears each time the camera is turned on.
Do not touch the lens portion as the cover opens and the lens portion extends. Also, do not leave the camera
with the lens portion extended for a long period of time with the power off as this may cause malfunction.
The following screen appears when the camera is turned on for the second time or afterwards.
To turn off the power
Press the POWER button again.
If the camera is running on battery power and you do not operate the camera for about three minutes, the
camera turns off automatically to prevent wearing down the battery pack (Auto power-off function).
Changing the language setting
You can change the screen display to show messages in a specified language. To change the
language setting, press MENU to display the menu screen. Select (Setup) with the control
button, then, select [ Language] in (Setup1), and select the desired language. t “User’s
Guide/Troubleshooting” (page 53)
A
1
Insert a “Memory Stick Duo” (not
supplied)
Select the image size for use
When there is no “Memory Stick Duo” inserted
The camera records/plays back images using the internal memory (32 MB). t “User’s Guide/
Troubleshooting” (page 26)
3
3
Insert the “Memory Stick Duo”
all the way in until it clicks.
Terminal side
Labeled side
4
4
button
1 Select a mode.
Select .
Select .
Still image:
Movie:
2 Press (Image Size).
3 Select the size with v / V.
The screen above is for still images.
For movies, select [640(Fine)] (“Memory Stick PRO
Duo” only), [640(Standard)] or [160].
4 Press (Image Size) to
complete the setting.
Image Size
Up to 10x15cm/4x6"print
Appx. Image Capacity
33pics
On still image sizes
For details on the image size t “User’s Guide/Troubleshooting” (page 15)
The default settings are marked with .
1)
Images are recorded in the same 3:2 aspect ratio as photograph printing paper or postcards, etc.
2)
Both edges of the image may be cut off when printing t “User’s Guide/Troubleshooting” (page 89)
3)
By using a Memory Stick slot or USB connection, you can enjoy higher quality images.
On the recordable number of still images and recordable time of movies
Recordable number of still images and recordable time of movies vary depending on the image
size selected.
For details on recordable number or time t “User’s Guide/Troubleshooting” (page 24)
The number of recordable images and time can differ according to shooting conditions.
To remove a “Memory Stick Duo”
Image size Guidelines No. of images Printing
6M Up to A4/8×10"print Less
More
Fine
Rough
3:2
1)
Match 3:2 Aspect Ratio
3M Up to 13×18cm/5×7"print
2M Up to 10×15cm/4×6"print
VGA For E-mail
16:9
2)
Display On 16:9 HDTV
3)
Still images Movies
Access lamp
Open the battery/“Memory Stick Duo” cover, then push the
“Memory Stick Duo” in once.
When the access lamp is lit
Never remove the battery/“Memory Stick Duo” or turn off
the power. The data may be corrupted.
Maximum number
of recordable
images
Maximum
recordable time
Digital Still Camera
Read This First
DSC-W30/W40/W50
Operating Instructions
Before operating the unit, please read this manual and “User’s Guide/Troubleshooting” (separate
volume) thoroughly, and retain them for future reference.
http://www.sony.net/
Checking the accessories supplied
A “Memory Stick Duo” is not
supplied.
The camera has its own internal
memory (32 MB), however,
purchase of a “Memory Stick
Duo” is recommended for
shooting more images.
“Memory Stick Duo”: you can
use a “Memory Stick Duo”
with your camera.
“Memory Stick”: you cannot
use a “Memory Stick” with
your camera.
Other memory cards cannot
be used.
For details on “Memory Stick
Duo” t
“User’s Guide/
Troubleshooting”
(page 95)
Battery charger BC-CSG (1)
Power cord (mains lead) (1)
Rechargeable battery pack
NP-BG1 (1)/Battery case (1)
USB, A/V cable for multi-
use terminal (1) (DSC-W50)
USB cable (1) (DSC-W30/W40)
A/V cable (1) (DSC-W30/W40)
Wrist strap (1) (DSC-W30/W50)
Neck strap (1) (DSC-W40)
Soft carrying case (1)
(DSC-W40)
CD-ROM (Cyber-shot
application software) (1)
Operating instructions: “Read
This First” (this manual) (1)
Operating instructions: “User’s
Guide/Troubleshooting” (1)
Notes
Charge the battery pack (supplied) before using the camera for the first time.
The LCD screen is manufactured using extremely high-precision technology so over 99.99% of the
pixels are operational for effective use. However, there may be some tiny black points and/or bright
points (white, red, blue or green in color) that constantly appear on the LCD screen. These points are
normal in the manufacturing process and do not affect the recording in any way.
The camera is a precision instrument. Be careful not
to bump the lens or the LCD screen, and not to apply
force to it. Attach the strap to prevent the camera
from damage by being dropped, etc.
Designed for use with compatible Sony batteries.
Additional information on this product and answers to frequently asked questions can be
found at our Customer Support Website.
Hook
Question and Answer IconNeed help?

Do you have a question about the Sony Cyber-shot DSC-W50 and is the answer not in the manual?

Summary

Camera Setup

Battery Preparation and Charging

Steps to insert and charge the battery pack.

Initial Power On and Clock Setting

Turning on the camera and configuring the clock.

Image Settings and Battery Status

Selecting Image Size

Choosing resolution for photos and videos.

Battery Level Check

How to check the remaining battery time.

Shooting Modes and Techniques

Auto and Scene Selection Modes

Using automatic and preset scene shooting modes.

Shooting Controls and Adjustments

Zoom, EV, self-timer, flash, and macro functions.

Image Viewing and Deletion

Viewing Recorded Images

Navigating, zooming, and index display of photos.

Deleting Images

Removing unwanted photos from the camera.

Overview

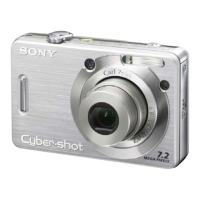
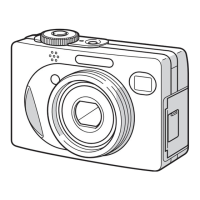
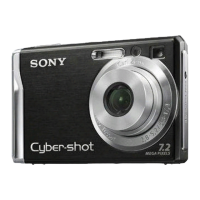
The Sony Cyber-shot DSC-W30/W40/W50 is a digital still camera designed for ease of use, offering both automatic and scene-specific shooting modes, as well as features for image viewing and management.

Function Description

The camera primarily functions as a digital still camera, capable of capturing both still images and movies. It features an internal memory of 32 MB, but its capacity can be expanded significantly with the use of a "Memory Stick Duo." The camera is powered by a rechargeable NP-BG1 battery pack, which can be charged using the supplied battery charger. An optional AC-LS5K AC Adaptor can also be used to power the camera directly from a wall outlet.

Usage Features

Getting Started:

To begin using the camera, the battery pack must first be charged. This involves inserting the battery into the charger, connecting the charger to a wall outlet, and waiting for the CHARGE lamp to turn off, indicating a full charge. Once charged, the battery pack is inserted into the camera until it clicks into place. The camera is then turned on by pressing the POWER button. Upon the first power-on, users are prompted to set the date and time using the control button, selecting the display format, setting numeric values for each item, and confirming with "OK."

Memory and Storage:

The camera has a built-in 32 MB internal memory. For extended shooting, a "Memory Stick Duo" is highly recommended. The manual explicitly states that "Memory Stick" (standard size) and other memory cards are not compatible. When a "Memory Stick Duo" is inserted, images are recorded to it; otherwise, the internal memory is used. To remove a "Memory Stick Duo," the battery/memory stick cover is opened, and the card is pushed in once to eject it. It's crucial not to remove the battery or "Memory Stick Duo" when the access lamp is lit, as this can corrupt data.

Image Capture:

The camera offers multiple shooting modes:

  • Still Image (Auto Adjustment Mode): This is the primary mode for simple point-and-shoot operation. Users hold the camera, position the subject in the center of the focus frame, and press the shutter button halfway down to focus (AE/AF lock indicator flashes then lights/beeps) before pressing it fully down to capture the image.
  • Movie Mode: To record a movie, the mode dial is set to movie mode, and the shutter button is pressed fully down to start recording. Pressing it again stops recording.
  • Scene Selection Modes: For specific shooting conditions, the camera provides various scene selection modes such as "ISO High Sensitivity" (for low-light without flash), "Beach" (for waterside scenes), "Landscape" (for distant focus), "Soft Snap" (for soft backgrounds), "Twilight" (for low-light without flash), "Twilight Portrait" (for low-light portraits with flash), and "Snow" (for bright whitish scenes). These modes have predetermined settings to optimize image quality for the chosen scenario. Some functions may not be available in certain scene selection modes.

Control Button Functions during Shooting:

The control button allows for quick adjustments:

  • Flash Mode: Users can cycle through "Flash Auto," "Flash Forced On," "Slow Synchro," and "Flash Forced Off" modes. "Flash Auto" strobes when light is insufficient, "Flash Forced On" always fires the flash, "Slow Synchro" uses a slower shutter speed for background detail in dark places, and "Flash Forced Off" disables the flash.
  • Exposure Adjustment (EV): Image brightness can be adjusted using the ▲ (Brighter) / ▼ (Darker) options. The compensation value is set in 1/3 EV increments.
  • Self-Timer: Options include "No indicator" (off), "10" (10-second delay), and "2" (2-second delay). The self-timer lamp flashes and a beep sounds before the shutter operates.
  • Macro Mode: For close-up shooting, the macro mode can be activated. It is recommended to set the zoom to the W side for the shortest shooting distance (approx. 2 cm).

Zoom:

The zoom lever allows for optical zoom. Beyond 3x zoom, the camera utilizes a "Digital Zoom" function. Zoom cannot be changed while shooting a movie.

Focusing Challenges:

Subjects that are difficult to focus on include those far from the camera and dark, with poor contrast, seen through glass, moving fast, reflective, or backlit. In such cases, the AE/AF lock indicator may flash slowly, and the camera may not beep. Recomposing the shot or using macro mode for close subjects is advised.

Display and Interface:

  • LCD Screen: The LCD screen is used for framing shots, reviewing images, and navigating menus. It is manufactured with high-precision technology, so minor black or bright points are normal and do not affect recording.
  • Screen Display Switch: This button can be used to brighten the LCD backlight (DSC-W50 only) for better visibility in bright outdoor light, though this may drain the battery faster. Pressing it again cancels the brighter backlight. Repeatedly pressing this button can also turn off the LCD screen, which is useful for saving battery power or when the LCD is difficult to see.
  • Function Guide: Operational instructions are displayed on the screen for various functions. These guides automatically turn off after a few seconds but can be canceled by pressing the shutter button halfway down. The function guide display can also be disabled in the setup menu.

Image Viewing and Management:

  • Playback Mode: Pressing the (Playback) button switches the camera to playback mode. If pressed when the camera is off, it turns on directly into playback.
  • Browsing Images: Use the ◄► buttons to select images. For movies, the play button is pressed to start playback, with options for rewind/fast forward and volume control.
  • Playback Zoom: In still image playback, sliding the zoom lever allows for enlarging images. The ///► buttons adjust the portion displayed. Pressing the zoom lever again undoes the zoom. Enlarged images can be saved using the [Trimming] function.
  • Index Screen: Sliding the (Index) lever displays multiple images as thumbnails. Images can be selected using ▲///. Pressing the button returns to single-image view.
  • Deleting Images: To delete an image, display it and press the (Delete) button. Select [Delete] and confirm. In index mode, multiple images can be selected for deletion. To delete all images in a folder, select [All In This Folder] instead of [Select].

Maintenance Features

Battery Management:

The camera displays a battery remaining indicator on the LCD screen. It takes about one minute for the correct indicator to appear. Indicators range from "Sufficient power" to "Battery low," which flashes when recording/playback will stop soon, prompting a battery change or recharge. The camera has an "Auto power-off" function that turns it off after about three minutes of inactivity to conserve battery power.

Power Sources:

The camera, battery charger, and optional AC-LS5K AC Adaptor are designed to be used in countries with power supplies ranging from 100 V to 240 V AC, 50/60 Hz. However, it is explicitly stated that electronic transformers (travel converters) should not be used, as they may cause malfunctions.

Clock Settings:

The date and time can be changed via the [Clock Set] option in the (Setup) screen. Midnight is indicated as 12:00 AM, and noon as 12:00 PM. If the D/M/Y format is selected, the time is set on a 24-hour cycle.

Language Settings:

The screen display language can be changed through the menu. Press MENU, select (Setup), then [A Language] in (Setup1), and choose the desired language.

General Care:

The camera is a precision instrument. Users are advised to avoid bumping the lens or LCD screen and to not apply excessive force. Attaching the wrist strap is recommended to prevent damage from accidental drops. When turning on the camera, avoid touching the lens portion as it extends. Do not leave the camera with the lens extended for long periods when powered off, as this may cause malfunction.

Sony Cyber-shot DSC-W50 Specifications

General IconGeneral
Image Sensor1/2.5" Super HAD CCD
Effective Pixels6.0 MP
Optical Zoom3x
Video Resolution640 x 480
Digital Zoom2x
Sensor TypeCCD
Screen Size2.5 inches
Battery TypeLithium-ion battery
ISO SensitivityAuto, 100, 200, 400, 800, 1000
Storage MediaMemory Stick Duo

Related product manuals