Step 2 Setting the date and time
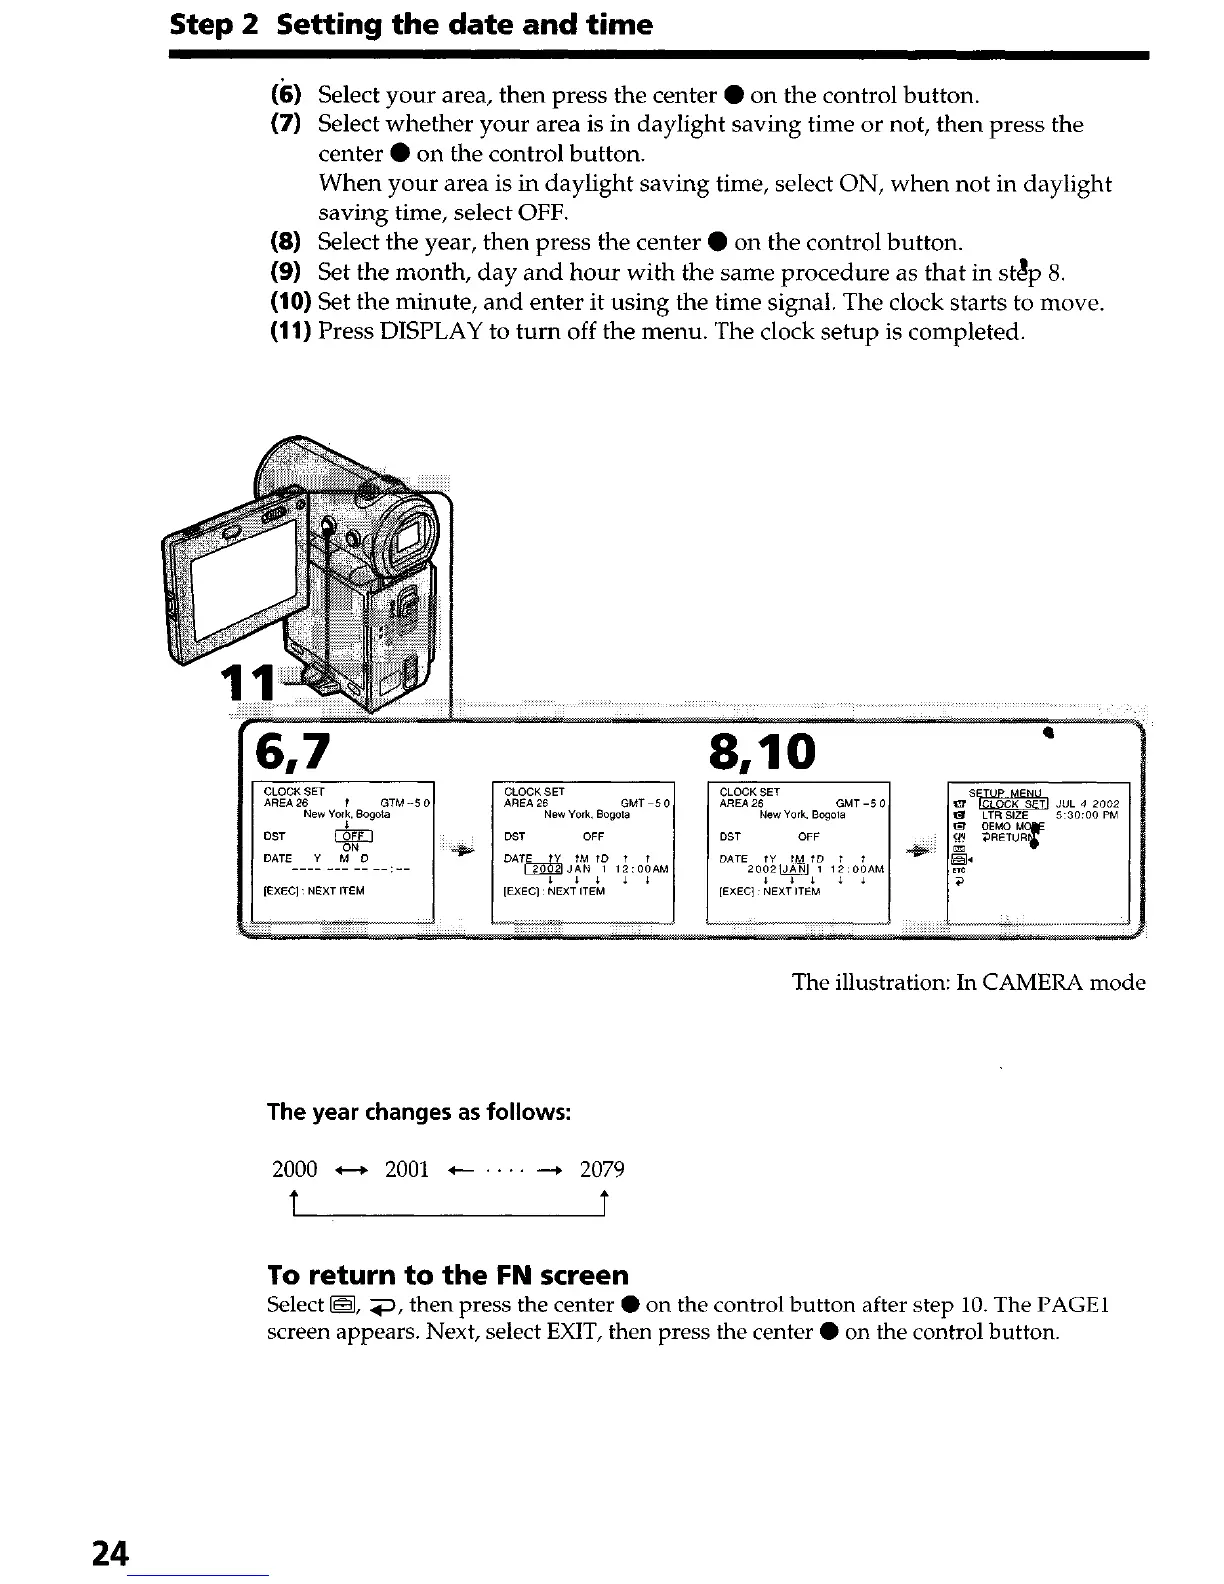
(6) Select your area, then press the center 0 on the control button.
(7) Select whether your area is in daylight saving time or not, then press the
center 0 on the control button.
When your area is in daylight saving time, select ON, when not in daylight
saving time, select OFF.
(8) Select the year, then press the center 0 on the control button.
(9) Set the month, day and hour with the same procedure as that in st!p 8.
(IO)
Set the minute, and enter it using the time signal. The clock starts to move.
(11)
Press DISPLAY to turn off the menu. The clock setup is completed.
The illustration: In CAMERA mode
The year changes as follows:
2000 - 2001 +- .... - 2079
t t
To
return to the
FN
screen
Select @, 3, then press the center 0 on the control button after step 10. The PAGE1
screen appears. Next, select EXIT, then press the center 0 on the control button.
24




 To Next Page