— 3 —
SERVICE NOTE
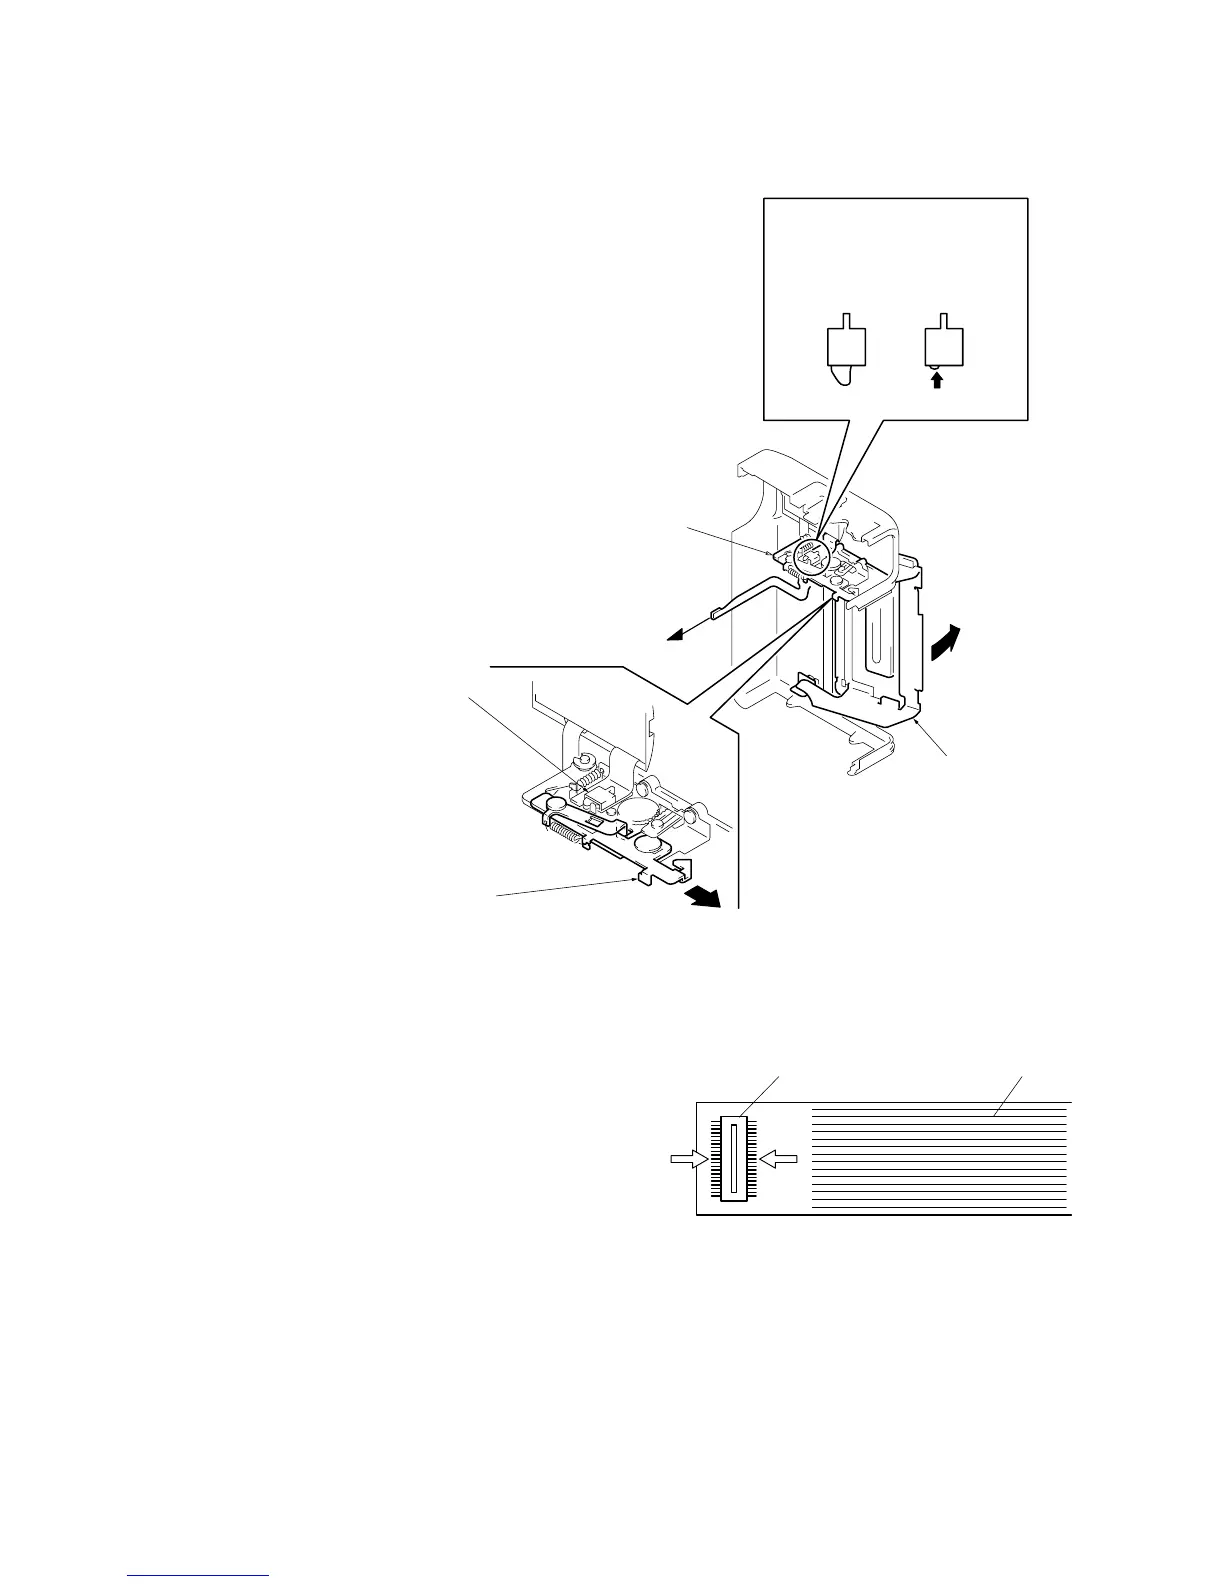
1 Ejecting with the cabinet (L) assembly removed
• Refer to “2. DISASSEMBLY”, and supply power with the
cabinet (L) assembly removed (however leave the flexible board
connecting the cabinet (L) assembly and main unit connected).
• Ejecting:
Operate the CS bracket assembly, open the cassette lid, turn
OFF the CC DOWN SW, and press the Eject button again.
• Loading:
Close the cassette lid.
(Turn ON the CC DOWN SW)
2 Handling the VC. MR board
Never heat the VC and MR boards with hot air. (Malfunctions
may result.)
Also remove after dehumidifying.
3 Special precautions on disconnection of connector
attached to the flexible board
• Apply force in the arrow direction and disconnect.
• Do not apply force in the direction as this will cause the solder
(of the pin) to float easily.
• When touching the pins with the solder iron, do not touch other
parts. (deformation may occur.)
• Ensure no folding lines are formed on the flexible board.
(This will cause the internal copper film to cut easily.)
Slide the CS lock plate in the arrow
direction, and open the cassette lid.
CC DOWN SW
CS bracket assembly
Connect to the main unit.
OFF
ON
CC DOWN SW
Cassette lid
Connector Flexible boar