Do you have a question about the Sony Handycam DCR-PC9 and is the answer not in the manual?
Section to record camcorder model and serial numbers for dealer reference.
Important safety instructions to prevent fire, shock, and damage from heat or moisture.
Declaration of Conformity and FCC compliance statements for the device.
Specific safety and compliance notes for Canada, including plug and voltage information.
Overview of recording/playing moving/still images on tape and Memory Stick.
Features for capturing images to computer and basic editing functions.
Functions for exposure, effects, focus, and special recording modes.
Features for searching, data codes, photo scans, and tape zoom after recording.
List and page references for all accessories supplied with the camcorder.
Guidance on how to read the manual, button conventions, and notes on cassette memory.
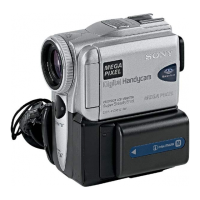
Instructions for installing and charging the battery pack and connecting to a power source.
Procedure for setting the camcorder's internal clock and date settings.
Instructions on how to properly insert and eject a video cassette.
Guide to operating camcorder functions using the LCD touch panel interface.
Steps to connect the AC power adapter or use the battery pack for power.
Visual guide for loading and closing the video cassette compartment.
Basic steps to start recording video, including lens cap removal and power settings.
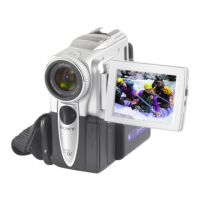
How to view recorded footage on the camcorder's LCD screen.
Guidelines for handling the LCD screen and viewfinder, including pixel behavior and sunlight exposure.
Detailed steps for inserting and removing the battery pack from the camcorder.
Instructions for connecting the AC adapter and charging the battery pack.
How to power the camcorder directly from an AC outlet using the adapter.
Step-by-step guide to configure the camcorder's internal clock and date settings.
Instructions for loading, ejecting, and preventing accidental erasure of cassettes.
How to navigate and operate camcorder functions using the LCD touch screen buttons.
Fundamental steps for capturing video, including power, cassette, and recording start/stop.
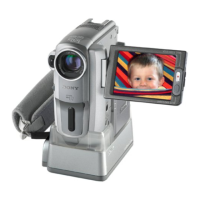
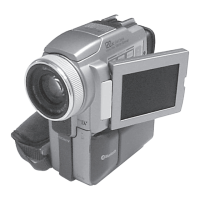
How to adjust the angle and position of the LCD panel for optimal viewing.
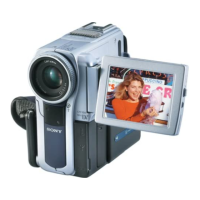
Using the LCD screen to view oneself while recording, often for self-shooting.
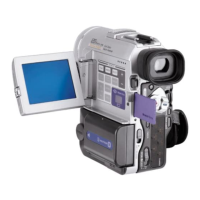
Guide to adjusting the viewfinder's focus and brightness for clear viewing.
How to operate the optical and digital zoom functions for framing shots.
Explanation of various icons and indicators shown on the screen during recording.
Using the BACK LIGHT function to improve exposure for subjects against bright backgrounds.
Instructions for using NightShot and Super NightShot modes for low-light recording.
How to use the self-timer for delayed recording, allowing the user to be in the shot.
Functions to quickly check recorded footage or find recording start points.
Steps to play recorded footage from a cassette, including controls and volume adjustment.
How to toggle screen indicators like data code, time, and settings on/off.
Accessing recorded date, time, and various settings information from the tape.
Using different playback controls like pause, fast forward, rewind, slow speed, and frame-by-frame.
Guide to connecting the camcorder to a TV using A/V or S-video cables for playback.
How to capture individual still frames from video onto the tape.
Recording in 16:9 aspect ratio for widescreen viewing and TV compatibility.
Applying visual transitions like fade-in/fade-out, wipes, and mosaics to recordings.
Applying digital image filters like Sepia, B&W, Solarize, and Mosaic to footage.
Adding effects like STILL, FLASH MOTION, LUMI., TRAIL, SLOW SHUTTER, and OLD MOVIE.
Selecting automatic exposure modes (Spotlight, Portrait, Sports, etc.) for different shooting scenarios.
Setting manual white balance for indoor, outdoor, or specific lighting conditions.
Steps to manually adjust exposure for backlit subjects, bright/dark scenes, or night shots.
Measuring exposure for a specific point on the screen to fix its brightness.
Guide to manually adjusting focus for challenging subjects or precise control.
Configuring the camcorder for automatic sequential recording and standby for time-lapse.
Instructions for creating stop-motion effects using cut recording.
How to use the viewfinder for camera control and touch panel operations.
Applying picture effects during playback for enhanced viewing.
Applying digital effects like STILL, FLASH, LUMI., and TRAIL during playback.
How to zoom in on specific areas of recorded footage during playback.
Using the remote to mark and return to a specific tape counter position.
Locating recorded scenes using titles stored on cassette memory.
Finding footage based on the date it was recorded, using cassette memory.
Locating and scanning still images recorded on tape.
Instructions for copying footage from the camcorder to a VCR using A/V or S-Video cables.
Copying footage digitally using an i.LINK (DV) cable for high-quality editing.
Creating programmed edits by selecting scenes and dubbing them to tape.
Converting analog video signals from external units to digital format via the camcorder.
Instructions for recording video from VCRs or TV programs onto the camcorder tape.
Adding new scenes from a VCR into existing recordings using insert editing.
Adding external audio via microphone or A/V jack to recorded tapes.
Superimposing preset or custom text titles onto video recordings.
Steps to create and store custom text titles for video recordings.
Adding text labels to cassettes stored in memory for identification.
Procedure to delete all data, including titles and labels, from cassette memory.
Guide to navigating and modifying camcorder settings via the menu system.
Explanation of various menu items and their modes based on the power switch position.
Details on settings for FRAME REC, INT. REC, EDITSEARCH, HiFi SOUND, AUDIO MIX, A/V t DV OUT, LCD B.L., LCD COLOR, VF B.L.
Configuration options for still image quality and moving picture sizes.
Options for SLIDE SHOW, DELETE ALL, FORMAT, PHOTO SAVE, TITLEERASE, TITLE DSPL, CM SEARCH, TAPE TITLE, ERASE ALL.
Adjusting recording modes (SP/LP) and audio modes (12-bit/16-bit).
Overview of Memory Stick file formats, naming conventions, and basic usage.
Procedures for physically inserting and removing the Memory Stick from the camcorder.
Operating Memory Stick functions via the camcorder's touch panel interface.
Choosing between FINE and STANDARD quality for still images, affecting compression.
Choosing between 320x240 and 160x112 resolutions for moving pictures.
Details on image sizes, meanings, indicators, and recording times for Memory Stick.
Capturing still images directly onto the Memory Stick.
Recording multiple still images in sequence using the multi-screen mode.
Using the self-timer to capture still images on the Memory Stick.
Saving moving images from tape as individual still images onto a Memory Stick.
Recording video clips directly onto the Memory Stick in MPEG format.
Saving moving images from tape as video clips onto a Memory Stick.
Combining still images with moving pictures using chromakey or overlap effects.
Creating and recording combined video and still images onto tape.
Saving combined video and still images onto a Memory Stick as a still image.
Automatically copying selected still images from tape to Memory Stick.
Playing back still images stored on the Memory Stick.
Viewing multiple images simultaneously in an index format for quick searching.
Playing back video clips stored on the Memory Stick.
System requirements for Windows and Macintosh computers to view camcorder files.
Guide to installing the necessary USB driver for computer connectivity.
Procedures to fix issues with incorrect USB driver registration or installation.
Steps to access and view image files on a Windows computer via USB connection.
Zooming in on still images stored on the Memory Stick for closer viewing.
Automatically playing back images in a sequence, useful for presentations.
Protecting selected images from accidental deletion or formatting.
Process for removing specific images from the Memory Stick.
Deleting images directly from the index screen view.
Removing all unprotected images from the Memory Stick at once.
Marking still images for printing according to DPOF standards.
A comprehensive guide to diagnosing and resolving common issues encountered with the camcorder.
Troubleshooting common problems related to power, tape, battery, and cassette handling during recording/playback.
Solutions for problems encountered when using the Memory Stick, including function, recording, deletion, and playback errors.
Addressing issues with title recording, cassette labeling, digital editing, remote commander, and TV output.
Troubleshooting problems related to power, charging, touch panel, indicators, and USB data transfer.
Understanding the 5-digit error codes displayed by the camcorder for self-diagnosis.
Explanations for warning indicators related to file errors, Memory Stick status, and formatting.
Meanings of indicators for tape status, battery level, moisture, and flash errors.
List of warning messages and their corresponding causes and recommended actions.
Information on compatible cassette types, including mini DV and cassette memory features.
Notes on recording and playing back tapes with copyright protection signals.
Details on audio modes, dual sound track playback, and mini DV cassette handling.
Information on InfoLITHIUM battery technology, charging, effective use, and storage.
Explanation of the i.LINK interface for digital video data transfer and baud rates.
Information on NTSC, PAL, and SECAM TV systems and camcorder compatibility.
How to adjust the camcorder's clock for different time zones.
How to prevent and handle moisture condensation issues inside the camcorder.
Instructions for cleaning the video heads, LCD screen, and viewfinder.
Maintaining the internal battery and calibrating the touch panel for optimal performance.
Safety guidelines for camcorder operation, handling tapes, and general care.
Safety and maintenance guidelines for the AC power adapter.
Instructions for cleaning the lens, battery pack handling, and notes on dry batteries.
Technical details of the camcorder's system, inputs/outputs, lens, and general features.
Technical details of the AC power adapter, including power requirements and dimensions.
Technical details for the NP-FM30 battery pack, including voltage, capacity, and temperature range.
Technical details for the Memory Stick, including memory type, voltage, and dimensions.
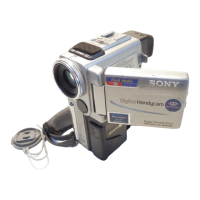
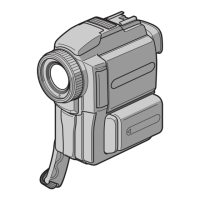
Labeled diagram identifying major camcorder components and their functions.
Identification of various ports (MIC, A/V, LANC, S VIDEO) and controls (FOCUS).
Proper way to hold the camcorder using the attached grip strap.
Identification of lens, viewfinder, lights, and connection ports (DV, USB, DC IN).
Details about the camcorder's lens quality and MTF measurement system.
Identification of switches, buttons, speaker, and grip strap on the camcorder.
Location of Memory Stick slot, viewfinder adjustment, cassette lid, and tripod mount.
Labeled diagram of the remote control and explanation of button functions.
Comprehensive list and explanation of all operational indicators displayed on the LCD and viewfinder.
| Type | Digital Camcorder |
|---|---|
| Recording Media | MiniDV |
| Optical Zoom | 10x |
| Digital Zoom | 120x |
| Sensor | CCD |
| Viewfinder | Color |
| Microphone | Stereo |
| Image Sensor | 1/4 inch CCD |
| LCD Screen | 2.5 inches |
| Interface | USB, FireWire |
| Effective Pixels | 680, 000 |