Do you have a question about the Sony DCR-TRV460 - Digital Handycam Camcorder and is the answer not in the manual?
Verify all necessary components are included with your camcorder.
Learn the correct procedure for charging the camcorder's battery.
Understand how to power on the camcorder and select operating modes.
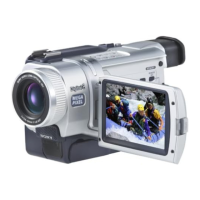
Learn to adjust the LCD panel angle and viewfinder for optimal viewing.
Set the camcorder's internal clock for accurate date/time recording.
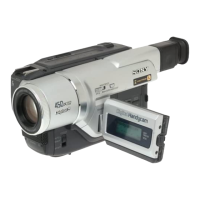
Guide on inserting cassette tapes and Memory Sticks into the camcorder.
Select the desired language for the camcorder's on-screen display.
Instructions on how to record video footage onto tape or Memory Stick.
Guide to capturing still photographs using the camcorder.
Learn to manually adjust exposure settings for optimal image brightness.
Methods for manually adjusting focus for sharp and clear images.
Utilize NightShot plus and Color Slow Shutter for low-light recording.
How to play back recorded video content from a cassette tape.
Access and view recorded content stored on a Memory Stick.
Simplified playback operation for new users.
Techniques for quickly finding specific scenes on a recorded tape.
Navigating and selecting options within the camcorder's menu system.
Adjust camera settings like Program AE and 16:9 WIDE mode.
Manage Memory Stick settings including quality, size, and formatting.
Apply various picture effects, fades, and overlays to recordings.
Access editing functions like End Search, Titles, and Program Edit.
Configure recording modes, audio settings, and display options.
Personalize the camcorder's menu for faster access to frequently used functions.
Instructions for connecting the camcorder to external video devices.
Copying recorded content from the camcorder to another tape.
Capturing external video sources onto the camcorder's media.
Transferring recorded video from tape to a Memory Stick.
Copying still images from a Memory Stick onto a video tape.
Editing and copying specific segments from tape to other devices.
Protect images from accidental deletion or mark them for printing.
Print still images directly from the camcorder to a compatible printer.
Solutions for common issues related to camcorder power and basic operation.
Troubleshooting steps for battery charging and power-related problems.
Solutions for issues related to cassette loading and ejection.
Resolving display issues on the LCD screen and viewfinder.
Troubleshooting common recording problems like tape not starting or power issues.
Solutions for playback errors, sound issues, and incorrect picture display.
Addressing problems with Memory Stick recognition, recording, and playback.
Troubleshooting issues encountered during dubbing or editing operations.
Explains various indicators and self-diagnosis codes with corrective actions.
Provides guidance for resolving issues indicated by on-screen messages.
Information on compatible cassette tape types and their usage.
Details on Memory Stick compatibility, handling, and data management.
Information on the Li-ion battery, charging, and effective usage.
Explanation of the i.LINK interface, its features, and connection requirements.
Guidelines for proper care, maintenance, and precautions for camcorder use.
Technical specifications of the camcorder, including video, audio, and lens details.
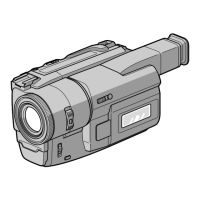
A visual guide to the camcorder's buttons, ports, and features.
Information on operating the remote control and changing batteries.
A detailed list of indicators and their meanings for camcorder status.
Alphabetical listing of topics and their corresponding page numbers for quick reference.