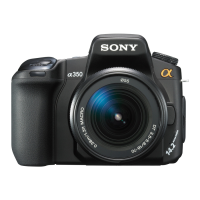
Do you have a question about the Sony DSLR-A500 and is the answer not in the manual?
| Megapixel | 12.3 MP |
|---|---|
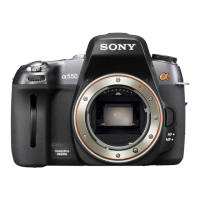
| Camera type | SLR Camera Body |
| Sensor type | CMOS |
| Image stabilizer | No |
| Image sensor size | - \ |
| Maximum image resolution | 4272 x 2848 pixels |
| Image sensor size (W x H) | 23.5 x 15.6 mm |
| Still image resolution(s) | 4272 x 2848 |
| Digital zoom | - x |
| Focal length range | - mm |
| Minimum aperture number | - |
| Focus | TTL |
| Auto Focus (AF) lock | Yes |
| Auto focusing (AF) modes | Continuous Auto Focus, Single Auto Focus, Spot Auto Focus |
| Power source type | Battery |
| Flash modes | Auto, Fill-in, Red-eye reduction, Slow synchronization |
| Flash guide number | 12 m |
| Flash recharging time | 4 s |
| Internal memory | - MB |
| Compatible memory cards | MS PRO Duo, MS Pro-HG Duo, SD, SDHC |
| Display diagonal | 3 \ |
| Display resolution (numeric) | 230400 pixels |
| Magnification | 0.80 x |
| USB version | 2.0 |
| Scene modes | Portrait, Sunset, Landscape (scenery) |
| Image editing | Resizing, Rotating |
| Photo effects | Black&White, Vivid |
| White balance | Auto, Cloudy, Custom modes, Daylight, Flash, Fluorescent, Incandescent, Shade |
| Self-timer delay | 2 s |
| Product color | Black |
| Battery type | NP-FM500H |
| Battery technology | Lithium |
| Battery life (CIPA standard) | 1000 shots |
| Operating temperature (T-T) | 0 - 40 °C |
| Light metering | Centre-weighted, Spot |
| ISO sensitivity | 200, 12800 |
| Light exposure modes | Aperture priority AE, Auto, Manual, Shutter priority AE |
| ISO sensitivity (max) | 12800 |
| ISO sensitivity (min) | 200 |
| Camera shutter type | Electronic |
| Fastest camera shutter speed | 1/4000 s |
| Slowest camera shutter speed | 30 s |
| HD type | Not supported |
| Maximum video resolution | - pixels |
| Depth | 84 mm |
|---|---|
| Width | 137 mm |
| Height | 104 mm |
| Weight | 597 g |
Guidelines for managing chemicals and handling exterior plastic parts during servicing.
Steps to verify product safety after repair before customer release.
Shows system connectivity and major component blocks.
Continues the overall system block diagram detailing interconnections.
Further details the overall system block diagram and component layout.
Completes the overall system block diagram, covering remaining sections.
Illustrates power distribution and regulation across the system.
Details power supply paths and voltage regulation for components.
Continues power block diagram, showing more supply lines and regulators.
Shows power distribution to specific modules and ICs.
Covers power supply details for specific chipsets and modules.
Final part of power block diagram, detailing low-level power management.
Illustrates physical layout of components for the A500 model.
Illustrates physical layout of components for the A550 model.
Guidelines for safely handling and replacing the imager component.