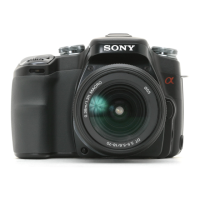
Do you have a question about the Sony a (alpha) DSLR-A100 and is the answer not in the manual?
Overview of camera buttons, dials, and connectors for initial setup.
Explanation of icons and data displayed on the viewfinder and LCD.
Approximate number of images that can be stored based on media capacity and image size.
Step-by-step guide for preparation, shooting, and post-shot confirmation.
Achieving sharp focus using auto and manual methods.
Adjusting shutter speed, aperture for correct light exposure.
Understanding light's effect on color and white balance.
Selecting image resolution and compression settings.
Explanation of shooting modes like Auto, P, A, S, and M.
Using preset modes for specific shooting scenarios.
Using Program Auto and Shift for exposure flexibility.
Controlling depth of field via aperture.
Controlling motion blur via shutter speed.
Full manual control over shutter and aperture.
Accessing ISO, WB, Metering, and other settings.
Setting white balance for accurate color under various lighting.
Setting autofocus area and AF modes.
Setting flash modes (Autoflash, Fill-flash, Rear sync).
Selecting light measurement method (Multi-segment, Center, Spot).
Controlling self-timer, continuous shooting, bracketing.
Manually shifting exposure value to adjust image brightness.
Fixing exposure settings before recomposing.
Previewing the depth of field at selected aperture.
Navigating between single-image and index displays.
Analyzing image tonal distribution.
Zooming in on image details for closer inspection.
Connecting the camera to a TV for playback.
Navigating and selecting menu options.
Overview of all camera menu categories.
Selecting resolution and file size.
Choosing JPEG compression or RAW format.
Enabling noise reduction for long exposures.
Reducing red-eye with pre-flash.
Selecting ADI or Pre-flash TTL modes.
Removing unwanted images.
Erasing data from the recording medium.
Preventing accidental image deletion.
Automatic playback of images.
Marking images for printing.
Setting shutter release behavior (focus confirmation).
Customizing AE Lock button function.
Reassigning control dial functions.
Preventing shutter release without card/lens.
Controlling LCD auto-off when using viewfinder.
Enabling auto-rotation of display for vertical shots.
Adjusting LCD screen brightness.
Selecting USB mode (Mass Storage/PTP).
Setting TV signal system (NTSC/PAL).
Managing file numbering.
Changing folder naming convention.
Setting automatic power-off mode.
Procedure for cleaning the image sensor.
Restoring all camera settings to factory defaults.
Physical connection steps.
Transferring photos to PC using Windows wizards.
Instructions for installing camera companion software.
Copying files from computer back to camera.
Camera usage on Mac systems.
Overview of different methods for printing photos.
Direct camera-to-printer connection.
Solutions for issues related to battery and power.
Troubleshooting common problems during shooting.
Fixing blurry or unfocused images.
Troubleshooting PC connection and software issues.
Media specific issues.
Media specific issues.
Explanations and solutions for error messages.
Important notes and precautions for Memory Stick media.
Guidelines and precautions for CF cards and Microdrives.
Information on battery usage, charging, storage, and life.
How to connect and use accessories like AC adapters and remotes.
Important safety and handling advice.
Technical details of camera components.
Exposure related specifications.
LCD screen specifications.
Battery and general specifications.
How to reset settings using dials or buttons.
| Sensor Type | CCD |
|---|---|
| Sensor Size | 23.6 x 15.8 mm |
| Effective Pixels | 10.2 MP |
| Autofocus Points | 9 |
| Screen Size | 2.5 inches |
| Viewfinder Type | Optical (pentamirror) |
| Weight | 638 g (body only) |
| Shutter Speed | 30 - 1/4000 sec |
| Continuous Shooting | 3 fps |
| Image Processor | BIONZ |
| Video Recording | No |
| Dimensions | 133 x 95 x 71 mm |
| ISO Sensitivity | ISO 100-1600 |
| Storage Types | CompactFlash (Type I or II) |
| Battery Type | NP-FM55H |
| Lens Mount | Sony A-mount |