General
Peak inrush current (DSR-250P
(1) Hot switching inrush current,
measured in accordance with
European standard EN55103-1:
6.3 A (230 V)
Power requirements
14.4 V (Lithium-ion battery pack)
12 to 17 V (AC power adaptor)
Average power consumption
(when using the battery pack)
During camera recording using
LCD
12.1 W
Viewfinder
10.5 W
Input/Output connectors
VIDEO IN/OUT
Input/output auto switch
RCA pin-jack, 1 Vp-p, 75 ohms,
unbalanced, sync negative
S VIDEO
Input/output auto switch
4-pin mini DIN
Luminance signal: 1 Vp-p,
75 ohms, unbalanced
Chrominance signal: 0.286 Vp-p
75 ohms, unbalanced
AUDIO IN/OUT CH-1/CH-2
Input/output auto switch
RCA pin-jack, 245 mV, (at output
impedance more than 47 kilohms)
Output impedance with less than
2.2 kilohms
Input impedance more than
47 kilohms
AUDIO IN CH1/CH2
XLR 3-pin, female
–60 dBu: 6.8 kilohms,
+4 dBu: 6.8 kilohms
(0 dBu = 0.775 Vrms)
PHONES
Stereo minijack (ø 3.5 mm)
LANC control jack
Stereo mini-minijack (ø 2.5 mm)
MIC IN +48V
XLR 3-pin, female
VF
20-pin
LIGHT
2-pin
DV IN/OUT
6-pin connector
Speaker
Dynamic speaker (ø 20 mm)
DC IN 12V
XLR 4-pin, female
DC OUT 12V
4-pin, male
LCD screen
Picture
2.5 type measured diagonally
49.9 × 37.3 mm (2 × 1 1/2 in)
Total dot number
200 640 (880 × 228)
Video camera
recorder
System
ideo recording system
2 rotary heads
Helical scanning system
udio recording system
Rotary heads, PCM system
Quantization: Fs32 kHz (12 bits,
channels 1/2, channels 3/4),
Fs48 kHz (16 bits, channels 1/2)
ideo signal
PAL colour, CCIR standards
NTSC color, EIA standards (DSR-250),
sable cassette
DVCAM cassette with the
mark printed
Mini DVCAM cassette with the
mark printed
DV cassette with the
mark
printed
Mini DV cassette with the
mark printed
ape speed
DVCAM format:
Approx. 28.218 mm/s
DV format SP mode: Approx.
18.812 mm/s
ecording/playback time
DVCAM format: 184 min (using
cassette PDV-184ME)
DV format SP mode: 270 min
(using cassette PDV-184ME)
ast-forward/rewind time
Approx. 45 s (using cassette
DVM60/PDVM-40ME)
Approx. 2 min 30 s (using cassette
PDV-184ME)
Viewfinder
Electric viewfinder (B&W)
Image device
1/3 type CCD (3 Charge Coupled
Device) Approx. 380 000 pixels
(DSR-250), Approx. 450 000 pixels
(DSR-250P)
(Ef
(Effective: Approx. 340 000 pixels)
fective: Approx. 400 000 pixels)
Lens
Combined power zoom lens
Filter diameter 58 mm (2 3/8 in)
12× (Optical), 48× (Digital)
F1.6 - 2.4
Focal length
6 - 72 mm (1/4 - 2 7/8 in)
When converted to a 35 mm still
camera
43.2 - 518.4 mm (1 3/4 - 20 1/2 in)
Colour temperature
Auto, nIndoor (3 200 K),
Outdoor (5 800 K), (A, B)
Minimum illumination
2 lux (F1.6)
(DSR-250P)
(DSR-250), 0.3 Vp-p (DSR-250P),
Operating temperature
0 °C to 40 °C (32 °F to 104 °F)
Storage temperature
–20 °C to +60 °C (–4 °F to +140 °F)
Dimensions (approx.)
242 × 251 × 509 mm (9 5/8 × 10 ×
20 1/8 in) (w/h/d)
Mass (approx.)
3.5 kg (7 lb 11 oz)
main unit only
4.9 kg (10 lb 13 oz)
including the BP-L40 (A) battery
pack, cassette PDV-184ME,
microphone, viewfinder, and
hood cap
Supplied accessories
See page 2.
SERVICE MANUALSERVICE MANUAL
R MECHANISM
— Continued on next page —
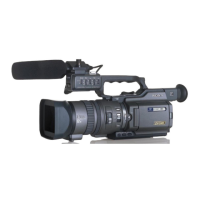
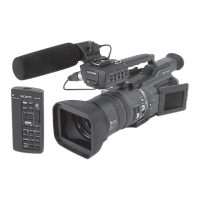
Photo : DSR-250
RMT-811
US Model
Canadian Model
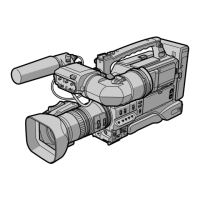
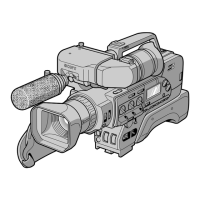
DSR-250
AEP Model
Chinese Model
DSR-250P
DIGITAL CAMCORDER
SPECIFICATIONS
NTSC model : DSR-250
PAL model : DSR-250P
DSR-250/250P
RMT-811
Ver 1.3 2003. 01