
C
campbellnatalieSep 12, 2025
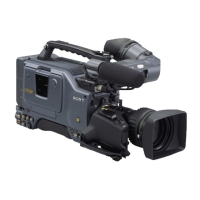
Why is the cassette automatically ejected from my Sony DSR-390L, DSR-390PL Camcorder?
- VValerie FosterSep 12, 2025
If the cassette is automatically ejected from your Sony Camcorder, an incorrect type of cassette may be loaded. Load a correct type of cassette.