Do you have a question about the Sony Handycam DCR-PC100 and is the answer not in the manual?
Explains connecting the camcorder to the power source via AC adaptor.
Details the process of inserting a mini DV cassette into the camcorder.
Steps to start recording a video using the camcorder.
How to view recorded footage on the camcorder's LCD screen.
Explains how to read button labels and operation sounds in the manual.
Information about using mini DV cassettes with cassette memory for enhanced functions.
Important guidelines for protecting the camcorder from damage and ensuring proper operation.
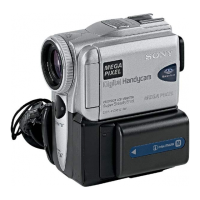
Instructions for inserting the battery pack into the camcorder.
Guide on how to charge the camcorder's battery pack using the AC adaptor.
Details on charging times and recording/playback durations for different battery packs.
How to power the camcorder directly from a wall outlet using the AC adaptor.
Procedure for removing a cassette from the camcorder.
How to use the write-protect tab on a cassette to prevent data loss.
Step-by-step instructions to begin recording video footage.
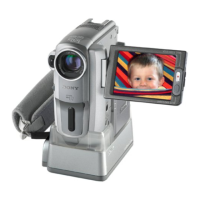
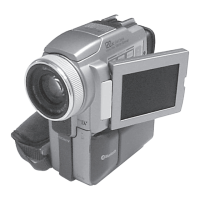
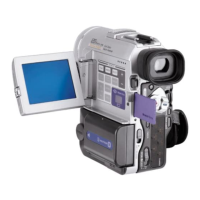
How to rotate and position the camcorder's LCD panel for optimal viewing.
How to change the brightness and backlight of the LCD screen.
How to adjust the viewfinder for clear focus of images and indicators.
Guide on how to attach the lens hood for better picture quality in strong light.
Explains different modes like normal, anti-ground shooting, and 5-sec recording.
Explains various indicators displayed on the screen during recording.
How to use the backlight function for subjects with light behind them.
Using the NightShot function for recording in low-light conditions.
How to use the self-timer to record yourself without manual operation.
How to quickly locate the end of recorded segments on the tape.
Step-by-step guide to play recorded tapes using the camcorder.
How to show or hide display indicators on the LCD screen during playback.
How to display recording data like date/time or camera settings during playback.
Reiteration of the End Search function for locating recorded portions.
How to view playback at a reduced speed for detailed review.
Instructions for connecting the camcorder to a TV or VCR for playback.
How to view playback wirelessly using an optional IR receiver.
How to record still images onto a mini DV tape.
Using the self-timer to capture still photos of yourself.
How to print still images from the camcorder using a video printer.
How to manually set white balance for accurate color reproduction in different lighting.
How to record in 16:9 widescreen format for compatible TVs.
How to create professional fade-in and fade-out transitions between scenes.
Applying digital visual effects like SEPIA, B&W, or SOLARIZE to recorded images.
Applying various digital effects like STILL, FLASH, LUMI, TRAIL, SLOW SHTR, OLD MOVIE.
Using automatic exposure modes like Spotlight, Sports Lesson, or Landscape for different shooting scenarios.
How to manually adjust exposure settings for backlit subjects or dark scenes.
How to manually adjust focus for subjects where autofocus may be ineffective.
Applying picture effects like SEPIA or B&W during playback of recorded tapes.
Applying digital effects like STILL or LUMI during playback of recorded tapes.
How to mark and return to specific points on the tape for easy scene retrieval.
Searching for recorded scenes based on titles stored in cassette memory.
Locating recorded scenes by searching for specific dates.
How to search or scan for still photos recorded on the tape.
Instructions for copying recorded content from one tape to another using a VCR.
Editing scenes between camcorder and DV products using an i.LINK cable for frame-accurate dubbing.
How to record TV programs or other video sources onto the camcorder's tape.
Recording video from other DV devices using the i.LINK (DV) cable.
How to insert new video segments from a VCR onto an existing tape.
How to connect external microphones via MIC jack or accessory shoe.
How to dub audio from external equipment using the AUDIO/VIDEO jack.
How to record new audio over existing audio on a tape.
How to choose, customize, and superimpose titles onto video recordings.
How to delete previously superimposed titles from the cassette memory.
How to create and save custom text titles in the camcorder's memory.
How to create and store custom labels for mini DV cassettes in their memory.
How to navigate and modify camcorder settings via the menu system.
A table detailing various menu items, their modes, meanings, and power switch requirements.
Instructions on how to set or reset the camcorder's internal clock.
Basic information about using Memory Sticks for still image storage.
How to properly insert and eject a Memory Stick from the camcorder.
Choosing image quality settings (SUPER FINE, FINE, STANDARD) for still pictures.
Choosing between different resolutions (1152x864, 640x480) for still images.
How to record still images directly onto a Memory Stick.
Recording multiple still images in sequence or as a slideshow.
Using the self-timer to capture still images onto a Memory Stick.
Combining still images from Memory Stick with moving video using chromakey or luminance key.
Capturing frames from a mini DV tape as still images onto a Memory Stick.
Capturing still images from external video sources like TV or VCR.
Copying still images from a Memory Stick back to a mini DV tape.
Playing back still images stored on a Memory Stick.
Viewing multiple still images simultaneously in an index format for quick selection.
How to view Memory Stick images on a PC using supplied software and adaptors.
Step-by-step guide to copy still images or titles from Memory Stick to a mini DV tape.
Automatically playing back Memory Stick images in a sequence like a slideshow.
How to protect selected images from accidental deletion or formatting.
How to delete individual still images stored on the Memory Stick.
How to delete all unprotected images from the Memory Stick at once.
Specifying images on Memory Stick for printing using DPOF standard.
Details on compatible cassette types, including mini DV with and without cassette memory.
Information on audio modes (12-bit, 16-bit) and handling mini DV cassettes.
Solutions for problems encountered during recording, like no operation or power off.
Solutions for problems during playback, like no sound, unclear picture, or search function not working.
Explains the 5-digit self-diagnosis codes and their meanings for user or dealer service.
Explains visual cues like flashing lights and symbols indicating potential issues.
Lists and explains on-screen messages that alert the user to specific conditions or errors.
Information on NTSC, PAL, and SECAM systems for international TV compatibility.
How to prevent and deal with moisture buildup inside the camcorder.
Instructions for cleaning video heads, LCD screen, and charging the internal battery.
Safety and operational guidelines for camcorder use, handling tapes, and AC power.
Guidelines for safe handling, charging, and storage of battery packs.
Technical details about the camcorder's system, lens, screen, power, and connectors.
Technical details for the AC power adaptor, including power requirements and dimensions.
Technical details for the battery pack, including voltage, capacity, and mass.
Technical details for Memory Stick, including memory type, voltage, and capacity.
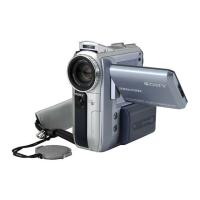
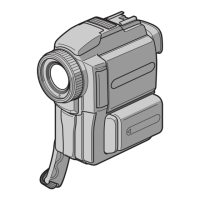
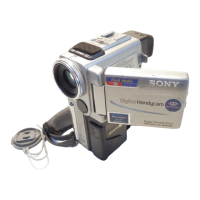
Diagrams and labels identifying key external parts of the camcorder.
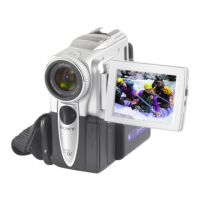
Diagrams and labels identifying buttons, switches, and dials on the camcorder.
Identification of battery terminals, DC jack, charge lamp, and tripod mount.
Identification of jacks, switches, lens features, and sensors on the camcorder.
Identification of DV IN/OUT, headphones, AUDIO/VIDEO, and S VIDEO jacks.
Diagrams and labels identifying buttons on the remote commander.
Instructions for inserting batteries and notes on remote operation in different modes.
Explains various indicators displayed on the camcorder screen, their meaning, and page references.
Lists functions for adjusting exposure based on lighting conditions.
Lists functions to enhance images like faders, effects, and titles.
Lists functions for natural-looking recordings like zoom, focus, and AE modes.
Lists functions related to editing, playback, and viewing on TV.