Do you have a question about the Sony Handycam DCR-TRV480E and is the answer not in the manual?
Specific advice for UK/Europe customers and general notes on using tapes, LCD, and lens.
Basic steps for recording video and capturing still photos.
Checking items, charging battery, and inserting media like tapes or Memory Sticks.
Techniques for controlling exposure and focus in various shooting conditions.
Applying visual effects and locating specific scenes within recordings.
Guide to using camcorder menus and customizing personal settings.
Connecting to external devices and computers for data transfer and editing.
Guidance on diagnosing and fixing common camcorder issues and interpreting warnings.
Details on camcorder specs, accessories, and quick reference guides.
Steps for attaching the battery pack and inserting a video cassette.
Steps for attaching the battery pack and inserting a Memory Stick.
Verifying included accessories and initiating battery charging.
Detailed steps for charging the camcorder's battery pack using the AC adapter.
Instructions for powering on the camcorder and selecting modes.
Guidance on using the AC adapter for continuous power.
Adjusting the LCD panel angle/brightness and viewfinder clarity.
Configuring date/time and utilizing the viewfinder for operation.
Procedures for inserting video tapes and Memory Sticks into the camcorder.
How to choose the language for the camcorder's interface.
Choosing recording mode (tape/Memory Stick) and starting/stopping recording.
Techniques for longer recording on tapes (LP mode) and Memory Sticks (image size).
Operating the zoom lever and activating the built-in light for varied shooting.
Setting up the self-timer for delayed recording initiation.
Steps to capture still images and review them on the camcorder.
Selecting still image quality and recording format (Field/Frame).
Using Easy Handycam mode for straightforward movie and still image recording.
Using the BACK LIGHT function to improve exposure in backlit scenes.
Adjusting exposure using spot metering and manual controls.
Utilizing NightShot features for recording in very dark environments.
Methods for controlling focus on specific subjects or manually.
Adding fade-in/out effects like black, white, and mosaic to recordings.
Using wipe, overlap effects, and fading stills into movies.
Adding digital effects like Still, Flash, Lumi. Key, and Trail to enhance recordings.
Superimposing still images onto movies using Memory Mix functions.
Using END SEARCH and EDIT SEARCH to locate specific scenes on tape.
Operating playback functions like play, pause, volume, and fast forward/rewind.
Interpreting playback indicators and using various playback modes.
Applying effects like STILL, FLASH, LUMI. KEY, and TRAIL during playback.
Viewing and managing still images and movies stored on a Memory Stick.
Understanding Memory Stick playback indicators and navigating folders.
Easy playback functions for first-time users in Easy Handycam mode.
Utilizing Easy Handycam for TV playback, dubbing, and menu adjustments.
Magnifying recorded images or movies using the zoom function.
Showing screen indicators, date/time, and camera settings data during playback.
Instructions for connecting the camcorder to a TV for playback.
Using Zero Set Memory and Date Search to locate specific scenes on tape.
Guide to selecting and adjusting settings within the camcorder's menu.
Personalizing the menu for quick access to frequently used functions.
Using various automatic exposure modes for different shooting scenarios.
Adjusting exposure, focus, and configuring NightShot features.
Utilizing digital zoom and slow shutter for enhanced recording capabilities.
Configuring wide-screen recording and image stabilization.
Setting image quality for stills and size for movies recorded on Memory Stick.
Deleting files, formatting the Memory Stick, and managing file numbering.
Creating and selecting folders for organizing images on the Memory Stick.
Adding visual effects like Sepia, B&W, and Solarize to recordings.
Playing back images as a slide show and overlaying stills with Memory Mix.
Using frame recording for stop-motion effects and interval recording for time-lapse.
Capturing still images at set intervals for time-lapse photography.
Viewing camcorder demonstrations and information on printing.
Adjusting playback speed and editing recorded scenes for dubbing.
Burning video content to DVDs or CDs via computer connection.
Using End Search and adding text titles to recordings.
Selecting recording modes (SP/LP) and audio settings (12/16-bit).
Configuring multi-sound playback and using tape compensation features.
Using TBC for tape sync and DNR for noise reduction.
Balancing main and sub audio tracks during playback.
Customizing LCD brightness, backlight, and color settings.
Converting analog signals to digital format via A/V to DV OUT.
Setting playback mode and managing USB connections for streaming and file transfer.
Choosing to display date, time, and camera settings during playback.
Configuring remaining battery indicator, remote control, recording lamp, and beep sounds.
Adjusting display output and configuring the auto shut off feature.
Setting the camcorder's clock, world time, and on-screen display language.
Adding, deleting, and sorting menu items for personalized shortcuts.
Linking the camcorder to VCRs, TVs, or computers using A/V or i.LINK cables.
Copying recorded video from the camcorder to another tape via VCR.
Capturing movie footage from external sources onto the camcorder.
Transferring still images and movies from tape to a Memory Stick.
Recording still images from a Memory Stick onto a video tape.
Creating programs by selecting and ordering scenes for dubbing.
Configuring IR setup codes to operate a VCR with the camcorder.
Adjusting synchronization between camcorder and VCR to ensure accurate recording.
Marking scene start/end points and recording them as programs.
Removing selected or all pictures from the Memory Stick.
Applying image protection to prevent accidental deletion.
Selecting still images for printing using the Print Mark function.
Printing still images directly from the camcorder to a PictBridge printer.
Viewing, editing, and organizing video and pictures on a computer.
Utilizing software for creating slideshows, music videos, and burning discs.
Accessing 'First Step Guide' and checking system requirements for PC use.
Instructions for installing Picture Package and related software on Windows PCs.
Steps for installing software and 'First Step Guide' on Macintosh computers.
Methods for viewing the 'First Step Guide' on Windows and Macintosh computers.
Procedure for copying camcorder footage to DVDs using Sony's 'Click to DVD' software.
Using the camcorder to convert analog VCR signals to digital format for computer transfer.
Resolving problems with camcorder power, operation, and remote commander.
Troubleshooting battery charging, discharge, and cassette ejection problems.
Addressing issues with the LCD screen, viewfinder, and touch panel functionality.
Solutions for tape start issues, power interruptions, SteadyShot, focus, and picture quality.
Resolving problems with playback, scene search, and tape counter indicators.
Troubleshooting Memory Stick operation, recording, playback, and deletion.
Resolving issues with dubbing still pictures, movies, or digital program editing.
Troubleshooting when the computer does not recognize the camcorder or Memory Stick.
Troubleshooting issues with USB connection, drivers, and software recognition.
Resolving issues where the 'First Step Guide' does not display correctly.
Interpreting self-diagnosis codes and warning indicators for camcorder issues.
List of warning messages and their corresponding corrective actions.
Information on power supply, TV systems, and usable cassette tapes for international travel.
Information on Memory Stick types, file formats, and handling precautions.
Information on InfoLITHIUM battery compatibility, features, and charging.
Maximizing battery performance, understanding battery life, and storage recommendations.
Details on the i.LINK standard, baud rates, and connection requirements.
Guidelines for camcorder care, handling, and avoiding environmental damage.
Procedures for preventing and resolving moisture condensation issues.
Instructions for cleaning the video head and LCD screen, and calibrating the touch panel.
Technical details on recording systems, optics, image devices, and connectors.
Specifications for the AC Adaptor and NP-FM30 rechargeable battery pack.
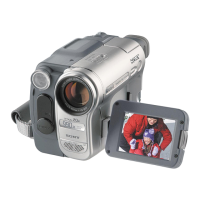
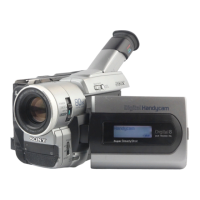
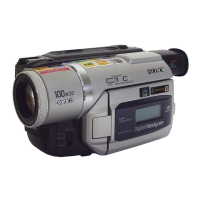
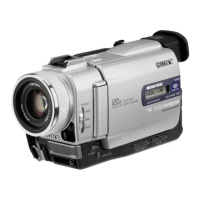
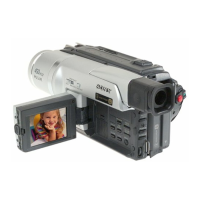
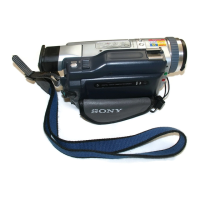
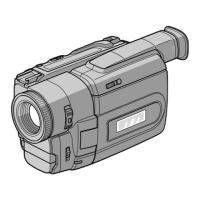
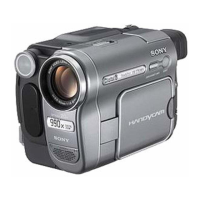
Diagrams and labels for the camcorder's buttons, lamps, and connectors.
Instructions for using the remote, replacing its battery, and removing the insulation sheet.
Explanation of icons and indicators displayed on the camcorder's screen and viewfinder.
Alphabetical listing of terms and their corresponding page numbers from A to J.