Do you have a question about the Sony Handycam HDR-FX1E and is the answer not in the manual?
ATTENTION regarding electromagnetic fields affecting picture and sound.
Explains HDV signal compression and the MPEG2 format used.
Information on pixel variations, sunlight exposure, and lens care.
Advice on playing HDV tapes on non-compatible devices and connecting devices.
Instructions on fastening grip belt and parts to avoid holding.
Guide to accessing and selecting settings via the camcorder's menu.
Procedures for copying footage to other devices and connecting to computers.
Resolving common issues and understanding warning indicators.
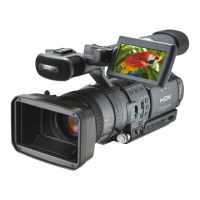
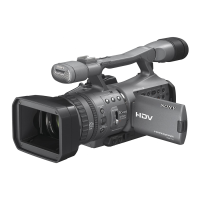
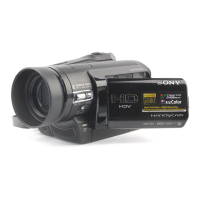
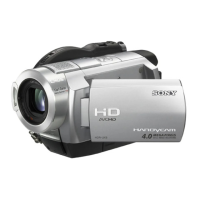
Details on battery, i.LINK, specifications, and parts identification.
Step-by-step guide to attaching battery and inserting cassette for recording.
List of items included with the camcorder and their purpose.
Detailed instructions on connecting the AC adapter and charging the battery.
Instructions on setting the power switch to CAMERA or VCR mode.
How to adjust angle and brightness of the LCD panel and viewfinder.
Procedure for setting the camcorder's internal clock.
Instructions for properly inserting a mini DV cassette into the camcorder.
Guide to selecting the on-screen display language.
How to record movies in HDV or DV format, including setup steps.
Explanation of recording indicators and technique for low-angle recording.
Recording in LP mode and operating zoom levers for framing shots.
Using the zoom ring for precise zoom and recording in mirror mode.
How to check current audio, output, and picture profile settings.
Fine-tuning exposure for backlit subjects and brightly lit scenes.
Setting white balance manually, recalling presets, and using auto lock.
Guide to manually adjusting iris, gain, shutter speed, and white balance.
Manual focus, distant subjects, and expanded focus for precise focusing.
Using the peaking function to highlight edges for easier focusing.
Adjusting color, brightness, etc., and saving settings in profiles.
Controlling microphone input volume and checking audio levels.
Using features like shot transition for smooth scene changes.
Adding black or white fade effects to recorded scenes.
Adding index signals for easier scene searching and editing.
Setting the camcorder to record DV format in 16:9 aspect ratio.
Quickly viewing the last few seconds of recorded footage.
Basic playback operations, including rewind, play, pause, and volume control.
Using picture search, skip scan, reverse playback, and slow-motion.
Locating scenes and displaying information during playback.
Choosing to show time code, tape counter, and other playback information.
Viewing recorded date, time, and camera settings.
Checking setup values for audio, output signals, and assign buttons.
Connecting camcorder to TV via i.LINK or Component Video for viewing.
Adjusting settings for correct display on different TV aspect ratios.
Finding specific scenes using zero set memory and tape counter.
Locating scenes based on the date they were recorded.
Finding scenes marked with index signals.
Navigating menus to change camcorder settings and adjustments.
Adjusting camera-specific settings like white balance and gain.
Setting transition duration and curve types for smooth scene changes.
Activating and choosing SteadyShot modes for image stabilization.
Displaying center marker and using frame recording for stop-motion.
Configuring audio playback modes, mixing, and recording formats.
Managing wind noise and selecting MIC/LINE input sources.
Adjusting LCD screen color, backlight brightness, and viewfinder brightness.
Configuring recording formats, playback signals, and output settings.
Adjusting display for TV aspect ratios and converting AV to DV output.
Accessing settings like assign buttons, clock, world time, language, and beep.
Configuring record/format lamps, iris dial, and data code display options.
Managing tape indicators, display options, and remote commander function.
Procedure for adding menu items to the Personal Menu for faster access.
Removing unwanted menu items from the Personal Menu.
Reordering menu items within the Personal Menu for custom access.
Restoring the Personal Menu to its default settings.
Assigning specific functions to the camcorder's ASSIGN buttons.
Instructions for copying footage to another recording device.
Using i.LINK for dubbing to HDV-compatible equipment.
Using i.LINK for dubbing to DV-compatible equipment.
Connecting to VCRs or TVs using A/V cables for dubbing.
Overall steps for dubbing footage to a new tape.
Capturing video from external sources like VCRs or TVs.
Linking camcorder to a computer via i.LINK for data transfer.
Adding new audio tracks to DV format tapes without erasing original sound.
Using camcorder as an interface to convert analog video to digital for computer transfer.
Steps for transferring analog video signals to a computer via the camcorder.
Solutions for power, operation, noise, remote, and heating issues.
Resolving problems related to charging, battery life, and power supply.
Troubleshooting problems with cassette ejection, moisture, and tape indicators.
Resolving display problems like unknown language or unclear pictures.
Solutions for tape start issues, power interruptions, zoom, and focus problems.
Fixing issues like playback errors, sound problems, and search function failures.
Resolving issues with picture display, dubbing, and audio during dubbing.
Understanding meanings and corrective actions for various on-screen indicators.
Cross-referencing warning messages with corrective actions and relevant pages.
Power supply, TV color systems, and world time settings for international use.
Understanding HDV format, copyright signals, and cassette notes.
Details on InfoLITHIUM battery compatibility, function, and charging.
Explanation of the i.LINK standard, its features, and connection types.
Advice on operating conditions, handling, and cleaning the camcorder.
Steps to prevent and resolve moisture condensation issues.
Guidelines for cleaning video heads, LCD screen, casing, and lens.
How to charge the internal battery that retains date and time settings.
Instructions for cleaning dust from the viewfinder.
Technical details of the camcorder's system, recording, and components.
Specifications for general, battery pack, and AC adapter.
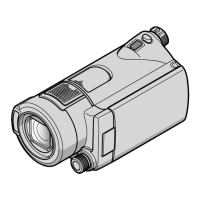
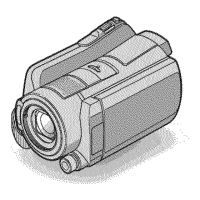
Diagrams and descriptions of camcorder components and their functions.
Diagram and description of remote commander buttons and battery installation.
Explanation of various icons and indicators displayed on the camcorder screens.
Alphabetical listing of topics and their corresponding page numbers.