z Advanced Operations
Setting the Clock
You need to set the clock to use the following features:
•alarm
•date stamp
1 Press MENU/NEXT repeatedly until the date display appears.
2 Press + or = to set the date.
Keep pressing the button, to change the date successively.
3 Press MENU/NEXT again.
The time display appears.
4 Press + or = to set the time.
Keep pressing the button to change the time successively.
5 Press pSTOP.
The unit returns to normal mode.
The clock starts from 0 second.
MENU/NEXT
pp
pp
pSTOP
Various Ways of Recording
Adding index numbers while recording
You can add index marks while recording a note at the point you
like so that you can quickly find and play from the marked
position.
While the unit is recording a note, press INDEX, and the new index
number flashes.
An index mark is added and the following index numbers will
increase by one.
Inserting a new note between two notes
1 Press MENU/NEXT repeatedly until "InS" appears.
2 Press + or = to select "On".
3 Press pSTOP.
The display returns to the normal mode.
4 Press + or = to select the index number before which
you want to insert a new note.
5 Press and hold REC for more than a second until "InS" appears
and flashes, and then speak into the microphone.
The new note is added and the notes after that are renumbered
as follows.
To stop recording
Press pSTOP.
To insert more notes
Repeat steps 4 and 5.
To record normally (not inserting)
Briefly press REC.
To return to the normal mode
Select "OFF" in step 2.
microphone
((
((
(
=/+=/+
=/+=/+
=/+
pp
pp
pSTOP
MENU/NEXT
INDEX
REC
v
4123
245
44
44
4
Insert a new note
Index numbers increase by one
New note
13
Inserting a new note in the middle of a
previously recorded note
1 Press MENU/NEXT repeatedly until "InS" appears.
2 Press + or = to select "On".
3 Press pSTOP.
The display returns to the normal mode.
4 Press + or = to select the index number to which you
want to add a note.
5 Press ( to play the note and press pSTOP at the point you
want to add a new note.
6 Press and hold REC for more than a second until "InS" appears
and flashes, and then speak into the microphone.
The new note is added and the previous note is divided into
two index numbers. Remaining notes after that are
renumbered.
To stop recording
Press pSTOP.
To insert more notes
Repeat steps 4 to 6.
To record normally (not inserting)
Briefly press REC.
To return to the normal mode
Select "OFF" in step 2.
Note
• When there are already 98 notes recorded in the file, you cannot insert a
new recording.
v
1
New note
44
44
4
13
35
Insert a new note
234567890123456
234567890123456
2
2345678
2345678
2
23456789
23456789
4
Index numbers increase by two
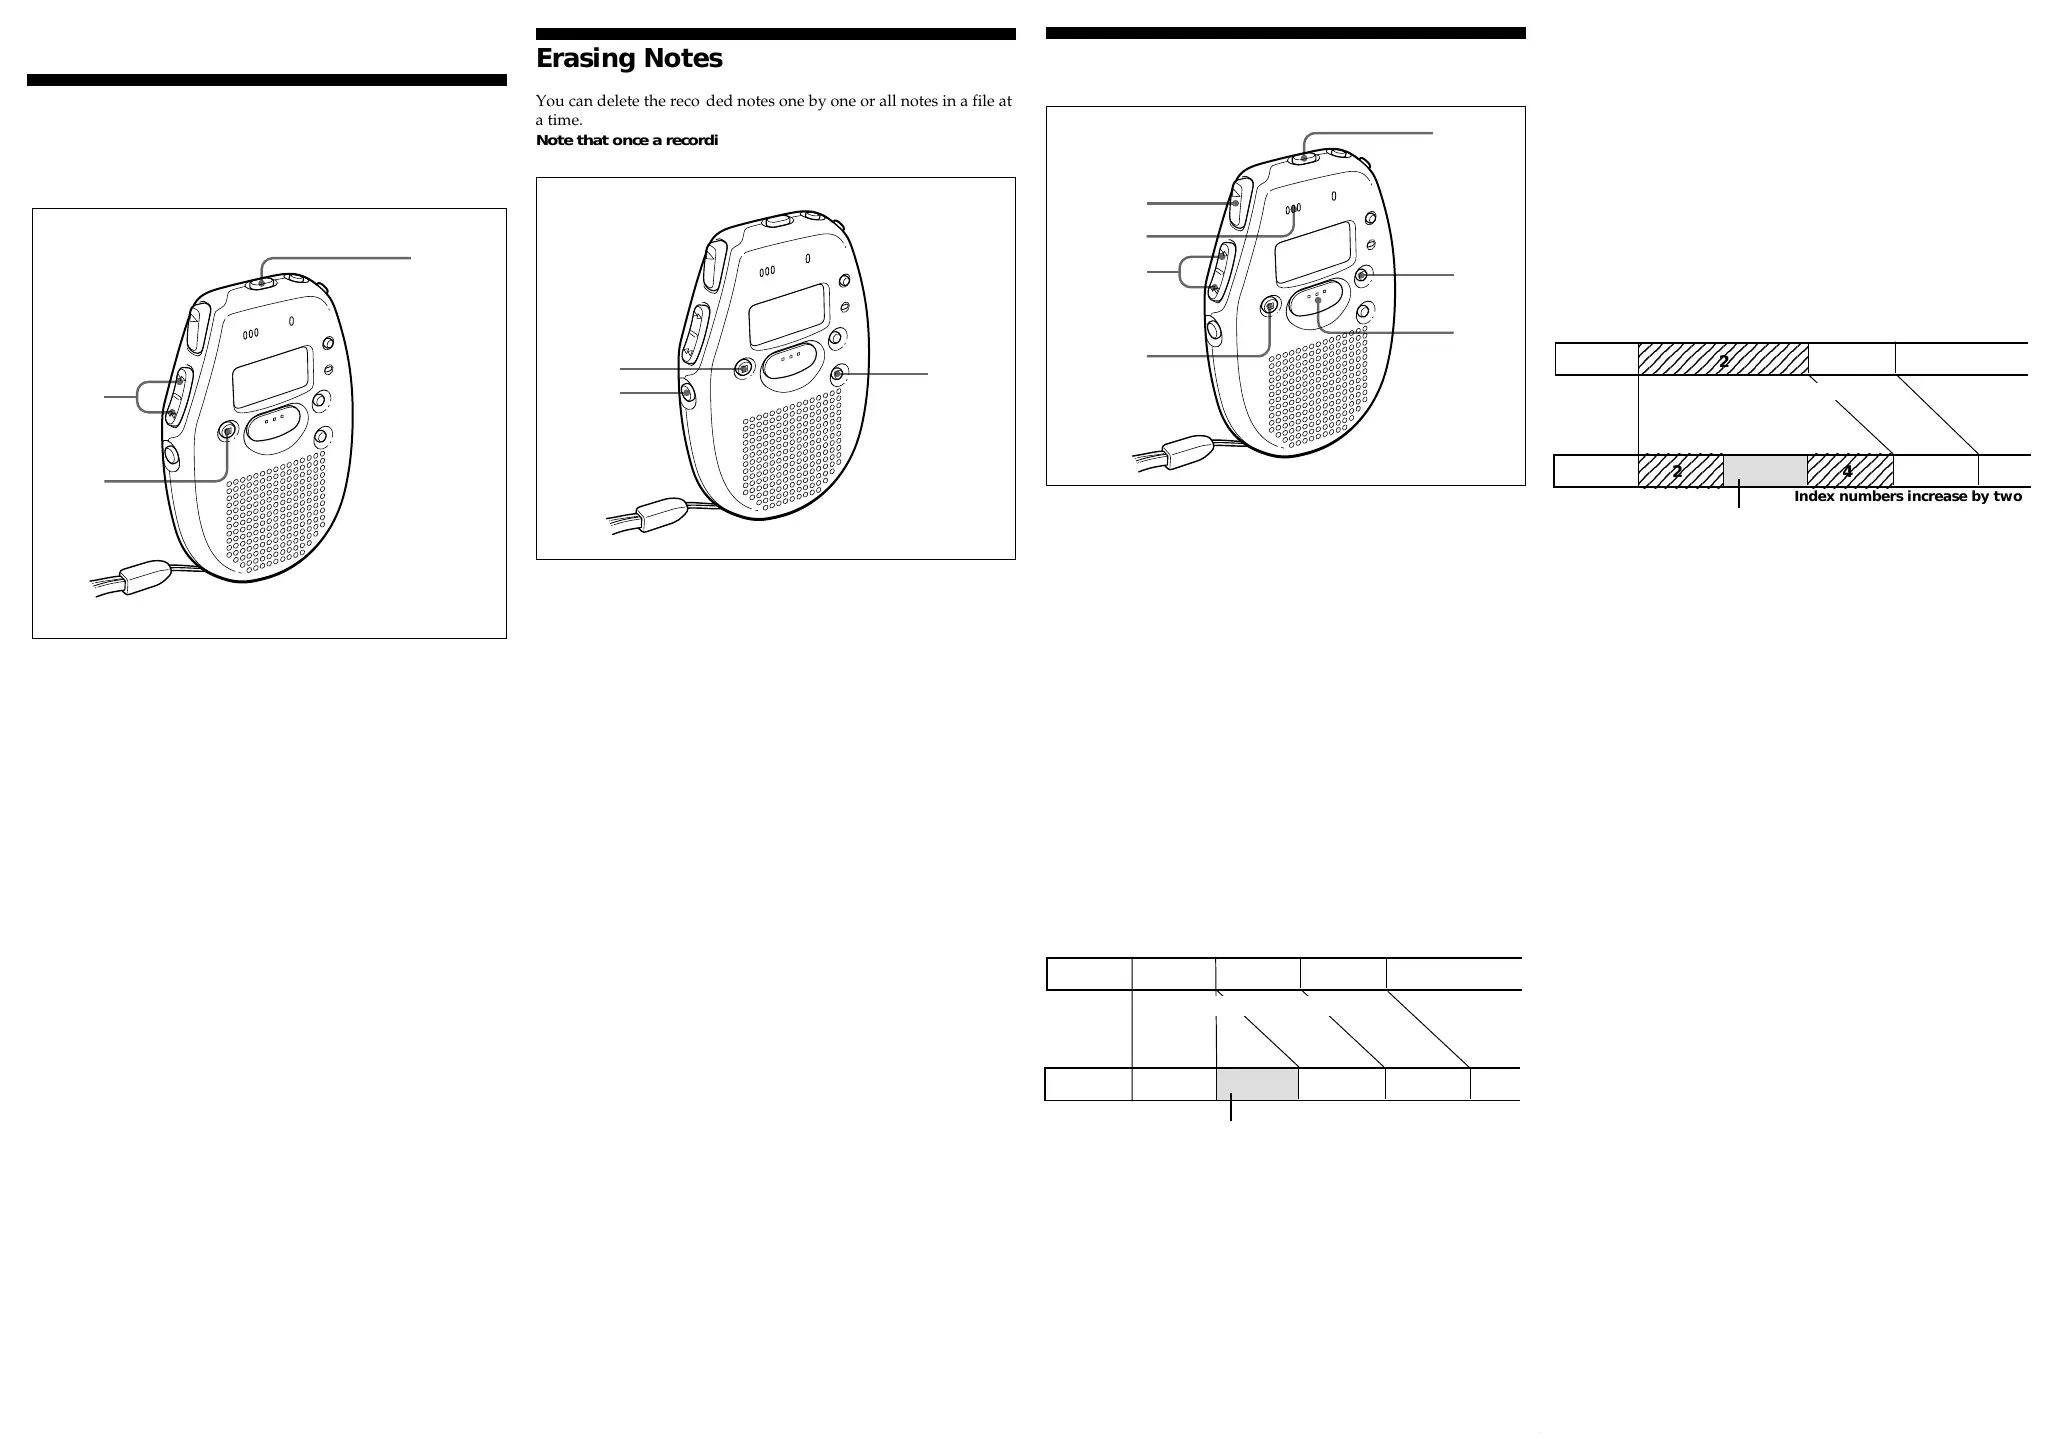
Erasing Notes
You can delete the recorded notes one by one or all notes in a file at
a time.
Note that once a recording has been erased, you cannot
retrieve it.
Erasing a note
1 Press ERASE while playing back the note you want to erase.
The index number and "ErASE" flash, and the first and the last
5 seconds of the note are played back 10 times.
2 Press ERASE again while the note is played back.
The note is erased and the remaining tracks are renumbered.
To cancel erasing
Press pSTOP before step 2.
To erase other tracks
Repeat steps 1 and 2.
To erase a note partially
Before you do steps 1 and 2, divide the note into the part to erase
and the part not to erase by adding an index mark. (For details,
refer to Adding/Erasing Index Marks.)
Erasing all notes in a file
1 Press FILE to select the desired file, A or B.
2 Press pSTOP and ERASE at the same time for about a second
during stop mode.
"All ErASE" flashes.
3 Press ERASE to erase the notes.
All the notes in the file are erased.
To cancel erasing
Press pSTOP before step 3.
=/+=/+
=/+=/+
=/+
FILE
pp
pp
pSTOP ERASE
 Loading...