Basic Operation
Basic Operation
5
1.
Connect the TV plug to your mains socket
(220 - 240V AV, 50Hz)
2.
Push in the On/Off button (labelled !) on the front
of the TV.
z If the red standby mode indicator on the front of the TV is
lit, press the TV I/1 button on the remote control to switch
on the set. Please be patient as the picture may take a
few moments to appear on the TV screen.
Switching on the TV
4
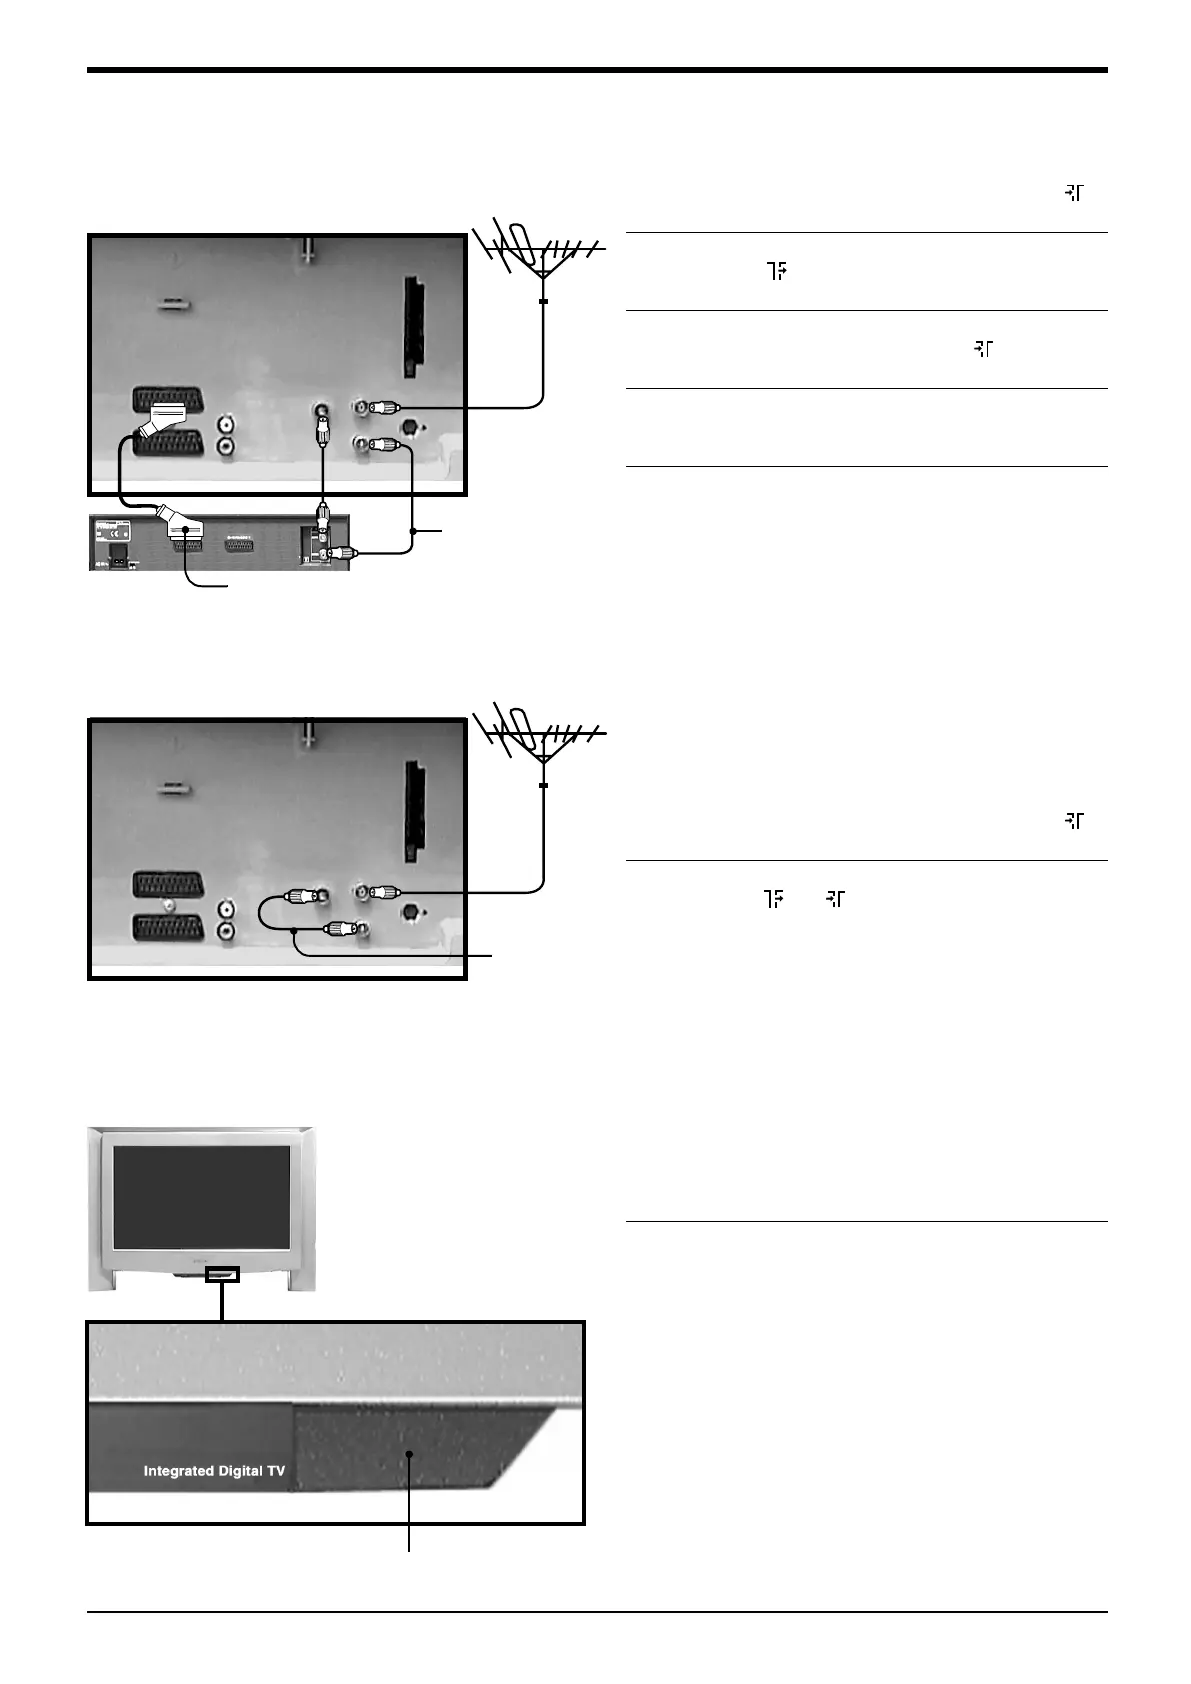
Connecting an aerial only
1.
Connect your aerial lead to the socket labelled 1
on the rear of the TV.
2.
Connect the supplied RF lead from the socket
labelled on the rear of the TV to the socket
labelled IN* on your VCR.
3.
Connect an RF lead from the socket labelled OUT*
on your VCR to the socket labelled 2 on the rear
of the TV.
4.
Connect a fully wired 21-pin scart lead from the
socket labelled i2/r on the rear of the TV to the
socket labelled TV* on your VCR**
5.
Insert a pre-recorded tape into the VCR and press
the ‘PLAY’ button. This enables the TV to locate
and store the video channel during the
‘Automatically tuning the TV’ procedure.
z *Socket names may vary depending on make and model
of VCR. Refer to your VCR instruction manual for details.
**If your VCR does not have a scart socket follow the
connecting instructions above ignoring the scart lead
connection.
1.
Connect your aerial lead to the socket labelled 1
on the rear of the TV.
2.
Connect the supplied RF lead from the sockets
labelled and 2 on the rear of the TV.
Connecting an aerial and VCR
3
Rear of TV.
Supplied RF lead
Scart lead
(not supplied)
Supplied
RF lead
Rear of TV.
On/Off button
2832DX50U.book Page 5 Monday, July 14, 2003 10:35 AM
 Loading...