[] Connect the power cord to a wall
outlet.
The demonstration appears in tile display.
When you press I/(_), the system turns on
and the demonstration automatically ends.
If tile plug does not fit the wall socket,
detach the supplied plug adaptor (only for
models equipped with an adaptor).
Inserting two R6 (size AA)
batteries into the remote
Attaching the speaker pads
Attach the supplied speaker pads to the bottom
of the speakers to stabilize the speakers and
prevent them from slipping.
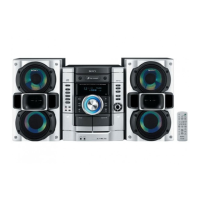
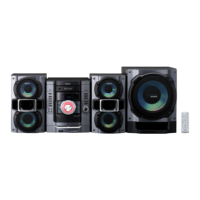
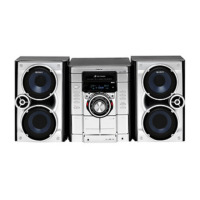
Front speaker (Left (4)/Right (4))
Sub wooler (4)*
Note
If }on do not use the remote for a long period of time,
remove Ihe batteries to avoid possible damage from
battery leakage and corrosion.
Tip
With normal use, the batteries should last for about six
months. When the remote no longer operates the
system, replace both batteries with new ones.
i i
i i
i i
i i
u
* MHC-GX555/RG575S/RG475S only
When carrying this system
Perform the t_lllowing procedure to protect
the CD mechanism. Use buttons on the unit
lk}rthe operation.
1 Press I/(3 to turn on the system, then
press CD to switch the function to CD,
2 Make sure that all discs are removed
from the system.
3 Hold down CD and then press I/(3 until
"STANDBY" appears.
Ariel" a lew seconds later, "STANDBY'
disappears and "LOCK" appears.
4 Unplug the power cord,
8 GB
 Loading...