Recording Audio Signals
40
Recording
Four channels (CH-1/CH-2/CH-3/CH-4) of audio
can be recorded (Linear PCM recording) in
synchronization with video recording.
You can use the built-in stereo microphones
(omni-directional electret condenser
microphones) or 2-channel external audio inputs
to the AUDIO IN connectors by switching with
the AUDIO IN switches.
Set the AUDIO IN switches, both CH-1 and
CH-2 (page 13), to INT.
1 Set the AUDIO IN switches CH-1 and
CH-2 to EXT.
2 Connect external audio sources to the
AUDIO IN connectors CH-1 and CH-2
(page 12).
3 Set the input (LINE/MIC/MIC+48V)
switches CH-1 and CH-2 (page 12) to
LINE (line level: +4 dBu).
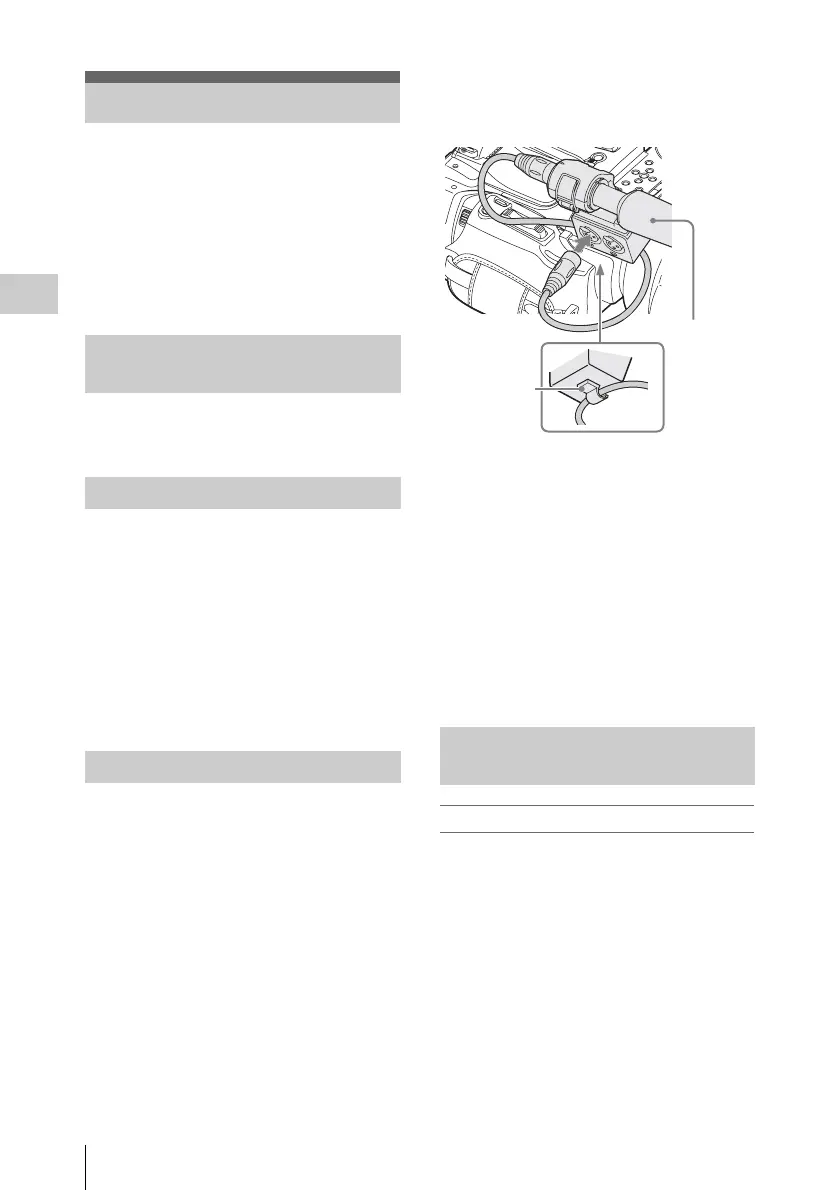
You can use an external microphone for
recording, such as the ECM-673 Electret
Condenser Microphone.
1 Lift up the handle of the external
microphone holder (page 12) and open
the cover.
2 Attach a microphone, then return the
external microphone holder cover to its
original position to secure it.
3 Connect the microphone cable to the
AUDIO IN CH-1/CH-2 connectors.
4 Set the corresponding AUDIO IN
switch (CH-1/CH-2) (page 13) to EXT.
5 Set the corresponding input (LINE/
MIC/MIC+48V) switch (CH-1/CH-2)
(page 12) according to the connected
microphone.
MIC: For a microphone that requires no
power supply
MIC +48V: For a microphone that requires
+48V power supply (such as the ECM-
673)
To adjust the levels automatically (AGC)
When the AUDIO SELECT switches CH-1 and
CH-2 (page 13) are set to AUTO, the audio
recording levels are automatically adjusted.
Recording Audio Signals
Using the Built-in Stereo
Microphones
Using External Inputs
Using an External Microphone
Adjusting the Audio Recording
Levels
External
microphone
to AUDIO IN
Cable clamp
 Loading...