Do you have a question about the Sony RM-LJ302 and is the answer not in the manual?
Guidelines for handling potential hazards and damage to the receiver.
Step-by-step guide on how to correctly insert batteries into the remote.
Information on battery life and when to replace them.
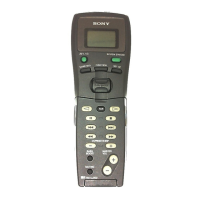
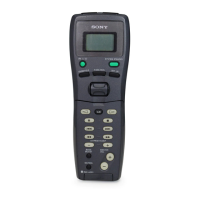
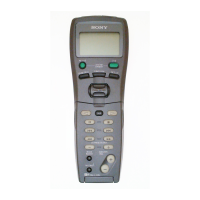
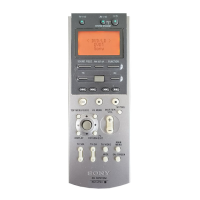
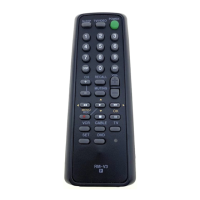
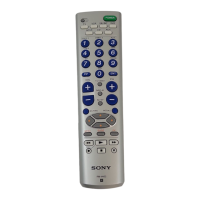
Detailed identification and description of all buttons and indicators on the remote.
Displays the list of components (functions) the remote can control.
Accesses the setup menu for configuring remote and component settings.
Buttons for controlling playback, recording, and navigation of media.
Displays the setup menu for VCR, DVD, or SAT tuner operations.
Details which remote buttons operate specific functions on various Sony components.
Lists operations available via the SUB button for different components.
Visual representation of the list hierarchy and access methods.
Steps to select a component from the function list for operation.
Assigns specific components to USER 1 and USER 2 for quick access.
Procedure for programming up to 8 IR codes into a macro list.
Initiates a programmed macro sequence for automated control.
Solutions for common problems encountered while using the remote control.
This document describes the Sony RM-LJ302 Remote Commander, a remote control designed to operate a home entertainment system, primarily a receiver, and other compatible components. It functions as a two-way remote system, meaning the component responds to signals from the remote by sending back additional signals, such as status information or text data, to the remote's display. This communication allows for interactive operation and ensures the remote's display reflects the current state of the controlled component.
The RM-LJ302 is a versatile remote control capable of managing various audio/video components. Its core functionality revolves around displaying and utilizing different lists to control components, sound fields, and system settings.
Component Control: The remote can control a wide range of components, including VCRs (VHS, Beta, 8mm), satellite tuners, DVD players, LD players, TVs, cable boxes, tuners, video CD players, CD players, MD decks, DAT decks, and tape decks (A and B). The specific buttons that operate each component are indicated by circles in a provided table.
Two-Way Remote System: The remote operates under a two-way system, where components send feedback signals (status, text data) back to the remote. This allows the remote's display to show the current status of the selected component, track numbers, disc memos, and other relevant information. For optimal performance in a multi-component setup, it is recommended to restrict two-way remote system operation to a single component, typically the receiver, by turning off the two-way system on other components.
Macro Play Function: The Macro Play function allows users to link several infrared (IR) codes into a single command sequence. The remote provides two macro lists (MACRO 1 and 2), each capable of storing up to 8 IR codes. This feature enables automated execution of multiple operations with a single button press, such as turning on several components and setting them to a specific input. Users can program the component category, maker, and specific IR codes for each step, and even introduce a delay (1 to 10 seconds) between IR code outputs.
Downloading Data from the Receiver: The remote can download various data from the receiver, enhancing its display capabilities. This includes index names of program sources, preset stations, CD memos, and information about the presence or absence of a CD in each slot of a compatible CD changer. This ensures the remote's display is always up-to-date with the system's configuration and content.
Setting Up the Remote: Before initial use, the remote needs to be customized to control the user's receiver. This involves turning on the receiver and pressing either SOUND FIELD, FUNCTION, or SUB on the remote. The remote will then communicate with the receiver, identify its model, and customize its operation lists accordingly.
Inserting Batteries: The remote requires three LR6 (size-AA) alkaline batteries, inserted with correct polarity. Batteries typically last about 3 months under normal conditions. When the remote stops operating the receiver, it's time to replace all batteries with new ones.
Display Window: The display window shows the current status of the selected component or a list of selectable items. It provides visual feedback for navigation and operation.
Easy Scroll Key: This key is central to navigating lists. Users move it up or down to select an item and then press it to confirm the selection.
AV I/O Switch: Turns on or off the components programmed to operate with the remote.
SYSTEM STANDBY Switch: Factory-set to turn off the receiver and other Sony audio/video components simultaneously ("ALL OFF"). Its function can be changed to turn on or off only the receiver.
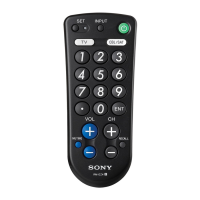
MASTER VOL +/- Buttons: Adjusts the volume level of all speakers simultaneously.
SLEEP Button: Activates the sleep function, allowing users to select a duration after which the receiver automatically turns off.
MUTING Button: Mutes the sound, with a corresponding indicator lighting up on the receiver.
SOUND FIELD Button: Displays the sound field list. Pressing it again reverts to component information.
FUNCTION Button: Displays the function (component) list. Pressing it again reverts to component information. The contents of this list can be customized.
SET UP Button: Displays the set up list. Pressing it again reverts to component information.
SUB Button: While operating a component, this button displays a list of operations whose corresponding buttons are not physically present on the remote. Users can then use the easy scroll key to select and enter the desired operation.
Tape/Disc Operation Buttons: Dedicated buttons for play, pause, stop, skip tracks, fast-forward, and rewind, with specific functions depending on the component (VCR, DVD, LD, CD, MD, DAT, tape decks).
CH/PRESET/D.SKIP +/- Buttons: Selects preset stations, channels, tracks, or discs.
LEVEL CENTER +/- and LEVEL REAR +/- Buttons: Adjusts the volume levels of the center and rear speakers, respectively.
EQ/TONE Button: Turns the equalizer or tone effect on or off.
TEST TONE Button: Outputs a test tone for speaker setup.
Cursor Buttons (+/+/+/-): Used for making specific settings after pressing the CURSOR MODE or SET UP button on the receiver. Also used for menu operations on VCR, DVD player, or SAT tuner.
D.TUNING ENTER Button: Enters Direct Tuning mode for tuners or confirms channel/disc/track selection for other components after numeric input.
SHIFT >10 -/-- Button: Selects memory pages for preset radio stations or inputs channel/disc/track numbers of eleven or higher.
Numeric Buttons (1 to 0): Inputs numeric values for channels, tracks, or other settings.
MENU Button: Displays VCR, DVD, or SAT menus on the TV screen for navigation and operations.
GUIDE Button: Displays the SAT guide for menu operations.
BASS BOOST Button: Increases the bass of the front speakers, with an indicator lighting up on the receiver.
Programming the Remote: The remote can be customized to match components connected to the receiver, including non-Sony components or Sony components not normally controllable by the remote. This involves selecting the component's category (e.g., VTR, LD) and manufacturer (e.g., Kenwood, Sony) from lists. Programming can be canceled at any time.
Auto Power Function: When enabled, the remote sends codes to appropriate Sony AV components upon selecting a video function, automatically turning them on and switching the TV to VIDEO 1 input mode. This feature is exclusive to Sony components.
Cleaning: The cabinet, panel, and controls should be cleaned with a soft cloth slightly moistened with a mild detergent solution. Abrasive pads, scouring powders, or solvents like alcohol or benzine should not be used.
Battery Replacement: When the remote no longer operates the receiver, all batteries should be replaced with new LR6 (size-AA) alkaline batteries.
Battery Care: To prevent damage from battery leakage and corrosion, batteries should be removed if the remote is not used for an extended period. The remote should not be left in extremely hot or humid places. Mixing new and old batteries, or alkaline and other kinds of batteries, is not recommended.
Remote Sensor Protection: The remote sensor of the receiver should not be exposed to direct sunlight or lighting apparatuses, as this may cause a malfunction.
Turning the Backlight On or Off: The backlight turns on each time a button is pressed. Users can turn off the backlight function to extend battery life.
Clearing Remote's Memory: All programming and downloaded data stored in the remote's memory can be cleared by following a specific procedure in the SET UP menu.
| power requirements | 3 V DC with three LR6 (size-AA) alkaline batteries |
|---|
| dimensions | 125 × 43 × 33 mm |
|---|---|
| mass | 130 g |