

R
rogerscassieSep 23, 2025
Why can't I use an AV mouse to control my Sony DVD VCR Combo?
- EEmily FlynnSep 23, 2025
The unit is not compatible with satellite TV receiver AV mouse, etc.
Why can't I use an AV mouse to control my Sony DVD VCR Combo?
The unit is not compatible with satellite TV receiver AV mouse, etc.
How to fix a Sony DVD VCR Combo remote that is not working?
If the remote isn't working, ensure you're pointing it at the remote sensor on the DVD-VCR. Replace all the batteries with new ones if they're weak. Also, make sure the TV / DVD·VIDEO switch is set correctly, and select the correct mode (DVD or VIDEO) using the SELECT DVD/VIDEO button.
Why is the timer not working on my Sony DVD VCR Combo?
If the timer isn't working, ensure the clock is set, a tape has been inserted, and the safety tab hasn't been removed. Also, make sure the tape isn't at its end, a program has been set for timer recording, your timer settings are past the current time, and the cable box or satellite receiver is turned on. Note that the clock stops if the DVD-VCR is disconnected from the wall outlet for more than one minute.
Why is there no picture on my Sony DVD VCR Combo?
If you're experiencing a blank screen or noisy picture, the connecting cords might be damaged. Try reconnecting them securely. Also, ensure the correct input selector is chosen on your TV, the disc isn't dirty or flawed, and that 'Progressive' is set to 'Off'. Check the settings and connections to your TV as well.
Why does playback stop automatically on my Sony DVD VCR Combo?
If playback stops automatically, it may be due to the disc having an auto pause signal. The player will stop playback at these signals.
Why can't I insert a tape into my Sony DVD VCR Combo?
If a tape cannot be inserted, check that a tape is not already in the tape compartment.
Why doesn't the tracking meter appear on the screen of my Sony DVD VCR Combo?
If the tracking meter does not appear on the screen, it is because the recording condition of the tape is very poor, and tracking cannot be adjusted.
Why is the title of the MP3 audio album not correctly displayed on my Sony DVD VCR Combo?
If the title of the MP3 audio album/ track or JPEG image album/file is not correctly displayed, it is because the player can only display numbers and alphabet.
Why can't I use certain functions on my Sony DVD VCR Combo?
If you cannot perform some functions, it may be because depending on the disc, you may not be able to do some operations.
How to control other TVs with my Sony DVD VCR Combo?
If you cannot control other TVs, set your TV’s code number.
Instructions to prevent fire or electric shock by avoiding exposure to rain/moisture and opening the cabinet.
Warning about increased eye hazard from optical instruments due to the laser beam.
Covers safety, power sources, placement, and operational advice for the unit.
Instructions for cleaning the unit, discs, and video heads.
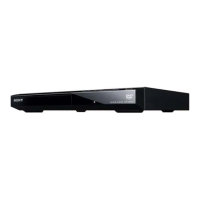
Lists the various disc formats (DVD VIDEO, CD, etc.) the player supports.
Details compatibility with DVD+RW, DVD-RW, DVD+R, DVD-R, and CD-R/RW discs.
Explains the player's region code system for DVD VIDEO playback.
Lists types of discs that are not compatible with the player.
Information on potential compatibility issues with recordable discs.
Steps to program the remote to control non-Sony TVs.
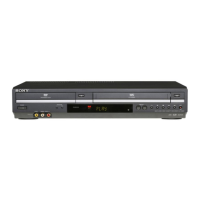
Explains stop, pause, resume, skip, replay, and track navigation functions.
Details on locate, slow motion, instant replay, and instant advance functions.
How to play back scenes quickly or slowly while hearing sound.
Selecting and playing specific titles, tracks, or chapters.
Starting playback from a specific time code on the disc.
How to select tape speed (SP/EP) and start/stop recording.
How to configure recording parameters like source, time, date, and speed.
Options for daily, weekly, or specific date recordings.
Steps to select, change, or cancel timer recordings.
How the system prioritizes programs when timer settings overlap.
Explains options like Dolby Digital, DTS, and Audio DRC.
Options for TV Type (aspect ratio) and Y/Pb/Pr Black Level.
How to disable the progressive scan setting.
Steps to set up a password and select a rating level for playback control.
Solutions for no picture, picture noise, aspect ratio, and progressive scan issues.
Solutions for no sound, noisy sound, and low volume issues.
| power requirements | AC120V, 60 Hz |
|---|---|
| power consumption | 20 Watts |
| coaxial audio digital output(s) | 1 (Rear) |
|---|---|
| RCA audio input(s) | 2 (1 Front, 1 Rear) |
| RCA audio output(s) | 1 (Rear) |
| composite video input(s) | 2 (1 Front, 1 Rear) |
| component video (Y/Pb/Pr) output(s) | 1 (Rear) |
| weight | 7.94 lbs (3.6KG) |
|---|---|
| measurements | 16.9" x 3.4" x 11.3" (430 x 85 x 287 mm) |