8
Using On-Screen Menus
You can make various settings and adjustments of the
monitor using the on-screen menus.
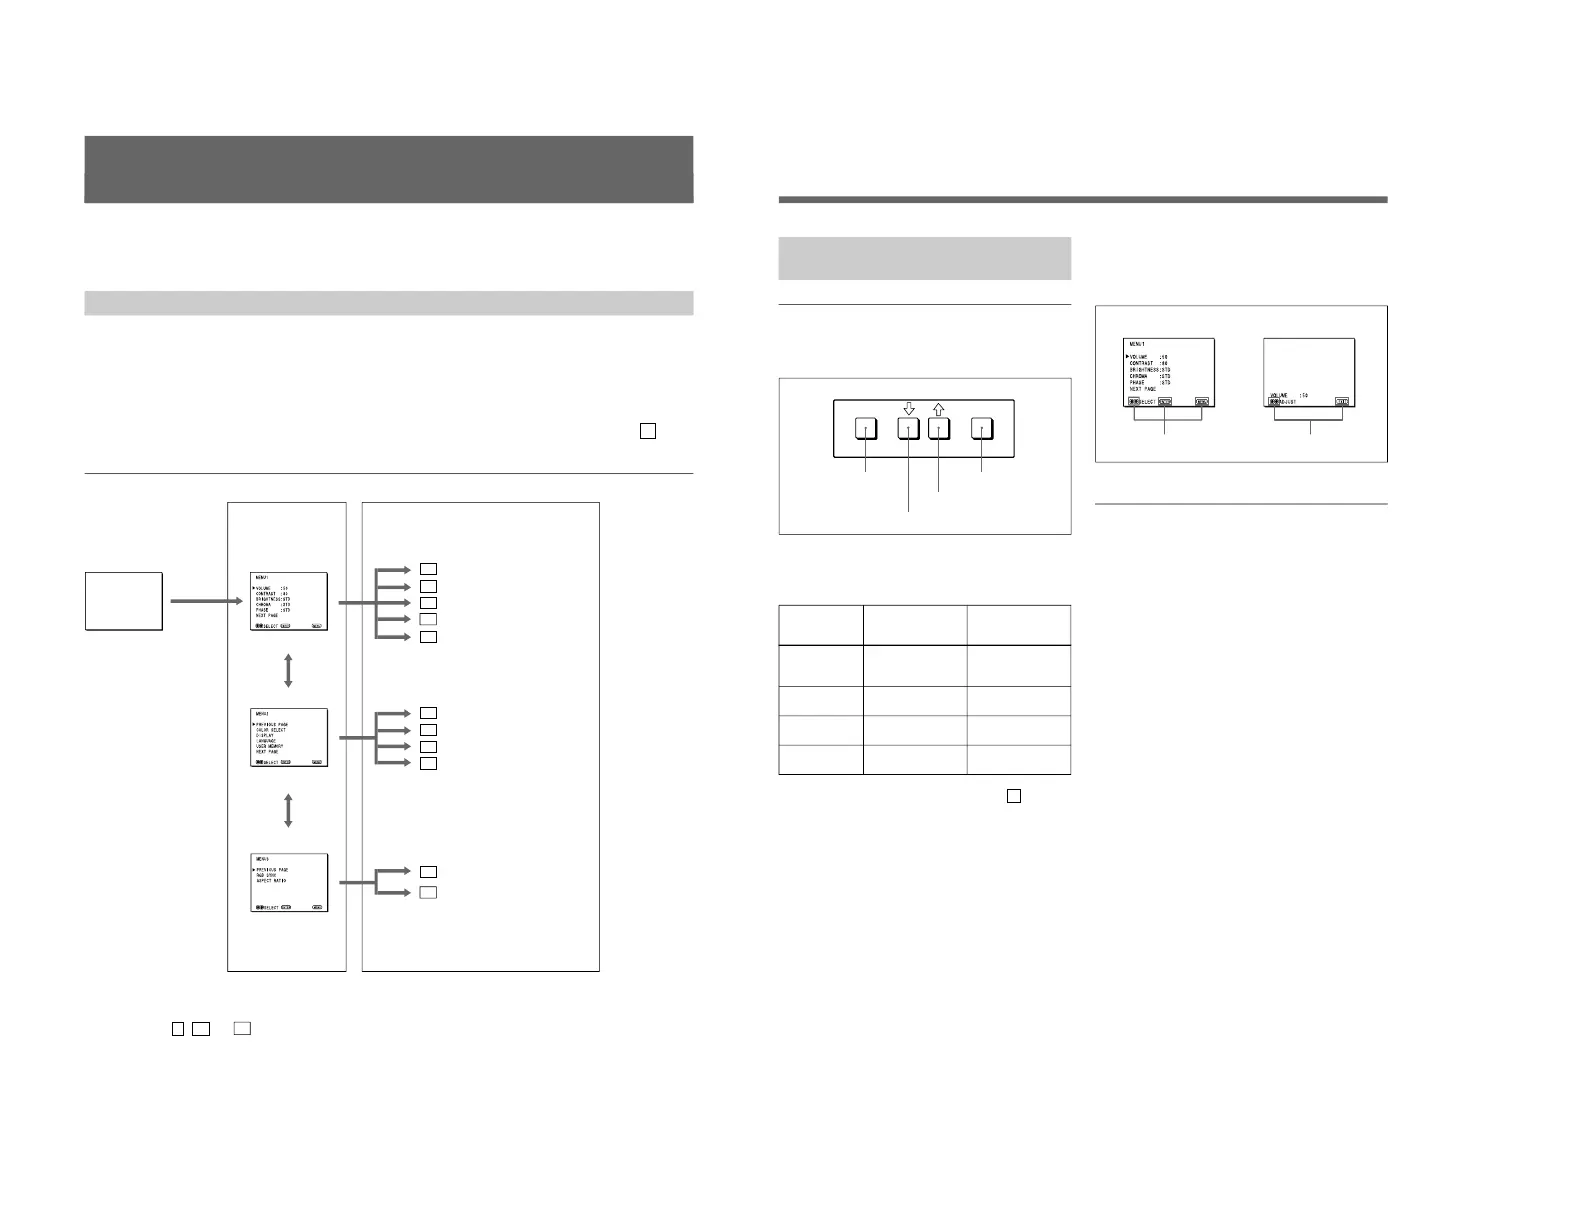
On-Screen Menu Configuration
Regular screen
1 MENU 1
On-screen menu tree-chart
2 MENU 2
3 MENU 3
a)
Item selection menus Adjustment and setting menus
a) These menus ( 3 , 3a and 3b ) are provided with PVM-14N6A/14N6E/14N6U /20N6A/20N6E/20N6U only.
Adjustment and setting menus
You can make desired adjustment or setting on
corresponding menu. The settings and adjustments
remain unchanged until next adjustment even if you
turn off the power.
To reset the settings and adjustments to the factory-
settings, select “ FACTORY PRESET” from 2d USER
MEMORY menu.
The on-screen menu is composed of the following two
menu types.
Item selection menu
You can select an adjustment and setting item such as
sound volume, contrast, brightness, color intensity,
color system and menu language by using the >,. and
ENTER buttons.
1a VOLUME menu
1b CONTRAST menu
1c BRIGHTNESS menu
1d CHROMA menu
1e PHASE menu
2a COLOR SELECT menu
2b DISPLAY menu
2c LANGUAGE menu
2d USER MEMORY menu
3a RGB SYNC menu
a)
3b ASPECT RATIO menu
a)
..........................................................................................................................................................................................................
Operation through On-Screen
Menus
Menu operation buttons
There are four menu operation buttons on the front
panel of the monitor.
Button functions depend on the displayed menu. The
following table shows the button functions on the item
selection menus and adjustment and setting menus.
Button
1 MENU/EXIT
2 .
3 >
4 ENTER
a) You can use the ENTER button only on the 2d USER
MEMORY menu of the adjustment and setting menus.
1) 3 MENU 3 is provided with PVM-14N6A/14N6E/14N6U/20N6A/20N6E/20N6U only.
Operating procedures
To display the menu, follow this procedure.
1
Press the MENU/EXIT (1) button.
2 MENU 1 appears.
To select items other than ones not displayed on
MENU 1
Select 2 MENU 2 or 3 MENU 3
1)
.
For details of how to select, see the “To change the item
selection menus” described later.
2
Move the cursor to the desired item by pressing the
. or > (2, 3) button.
3
Press the ENTER (4) button.
The adjustment and setting menu selected in step 2
appears.
For detailed information of menus, see “Functions of On-
Screen Menus” on page 10.
Usable buttons depend on the displayed menu. Buttons
that can be used on the menu are displayed at the
bottom line of the screen. You can perform menu
operation using displayed buttons.
Display of the usable menu operation buttons
Menu
Usable buttons
Usable buttons
Function on the
item selection
menus
To return to the
regular screen.
To move the cursor
downward.
To move the cursor
upward.
To decide a
selected item.
Function on the
adjustment and
setting menus
To return to the
item selection
menu.
To decrease value/
select item.
To increase value/
select item.
To decide a
selected item
a)
.
1 MENU/EXIT button
3 > button
2 . button
4 ENTER button
..........................................................................................................................................................................................................
 Loading...