21GB
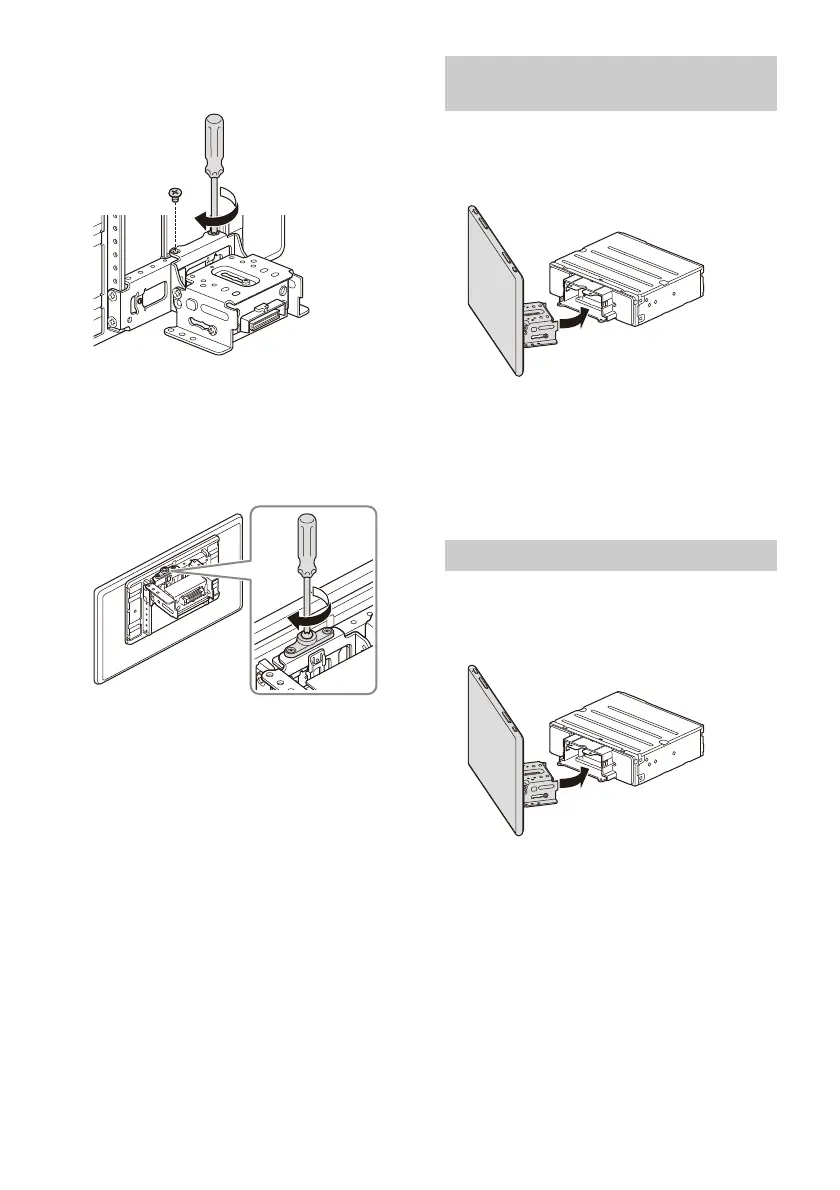
3 At the desired positon, tighten the 2 screws
on the top side firmly to secure the
connector bracket.
Tighten the screws firmly.
When you tighten a screw, be careful not to
apply too much torque as doing so may damage
the screw (the torque value should be from
1.5 N•m to 2.0 N•m).
4 Turn the unit over, tighten the 1 screw firmly
to secure the connector bracket.
Note
Be sure to tighten the screws on the top side first, then
tighten the screw on the bottom side.
Be careful not to pinch your fingers or scratch the
center cluster panel of your car when attaching the
display to the unit.
1 Attach the display to the unit temporarily.
2 Confirm that the display does not block the
driver’s view or interfere with normal
driving operations.
If further adjustment of the mounting position
(depth, height, angle, width) is necessary,
remove the display from the unit, then adjust it
again accordingly.
Be careful not to pinch your fingers or scratch the
center cluster panel of your car when attaching the
display to the unit.
1 Attach the display to the unit.
Make sure that the connector brackets of the
display is fully inserted to the unit.
Making sure the mounting positions
of the display
Attaching the display to the unit