22GB
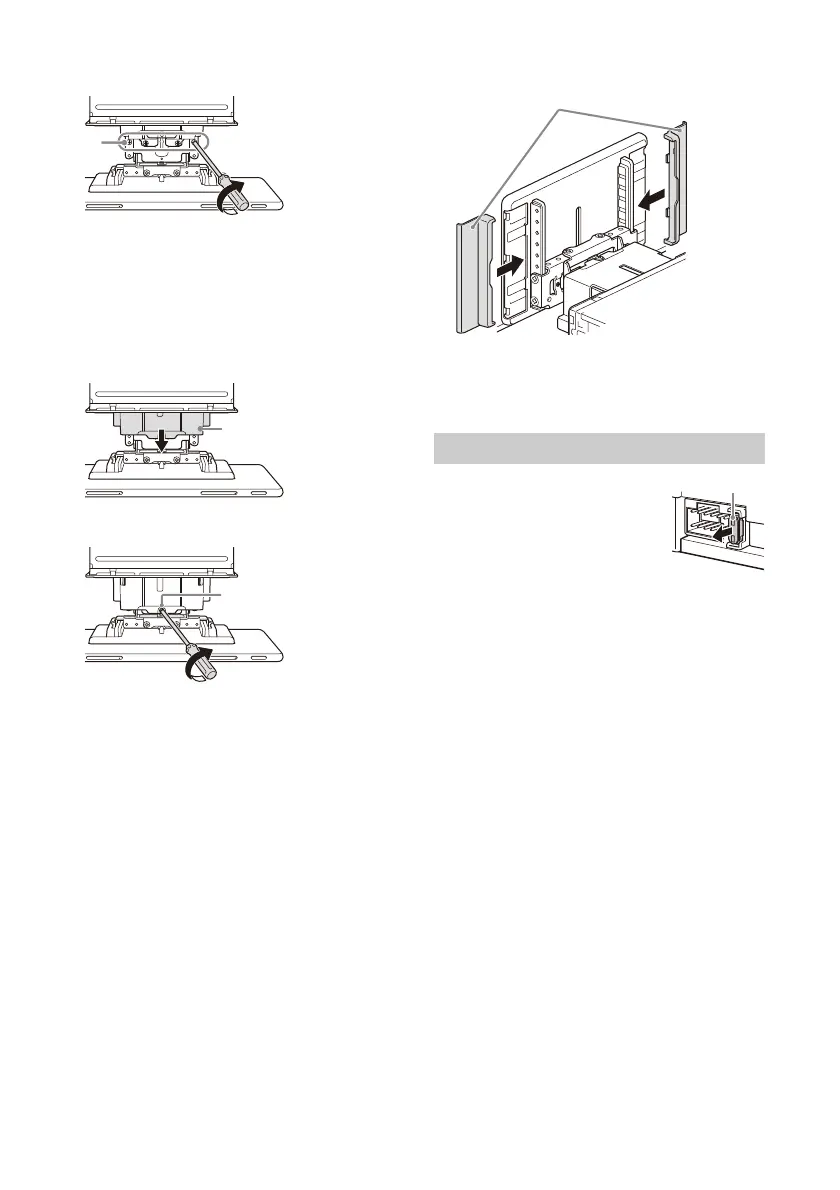
2 Tighten 4 screws (on top) to secure the
connector bracket to the unit.
Tighten the screws firmly.
When you tighten a screw, be careful not to
apply too much torque as doing so may damage
the screw (the torque value should be from
1.5 N•m to 2.0 N•m).
3 Slide the joint cover out to protect the
mounting base of the display, then tighten
the fixing screw to secure the cover.
Tighten the screw firmly.
When you tighten a screw, be careful not to
apply too much torque as doing so may damage
the screw (the torque value should be from
1.5 N•m to 2.0 N•m).
4 Attach the rear panel covers along the
guides for protection.
Notes
• Be sure to use the specified screws.
• If the display appears to rattle, tighten the screws
periodically.
When replacing the fuse, be sure to
use one matching the amperage
rating stated on the original fuse.
If the fuse blows, check the power
connection and replace the fuse.
If the fuse blows again after
replacement, there may be an
internal malfunction. In such a case, consult your
nearest Sony dealer.
Fuse replacement