EasyManua.ls Logo

SoonMark M8 - User Manual

SoonMark M8
16 pages
Print Icon
To Next Page IconTo Next Page
Loading...
User manual of
Direct Thermal
Barcode Printer
Model: M8
Brand: SoonMark
Paper size: 100mm x 150mm
Question and Answer IconNeed help?

Do you have a question about the SoonMark M8 and is the answer not in the manual?

Summary

Equipment Checklist

Printer Components and Accessories

Lists included printer parts and accessories such as adapters, cables, operation manual, and driver disk.

Loading the Label Roll

Instructions on how to insert the label roll using the roll mount and core adapters for secure printing.

Printer Parts Overview

Front Surface Identification

Identifies key features on the printer's front surface, including the clear window, open button, and feed button.

Back Surface Ports and Controls

Details the ports and controls on the printer's back surface, such as SD card slot, USB port, and power switch.

Initial Printer Setup

Connecting Power and PC

Guides on connecting the printer to a PC via USB and to a power source using the power cord.

Driver Software Management

Downloading and Extracting Driver

Instructions for downloading the printer driver zip file from the website and extracting its contents.

Printer Driver Installation Process

Initiating Driver Installation

Steps to start the driver installation by double-clicking the driver file and accepting the license agreement.

Completing Unpacking and Setup

Instructions for selecting the installation directory and completing the driver unpacking phase.

Running the Driver Wizard

Guidance on clicking the shield icon and proceeding with the Seagull Driver Wizard for installation.

Configuring Printer Name

Steps to specify the printer name, like 'SMK-M8', and confirm settings before installation.

Finalizing Installation

Completing the driver installation process and closing the completion wizard.

Size Setting Configuration

Accessing Printing Preferences

Navigating Windows settings to Printer & Scanners, selecting the printer, and accessing its printing preferences.

Setting Label Size

Selecting the '4 x 6' paper size for the A6 sticker and applying the changes in printing preferences.

Printing the eAWB

Selecting Printer and Scale

Choosing the 'SMK-M8' printer and setting the scale to 'Fit to Paper' for printing.

Overview

This document serves as the user manual for the SoonMark M8 Direct Thermal Barcode Printer, designed for printing labels of 100mm x 150mm. The manual provides comprehensive instructions for setting up, installing drivers, configuring settings, and ultimately printing eAWBs (electronic Air Waybills).

Function Description

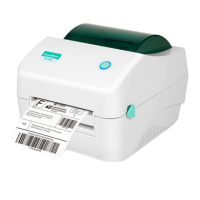
The SoonMark M8 is a direct thermal barcode printer, meaning it uses heat to produce images on thermal paper, eliminating the need for ink or toner. Its primary function is to print barcode labels, specifically designed for eAWBs with a paper size of 100mm x 150mm. This makes it suitable for logistics, shipping, and other applications requiring efficient and clear label printing. The device is designed for ease of use, with a straightforward installation process and intuitive controls.

Usage Features

The printer offers several features that enhance its usability and efficiency:

  • Equipment Checklist and Assembly: The manual begins with an equipment checklist, ensuring all necessary components are present for setup. These include the adapter + power jack adapter, USB printer cable, operation manual, driver disk, and power cord. The assembly process is detailed, specifically for inserting the label roll using the 'Roll Mount'. The 'Roll Mount' consists of a label spindle and core adapters. The core adapters are placed on both sides of the label roll to secure it during printing, ensuring stable and accurate label feeding.

  • Printer Parts Overview: A clear overview of the printer's front and back surfaces is provided, identifying key components and their functions:

    • Front Surface:
      • Clear Window: This allows users to view the label roll inside the printer, making it easy to monitor label consumption and anticipate when a new roll is needed.
      • Feed Button: This button is crucial for the calibration process, ensuring the printer accurately detects and feeds labels.
      • Open Button for the Top Cover: This button allows access to the internal components, primarily for loading label rolls and performing maintenance.
    • Back Surface:
      • SD Card Slot: While not explicitly detailed in its function for printing, this slot suggests potential for data storage or firmware updates.
      • USB Printer Port: This is the primary connection point for linking the printer to a PC or laptop, enabling data transfer for printing.
      • Power Jack Adapter Slot: This is where the power jack adapter is connected to supply power to the printer.
      • Power Switch (I - On, O - Off): A simple toggle switch to power the device on or off.
  • Printer Setting and Connectivity: The setup process is divided into two main steps:

    • Step 1 (Power Connection): Users are instructed to connect the USB cable to their PC/laptop and plug the power cord into a socket. This establishes the initial power supply and data link.
    • Step 2 (Printer Connection and Power On): The USB printer cable and power jack adapter are then connected to the printer itself. Once connected, turning on the power switch will result in a single beep, indicating that the printer has successfully powered on and is ready for further configuration.
  • Driver Download and Installation: A critical aspect of using the printer is installing the correct drivers. The manual outlines a three-step process:

    • Step 1 (Download Driver): Users are directed to a specific URL (www.skynet.com.my/labelprinter) to download the printer driver. The manual highlights where to find the "Download Driver" link.
    • Step 2 (Save Driver File): The downloaded driver is a zip file, which users are advised to save in any folder on their PC/laptop.
    • Step 3 (Extract Driver File): To prepare the driver for installation, users must right-click the zip file and select "Extract Here" to unzip its contents.
    • Installation Steps:
      • Step 1 (Initiate Installation): After extraction, users double-click the "Driver (for Win7 Win8 Win10)" file to start the installation.
      • Step 2 (License Agreement): Users must accept the terms of the license agreement by ticking the appropriate box and clicking "Next."
      • Step 3 (Installation Directory): The software will unpack to a default directory, and users click "Next" to proceed. After unpacking, users click "Finish."
      • Step 4 (Shield Icon Notification): A "Shield icon" will blink on the PC/laptop taskbar, indicating that further action is required to continue the installation. Clicking this icon brings up the "Seagull Driver Wizard."
      • Step 5 (Driver Wizard - Install Printer Drivers): Within the wizard, users select "Install printer drivers" and click "Next." The printer model (4BARCODE 4B-2054D) and port (USB002) are automatically detected. Users can then rename the printer for easier reference, with the suggested name being "SMK-M8" (SMK for SoonMark, M8 for the model name). After renaming, users click "Next."
      • Step 6 (Completion): Finally, users click "Finish" to complete the driver installation. A confirmation message indicates successful installation, and users click "Close."
  • Size Setting for Labels: Configuring the correct label size is essential for accurate printing. This process involves:

    • Step 1 (Accessing Devices): Users navigate to Windows "Settings" and then click on "Devices."
    • Step 2 (Printer & Scanners): Within "Devices," users select "Printer & Scanners," locate the "SMK-M8" printer, and click "Manage."
    • Step 3 (Printing Preferences): In the printer management window, users click on "Printing preferences."
    • Step 4 (Select Label Size): Under the "Stock" tab, users select "4 x 6 (4.00 in x 6.00 in)" for A6 stickers. After selecting, they click "Apply" and then "OK" to save the changes.
  • Printing the eAWB: The final step is to print the eAWB:

    • Step 1 (Select Printer): Once all settings are configured, users select the "SMK-M8" printer from the print destination options.
    • Step 2 (Fit to Paper and Print): Users ensure that "Fit to Paper" is selected for the "Scale" option in the print dialog, and then click "Print." This ensures the eAWB content is correctly scaled to the 100mm x 150mm label size.

Maintenance Features

While the manual does not explicitly detail a dedicated "maintenance" section, some aspects imply basic maintenance practices:

  • Clear Window for Label Monitoring: The clear window on the front surface allows users to visually inspect the label roll. This helps in proactively replacing rolls before they run out, preventing interruptions during printing. It also allows for quick checks for any label jams or misfeeds.
  • Open Button for Top Cover: The ability to open the top cover is crucial for loading new label rolls. This access also facilitates basic troubleshooting, such as clearing paper jams or inspecting the print head for any debris, although specific cleaning instructions are not provided in this excerpt.
  • Driver Updates: The installation process for drivers suggests that future driver updates would follow a similar procedure, ensuring the printer remains compatible with operating system changes and benefits from performance improvements or bug fixes. While not a daily maintenance task, keeping drivers updated is a form of software maintenance.
  • Calibration Process: The "Feed Button" is used for calibration. Regular calibration, especially after changing label rolls or if print quality issues arise, can be considered a maintenance step to ensure optimal label feeding and print accuracy.

In summary, the SoonMark M8 Direct Thermal Barcode Printer is a user-friendly device designed for efficient label printing, particularly for eAWBs. Its features focus on straightforward setup, clear identification of parts, guided driver installation, precise label size configuration, and a simple printing process. While extensive maintenance details are not provided, the design allows for basic user-level intervention for label loading and visual inspection.

SoonMark M8 Specifications

General IconGeneral
BrandSoonMark
ModelM8
InterfaceUSB
Weight150g
Supported Barcode TypesUPC-A, UPC-E, EAN-8, EAN-13, Code 39, Code 128