13
ASSEMBLY
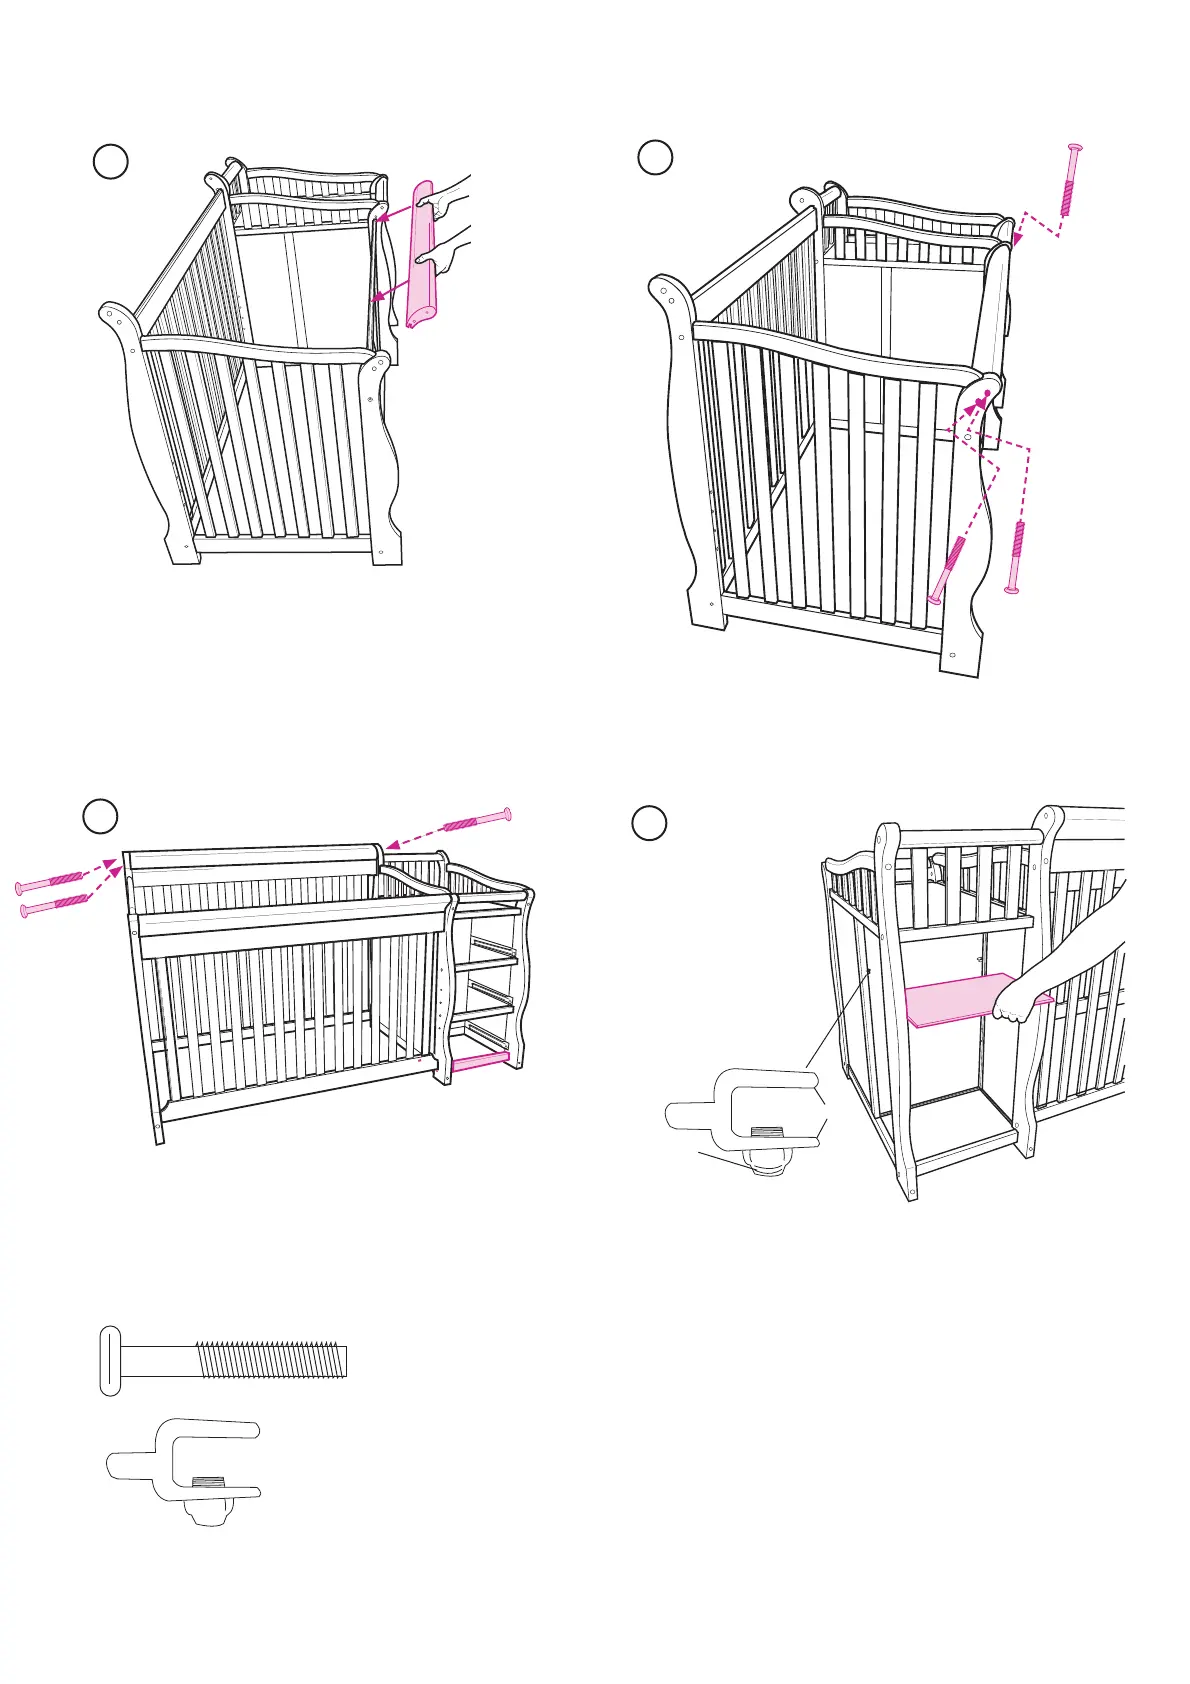
12. Insert Shelf Support Brackets (K) into holes in
back of organizer. Slide shelves (J) into “bite” of
bracket. When in place, tighten retainer screws
on brackets. Figure 12.
NOTE: Retainer screws MUST be tightened to
keep shelves from moving.
Add changing pad to top of organizer.
(J)
(K)
Bite
Retainer Screws
(D1) (x6)
11. Secure Back Contoured Top (E1) to top of
Back Side Rail (C1) with two (2) Bolts (D1) and
one (1) Bolt (D1). Figure 11.
Once complete, insert three (3) drawers into
changing table.
(C- 4)
9. Insert groove on bottom of Front
Contoured Top (E1) to top of Front Side Rail
(C1). Figure 9.
NOTE: Loosen bolts on Left Side Rail (A1) to fit
Front Contoured Top (E1). Retighten once in
place.
(E1)
9
(C1)
(A1)
10. Secure Front Contoured Top (E1) to top of
Front Side Rail (C1) with two (2) Bolts (D1) and one
(1) Bolt (D1). Figure 10.
(E1)
(D1)
(D1)
(C1)
10
(D1)
11
12
(D1)
(D1)
(D1)
(K) (x8)
 Loading...