page 8
SORELLE
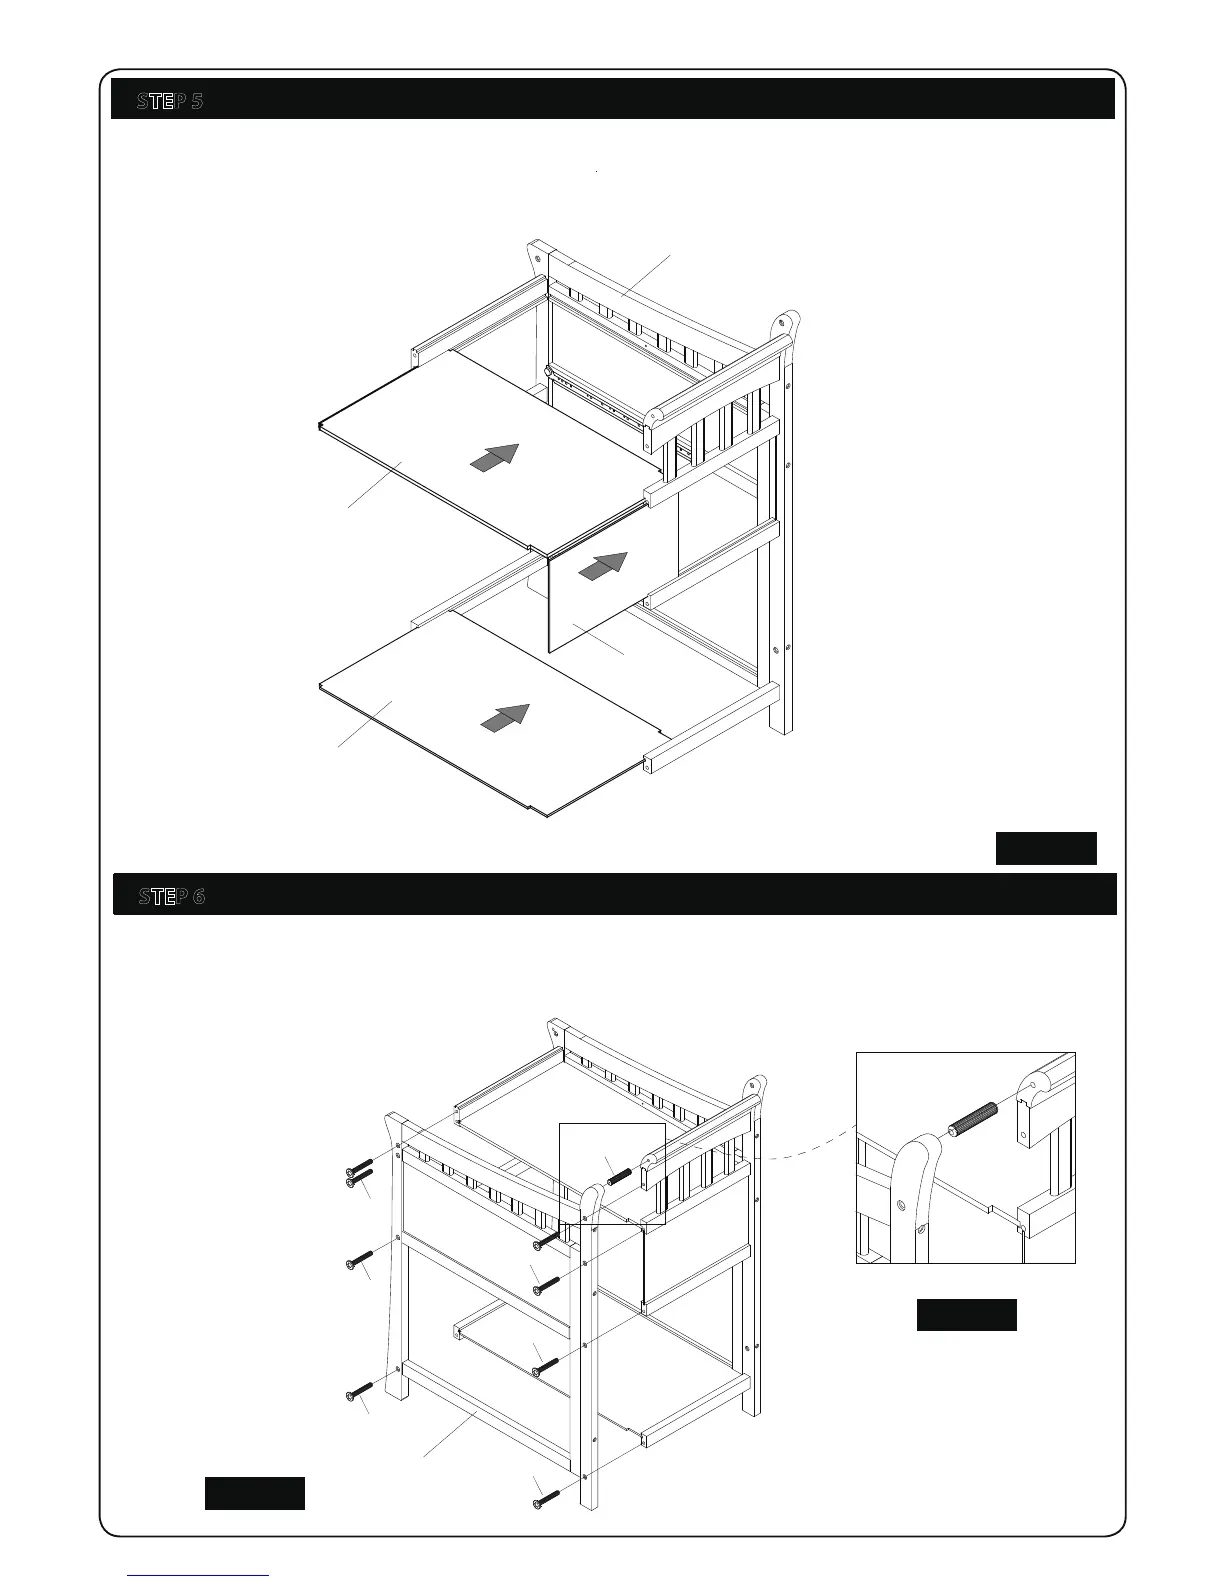
STEP 5 CHANGER ASSEMBLY (PART 2)
STEP 6 CHANGER ASSEMBLY (PART 3)
Figure 5 :
Figure 6B:
Figure 6A:
A
A
B.
.
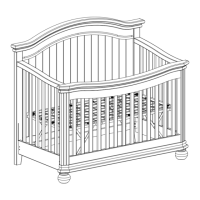
Slide Top Shelf (O1) and Bottom Shelf (O2) veneered side up horizontally into the grooves.1
Slide Back Middle Shelf (P) veneered side facing outwards vertically into the grooves. Figure 5.
Top Shelf (O1)
Insert one 1 x wooden dowel (f) to the top hole
of the the Decorative Support Bar (J). Figure 6A.
B Insert eight 8 x bolt (c) into remaining exposed
holes and fasten to connect Right Panel (E).
Figure 6B.
Bottom Shelf (O2)
Back Middle Shelf (P)
Middle Panel (D)
Right Panel (E)
c
c
c
c
c
c
f
f