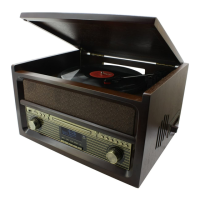
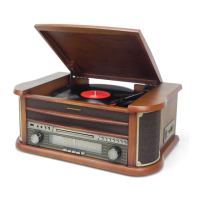
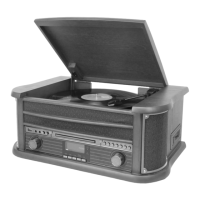
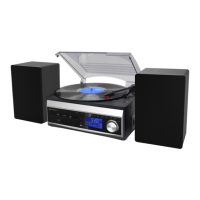
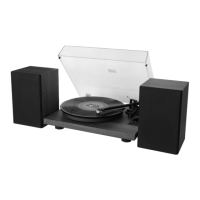
This document outlines the operation, maintenance, and safety guidelines for a versatile audio system. The device integrates multiple playback options, including a phonograph, CD player, cassette player, USB playback, and radio (DAB/FM), along with Bluetooth connectivity.
Function Description
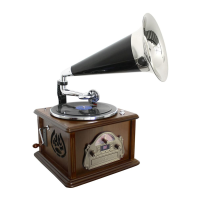
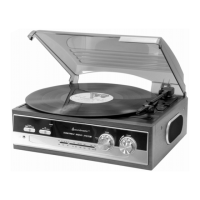
The core functionality of this system revolves around its ability to play various audio formats. The phonograph supports 33, 45, and 78 rpm records, featuring a belt-drive turntable. The CD player is compatible with standard CDs, CD-R, CD-RW, and MP3 discs. For cassette tapes, it accommodates C60-C90 types, with a warning against C120 cassettes. USB connectivity allows for MP3 playback and recording from various sources. The radio function includes both FM and DAB (Digital Audio Broadcasting) modes, offering a wide range of stations. Bluetooth functionality enables wireless audio streaming from compatible portable devices.
Beyond playback, the device also offers recording capabilities. Users can record from the radio (FM), CD, MP3 discs, cassette tapes, phonograph, and Bluetooth sources directly to a USB disk. This allows for easy digitization of analog media or capture of radio broadcasts.
The system is designed for ease of use, featuring a clear LCD display for navigation and status updates. A remote control is included, mirroring most of the front panel controls for convenient operation from a distance.
Usage Features
Power On/Off: To power on the system, first press the AC MAIN POWER button located on the back, then press the POWER button on the front panel for one second. To turn off, press and hold the front POWER button for three seconds, or press the AC MAIN POWER button on the back directly. The unit will automatically power off if left idle after stopping playback.
Volume Control: Adjust the listening level using the VOLUME control.
Function Selection: Use the FUNCTION buttons to switch between different modes such as USB, CD, TAPE, PHONO, FM, DAB, and BLUETOOTH.
USB Operation:
- Enter USB mode via the FUNCTION button.
- Insert a USB device into the USB socket. The system will automatically begin playing the first song.
- An MP3 icon will appear on the display when MP3 files are detected.
- Playback controls (PLAY/PAUSE, DN/F.R, UP/F.F, STOP) function similarly to CD mode.
CD/MP3 Playback:
- Press the FUNCTION button to enter CD mode.
- Open the CD drawer using the OP/CL button.
- Place a disc (MP3 compatible) with the label side facing up.
- Close the drawer with the OP/CL button. The player will read the disc and begin playback.
- An MP3 icon indicates MP3 file detection.
- Track Skip and High-Speed Search: During playback, repeatedly press SKIP+ (Fast Forward) or SKIP- (Fast Reverse) to skip tracks. Hold these buttons for high-speed search within a track.
- Repeat/Random Function: In CD/MP3 mode, press the PLAY.MODE button (or P.MODE MENU on the remote) to cycle through repeat options: repeat current track, repeat tracks in the current folder, repeat all tracks, or random playback.
- Memory Function (Program Play): In CD stop mode, press PLAY.MODE (or PROGRAM on remote) to enter program mode. Select desired tracks using UP/F.F or DN/F.R and confirm with PLAY.MODE or PROGRAM. Up to 99 MP3 tracks or 20 CD tracks can be programmed. Press PLAY/PAUSE to play the programmed sequence. Press STOP twice to exit program mode and clear the memory.
Bluetooth Operation:
- Turn on the unit and select BLUETOOTH mode using the FUNCTION button.
- On your portable device (smartphone, tablet, etc.), select the Bluetooth ID "DBT" and confirm the connection.
- Music can then be streamed from your mobile device, with all playback operations controlled via the mobile device.
Radio Operation (FM/DAB):
- Press the FUNCTION button to enter FM or DAB mode.
- FM: Connect the FM antenna. Press SCAN for auto-search, or rotate TUNING/ENTER to manually tune. The "stereo" indicator appears for FM stereo stations; weaker signals may switch to mono. TUNING/ENTER can toggle between stereo and mono. INFO button displays program type, number, audio, time, and date. MENU button allows setting scan options (all stations or strong stations only).
- DAB: Connect the DAB antenna. The unit will automatically scan for DAB stations. Rotate TUNING/ENTER to manually select DAB stations and confirm with TUNING/ENTER. The "stereo" indicator appears for DAB stereo stations. INFO button displays program type, number, frequency range, signal strength, time, and date.
- Memory Function (Presets): In DAB/FM mode, tune to a desired station. Press and hold PRESET for two seconds. "Preset Store 1: (Empty)" will appear. Rotate TUNING/ENTER to select a preset number and confirm to store the station. Up to 10 DAB and 10 FM stations can be programmed. Press PRESET once to play stored tracks, then rotate TUNER/ENTER or use SKIP+/- to select a preset.
Cassette Operation:
- Press the POWER button to turn on the system.
- Press the FUNCTION button to enter TAPE mode.
- Insert a cassette into the slot on the right side, with the desired side facing up and the open end to the right. Playback begins automatically.
- Adjust volume with the VOLUME control.
- To fast forward, depress the EJ/F.F (Eject/Fast Forward) button halfway. Release to resume normal playback.
- The player stops automatically at the end of the tape. Depress EJ/F.F completely to eject the cassette. EJ/F.F can also be used to stop playback and eject the cassette at any time.
Phonograph Operation:
- Press the POWER button and set volume to a low level.
- Press the PHONO button to enter PHONO mode.
- Remove the stylus cover and release the tone arm lock.
- Set the speed selector to 33, 45, or 78 rpm. Use the 45 rpm adapter for 'singles'.
- Place the record on the centre spindle.
- Raise the cue lever to lift the tone arm. Move the tone arm to the record's edge. The turntable starts automatically. Gently lower the tone arm with the cue lever.
- Adjust volume with the VOLUME control.
- The tone arm automatically returns to its rest at the end of the record, and the player stops.
- Important: Do not manually turn or stop the turntable. Secure the tone arm clamp to prevent damage when moving or jarring the turntable.
- Transit Screw: Before playing, turn the silver transit screw (located upper right of the turntable platform) clockwise (screw going down) completely using a screwdriver. For transportation, turn the screw counter-clockwise.
- Turntable Auto-Return Adjustment: If the turntable stops early or doesn't auto-return, use a screwdriver to turn the screw inside the "NO OPEN" PVC plate hole (at the back) about 45 degrees clockwise. Repeat if necessary. If the turntable doesn't stop and keeps turning, turn the screw about 45 degrees counter-clockwise.
USB Recording:
- Plug a USB disk into the USB socket.
- Radio Recording: In FM mode, press RECORD once. "usb" will flash after 5 seconds, indicating recording has started. Press STOP to end. During recording, PLAY/PAUSE can pause/resume recording (toggling "usb" flash).
- CD Recording: In CD playback mode, press RECORD once. "REC-1" appears. Press UP/F.F (SKIP+) once to record the whole file ("REC-F").
- MP3 Disc Recording: In MP3 playback mode, press RECORD once ("REC-1"), then twice to confirm. "REC" and "usb" will flash, recording starts after 5 seconds. PLAY/PAUSE can pause/resume.
- Cassette Recording: In TAPE mode, press RECORD once ("REC-1"), then twice to confirm. "REC" and "usb" will flash, recording starts after 5 seconds. PLAY/PAUSE can pause/resume.
- Phonograph Recording: In PHONO mode, press RECORD once ("REC-1"), then twice to confirm. "REC" and "usb" will flash, recording starts after 5 seconds. PLAY/PAUSE can pause/resume.
- Bluetooth Recording: In BLUETOOTH mode, press RECORD once ("REC-1"), then twice to confirm. "REC" and "usb" will flash, recording starts after 5 seconds. PLAY/PAUSE can pause/resume.
- Note: Recording will fail if STOP is pressed during recording.
- Deleting Tracks: Press DELETE once ("DEL-1") to delete the playing track. Press UP/F.F (SKIP+) once to delete the playing file ("DEL-F"), or twice to delete all tracks on the USB ("DEL-A"). Confirm by pressing DELETE again.
Mute / EQ Operation:
- Press MUTE once to silence the speakers ("MUTE ON"). Press MUTE, Volume +/-, or EQ to cancel mute.
- Press EQ to cycle through sound effects: POP, CLASSIC, ROCK, JAZZ, FLAT.
Timer and Date Setting:
- In FM or DAB mode, press MENU, rotate TUNING/ENTER to "SYSTEM", and confirm.
- Rotate TUNING/ENTER to "TIME" and confirm.
- Enter "Set Time/Date". Rotate TUNING/ENTER to select "Auto update" or "Set 12/24 Hour".
- For "Auto update", choose "No update", "Update from Any", "Update from DAB", or "Update from FM" and confirm.
- For "Set 12/24 Hour", choose "Set 12 Hour" or "Set 24 Hour" and confirm.
- To set time, confirm 12 or 24 Hour. Rotate TUNING/ENTER to set "Hour", "Minute", "AM or PM" and confirm.
- To set date, rotate TUNING/ENTER to set "Set Date" (e.g., "1-1-2009") and confirm.
Language Setting:
In FM or DAB mode, press MENU, rotate TUNING/ENTER to "LANGUAGE", and confirm. Choose from English, Nederlands, Deutsch, Norsk, Svenska.
Line Out Operation:
Connect an external recording device (e.g., cassette recorder, Mini-Disc) to the "LINE OUT" jacks using an audio cable (not included). The system's audio will be exported to the external device while also playing through its speakers.
AUX In Operation:
Connect an external audio source to the "AUX IN" jack using an audio cable (not included). The external source's audio will play through the system's speakers.
Remote Control Battery Installation:
The remote requires one CR2025 (3V) lithium battery. Hold and press the clasp with your thumb in the direction of the arrow, then slide out the battery compartment with your forefinger. Insert the CR2025 battery with the positive polarity facing up. Push the compartment back until it clicks.
Maintenance Features
Environmental Protection:
Do not dispose of this product with household waste. Return it to a collection point for recycling electrical and electronic devices, as indicated by the symbol on the product, manual, or packaging. The materials are reusable, contributing to environmental protection. Contact local authorities for collection point details.
Safety:
- Use only in dry indoor environments.
- Protect from humidity.
- Do not open the device due to risk of electric shock; refer servicing to qualified personnel.
- Connect to a properly installed and earthed wall outlet matching the mains voltage specifications.
- Keep the mains cable dry and undamaged. Replace damaged cables/plugs immediately.
- Disconnect from mains during lightning.
- Supervise children using the device.
Cleaning:
- Clean the device with a dry cloth only.
- Do NOT use cleaning agents or abrasive cloths.
- For cabinets, use a soft, non-abrasive dust cloth. For smudges, use a quality commercial dusting and polishing spray cleaner, but spray onto the cloth first, not directly onto plastic or metal parts.
Furniture Protection:
The device has non-skid rubber feet. To prevent marks or residue on fine wooden furniture from oil-based polishes or wood preservatives, apply small self-adhesive felt pads to the bottom of the rubber feet.
Cassette Care:
- Prevent tape jamming and tangling.
- Check for loose tape layers through the cassette window; take up any slack with a pencil or hexagonal ballpoint pen before insertion.
- If the cassette feels "tight," fast-wind it from end to end and back again to remove "ridges."
- Use only well-known tape brands. Avoid C-120 cassettes.
- Do not expose cassettes to direct sunlight, dust, or oil, and avoid touching tape surfaces.
Compact Disc Care:
- To remove a disc from its case, press the center and lift by the edges.
- Wipe fingerprints and dust from the recorded surface with a soft, lint-free, dry cloth. Wipe in a straight line from the inside to the outside.
- Never use detergents or abrasive cleaners. A CD cleaning kit can be used if necessary.
- Never write on or affix labels to the surface of compact discs.
Battery Disposal:
Used batteries are hazardous waste and must NOT be disposed of with household waste. Return them to your dealer or community collection points. Only return fully discharged batteries. Keep batteries away from children; contact a physician immediately if swallowed. Check batteries regularly for leakage. Batteries marked Cd (cadmium), Hg (mercury), Pb (lead) are particularly hazardous.