This document describes a multi-functional audio system with various playback, recording, and connectivity options.
Environmental Protection and Safety
The device is designed with environmental protection in mind. It should not be disposed of with normal household waste at the end of its life cycle. Instead, it should be returned to a collection point for the recycling of electrical and electronic devices, as indicated by a symbol on the product, user manual, or packaging. The materials used are reusable, and by reusing, recycling, or otherwise utilizing old devices, users contribute significantly to environmental protection. Local authorities can provide details on collection points.
Safety Warnings:
The device is a Class 1 laser product. A caution warns against invisible laser radiation when opening the cover or pressing the safety interlock, advising users to avoid exposure to the laser beam. There is also a warning for the risk of electric shock, indicating that the cover (or back) should not be removed as there are no user-serviceable parts inside. Servicing should be referred to qualified personnel. A symbol indicates the presence of dangerous voltage inside the enclosure, sufficient to cause electric shock, while another symbol points to important operating and maintenance instructions.
Safety, Environmental, and Setup Instructions
Usage Environment:
The device should only be used in dry indoor environments and protected from humidity. It should not be exposed to direct sunlight or other heat sources. Proper ventilation is crucial to prevent heat accumulation, so the ventilation openings must not be covered. The device should be installed in a safe, vibration-free location, as far as possible from computers and microwave units to avoid radio reception disturbance.
Electrical Safety:
Do not open the device; doing so poses a risk of electric shock and will void the warranty. Repairs should only be performed by authorized service/customer centers. The device must be connected to a properly installed and earthed wall outlet, ensuring the mains voltage matches the specifications on the rating plate. The mains cable must remain dry during operation and should not be pinched or damaged. A damaged mains cable or plug must be immediately replaced by an authorized service center. In case of lightning, the device should be immediately disconnected from the mains supply.
Child Safety:
Children should be supervised by parents when using the device.
Cleaning:
The device should be cleaned with a dry cloth only. Do NOT use cleaning agents or abrasive cloths.
Laser Safety:
The device is equipped with a "Class 1 Laser." Avoid exposure to the laser beam as this could cause eye injuries.
Battery Handling:
Only mercury and cadmium-free batteries should be used. Used batteries are hazardous waste and must NOT be disposed of with household waste. They should be returned to the dealer or collection points in the community. Batteries should be kept away from children, as swallowing batteries can be dangerous; a physician should be contacted immediately if a battery is swallowed. Batteries should be checked regularly to avoid leakage. Consumers are legally obligated to return all batteries for environmentally responsible recycling, regardless of whether they contain harmful substances (marked Cd for cadmium, Hg for mercury, Pb for lead). Batteries can be returned free of charge to public collection points or shops selling batteries of the respective kind. Only fully discharged batteries should be returned.
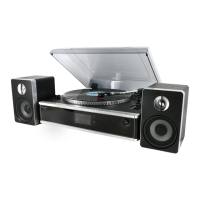
Location of Controls
The device features a comprehensive set of controls for various functions:
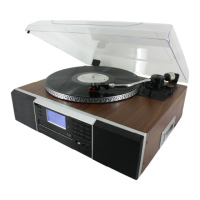
- Dust Cover: Protects the turntable.
- LCD Display: Shows operational information.
- CD Tray Open/Close Button & CD Tray: For loading and unloading CDs.
- 3.5mm AUX In Jack & 3.5mm Headphone Jack: For external audio input and private listening.
- Panel Cover: A protective cover.
- USB Socket & SD/MMC Card Slot: For connecting USB storage media and SD/MMC cards.
- Standby LED Indicator & Power On/Standby Button: For power status and control.
- Function Button: To select different modes (Tuner, CD, USB, SD, Phono/AUX).
- Memory/Clock-Adjust Button: For setting clock and memory functions.
- Folder/Pre-Up Button & Folder/Pre-Down Button: For navigating folders or preset stations.
- Record Button: For recording audio.
- Eject Button: For ejecting the tone arm or CD.
- Band / Play/Pause Button: For selecting radio bands or controlling playback.
- Tuning/Skip Up & Tuning/Skip Down Buttons: For tuning radio stations or skipping tracks.
- Stop Button: To stop playback or recording.
- ST/Mono-Play Mode Button: For stereo/mono selection.
- Preset EQ Button: For selecting equalizer presets.
- Volume Up/Down Button: For adjusting audio volume.
- Remote Sensor: For receiving signals from the remote control.
- Spindle Adaptor: For playing records with larger center holes.
- Strobe Illuminator: For checking platter speed.
- Alignment Screw with Rubber Cover: For adjusting tone arm stopping position.
- Counter Weight: For balancing the tone arm.
- Antiskating: For adjusting anti-skating force.
- Cueing Lever: For raising and lowering the tone arm.
- Tone-Arm Lock: Secures the tone arm.
- Turntable Speed Selector: For selecting playback speed (33, 45, 78 RPM).
- Pitch Adjustment: For fine-tuning playback speed.
- Speaker Terminal (L/R) & Line Out Socket (L/R): For connecting external speakers and outputting audio to other systems.
- 75 Ohm FM Socket: For connecting an FM antenna.
- AC Cord: For power connection.
Precautions for Use
Installation:
All parts should be unpacked, and protective material removed. The unit should not be connected to the mains before checking the mains voltage and ensuring all other connections are made. Vents must not be covered, and several centimeters of space should be left around the unit for ventilation.
Counter Weight Installation:
- Slide the counter weight completely into the rear of the tone arm until it reaches the end. Turn it clockwise until it clicks into place.
- Twist the counter weight clockwise and backward until it reaches the white line as shown in Figure 2.
- Twist the counter marking until it reaches the "1" position.
- Twist the counter weight anti-clockwise and inward until it reaches the appropriate working pressure.
The working pressure of the provided stylus is typically between 4-6 grams, according to the cartridge manufacturer. Each stylus has its own working pressure, so users should refer to the specific stylus specifications.
Connection
- Connect the power cord (37) to an AC outlet and connect the speaker wire to the speaker terminal (34) on the rear side of the unit.
- Press the power button (11). If the standby LED indicator (10) lights off, it means the power supply is normal, and the system is ready to play music.
Setting the Clock
- Set the unit in standby mode.
- Press and hold the "MEM/CLK-ADJ" button (13). The LCD display (2) will show "SET CLOCK" and then "12HR OR 24 HR." Press the skip up or skip down button (18/20) to select the appropriate hour format (12HR/24HR). Press "MEM/CLK-ADJ" button (13) again to confirm.
- The LCD (2) will display the first and second digits of "00" flashing. Press skip up or skip down button (18/20) to set the correct hour. Press "MEM/CLK-ADJ" button (13) to store the correct hour.
- The third and fourth digits of "00" will flash. Press the skip up or skip down button (18/20) to set the correct minutes. Then press "MEM/CLK-ADJ" (13) to store the correct minute.
Note: The pre-set time will be completely reset if the main power supply is disconnected. It is recommended to switch the system into standby mode for convenient usage.
Listening to Radio
Manual Tuning:
- Press the function button (12) to select "TUNER" mode.
- Press the "BAND / PLAY/PAUSE" button (17) to select the desired band (MW or FM).
- Tune to the required station by pressing the "TUNING / SKIP UP" or "TUNING / SKIP DOWN" button (18/20).
- Adjust the volume control (23) to the desired level.
Auto Tuning:
- Press the function button (12) to select "TUNER" mode.
- Press the "BAND / PLAY/PAUSE" button (17) and select the desired band (MW (AM) or FM).
- Press and hold the "SKIP / TUNING UP" or "TUNING / SKIP DOWN" button (18/20) for 1-2 seconds and then release.
- The unit will start seeking automatically and stop until a radio station is reached.
- Repeat steps 3 and 4 until the desired radio station is reached.
- Adjust the volume up/down controls (23) to the desired volume level.
Preset Stations:
Up to 40 radio stations (30 FM, 10 AM) can be stored in memory.
- Set to "TUNER" mode.
- Tune to the desired radio station using "MANUAL" or "AUTO" tuning method.
- Press the "MEM / CLK-ADJ" button (13) to enable program state.
- Press "FOLDER / PRE-UP" (14) or "FOLDER / PRE-DOWN" button (at remote handset) to select the desired station memory position for storage.
- Press "MEM / CLK-ADJ" button (13) again to confirm the setting.
- Repeat steps 2 to 5 to store other stations.
- Press "FOLDER / PRE-UP" or "FOLDER / PRE-DOWN" button at the remote handset to select the preset stations in order.
- To return to normal tuner mode, leave keys free.
FM & FM-Stereo Reception:
- Press the "FM-ST/MONO" button (21) repeatedly. FM programs are received in mono and stereo mode repeatedly. In particular, when stereo signals are weak, it is preferable to receive the program in mono.
- If stereo signal is being received, the "STEREO" indicator will appear on the LCD display (2) to show FM stereo program is now receiving.
Hints for Best Reception:
- AM: The receiver has a built-in AM bar antenna. If AM reception is weak, slightly rotate or reposition the unit to improve the reception. The FM receiver has a built-in FM wire antenna (36) hanging at the rear cabinet. This wire should be totally unraveled and extended for the best reception.
Playing Compact Disc
Getting Start:
- Press the function button (12) to select "CD" mode.
- Press the CD tray open/close button (3) to open the CD tray (4).
- Place a CD with the printed side facing up inside the tray and then close it by CD tray open/close button (3).
- Focus search is performing, the LCD display (2) will show the total number of tracks & total playing time.
Play / Pause Mode:
- Press the "BAND / PLAY/PAUSE" button (17) to start playback. The first track will start playback.
- To interrupt, press the "BAND / PLAY/PAUSE" button (17) once. The playing time will freeze & flashing on the LCD display (2). Press again to resume normal playback.
Stop Mode:
- If "STOP" button (19) is pressed during play or pause mode, the system will go to stop mode.
Skip Mode (Skip Up / Skip Down):
- During play or pause mode, if "SKIP UP" button (18) is pressed, it will go to the next track and display the track no. and then remain the play or pause mode.
- During play or pause mode, if "SKIP DOWN" button (20) is pressed, it will go back to the beginning of the track, original track no. is display and remain the play or pause mode.
- After "STOP", press "SKIP DOWN" button (20) again will go to the previous track and remain the play or pause mode.
For MP3 Disc:
- After focus search is performing, the total number of track and album will be shown on the LCD display (2).
- Press "FOLDER / PRE-UP" (14) to select the album number.
- Press "SKIP UP" or "SKIP DOWN" button (18/20) to select the track number.
- When the desired track and album is being selected, press the "BAND / PLAY/PAUSE" button (17) to start playback.
ID3 (Track/Album Title) Function (by Remote Handset):
Press the "INFO" button until the LCD display (2) shows "FILE - ...", "DURING PLAYBACK OF MP3/WMA FILE, THE SONG TITLE / ARTIST NAME / ALBUM NAME IS BEING DISPLAYED IN SEQUENCE." Press the "INFO" button again to disable the function.
Remark: In case of no name had been assigned for the track, "NO TITLE" or "NO ARTIST" is being displayed on LCD display (2). No song title/album name can be recognized if the input format on the disc/mass media is not supporting the system. The system support only English and numeral for ID3 function.
Connecting:
The system is able to decode and playback all MP3/WMA files stored in memory media with a USB connecting port or SD/MMC memory card.
- Set the system at standby mode first or other function except SD or USB mode.
- Plug-in the USB pen-drive with the face up & make sure it goes in completely or insert the memory card in the direction of the arrow as shown in the label on the underside of the memory card slot cover. Insert straight without bending.
Connecting the USB upside down or backwards could damage the audio system or the storage media (USB thumb drive / SD/MMC card). Check to be sure the direction is correct before connection.
- Press the functions button (12) to select "SD CARD MODE" or "USB MODE."
- The system will start reading the storage media automatically after connecting, and the LCD display (2) will show the total number of MP3/WMA files being detected.
- Repeat the same playback procedure as playing CD/MP3 disc as above.
Remark: The system can detect and read files under MP3 and WMA format only through the USB port. If connecting the system to an MP3 player via the USB socket, due to variances in MP3 encoding format, some MP3 players may not be able to play via the USB socket. This is not a malfunction of the system. The USB port does not support connection with a USB extension cable and is not designed for communication with a computer directly.
Encoding of CD/Phono into MP3 File to USB Memory
The system is able to encode normal CD or turntable to MP3 format and record to memory media with a USB connecting port (or SD/MMC card slot). Before starting the encoding, insert the memory media (USB pen drive or SD/MMC card) into the system & make sure it has adequate free memory size for recording.
A) CD Encoding
I) Encoding 1 Track / 1 Disc:
- Perform normal playback of the CD track you want to encode & record.
- Press the "REC" button (15) during the playback of the desired track, and the system will start encoding.
- The system will show "REC" and flashing. Encoding is performing now.
- Press the "REC" button (15) repeatedly again to select record 1 track "REC_ONE" or record one entire disc "REC_ALL".
- After completing of recording, the unit will stop playback automatically.
II) Encoding by Program:
- Place a CD with the printed side facing up inside the tray & then close the CD tray.
- Select the desired tracks by following "CD DISC PROGRAMMING" procedures. Then press "CD PLAY/PAUSE" button (17) to start playback.
- Select a desired track by pressing skip up or down buttons (18/20).
- Press the "MEM/CLK-ADJ" button (13) to store the track into memory.
- Repeat steps 3 and 4 to enter additional tracks into the memory if necessary.
- When all the desired tracks have been programmed, press "BAND / PLAY/PAUSE" button (17) to play the disc in assigned order.
- Press "STOP" button (19) to terminate program play.
After program complete, press "MEM/CLK-ADJ" button (13) repeatedly to review the tracks being programmed. Press "STOP" button (19) at CD stop mode to cancel all programmed memory. For MP3 disc / file, press the "FOLDER / PRE-UP" button (14) to select the 1st track of next folder directly and hence to speed up the song selection. The programming model will automatically stop if no button is being pressed in a period of about 10 seconds after pressing the "MEM/CLK-ADJ" button (13).
III) Copying of MP3/WMA File:
If putting an MP3/WMA disc instead of a CD-disc, the system will copy the files to the USB or SD/MMC card if the "REC" button (15) is pressed. The operation procedures are the same as CD encoding as stipulated above, and the system will switch to copying mode only if an MP3/WMA file is being read.
Remark: The system will store the file to a USB source first if both USB and SD slot are occupied by storage media. The system will create a "FCOPY" folder and then store all copy files in it. If the "REC" button (15) is pressed during playback of a USB or SD source, the file will copy from USB to SD or SD to USB.
B) Phono Encoding:
- Select "PHONO/AUX" mode and then press the "REC" button (15) directly.
- The LCD display (2) will show "REC" and flashing after a few seconds. The system is starting the encoding mode.
- Start playback at phono for the track you want to record to a USB position.
- After finishing recording, press the "STOP" button (19) until the text on the LCD display (2) stops flashing and returns to "PHONO/AUX" mode.
C) Radio Encoding:
- Select "TUNER" mode and then select the desired radio station.
- Press the "REC" button (15) to start the encoding.
- The LCD display (2) will show "REC" and flashing after a few seconds. The system is starting the recording.
- After finishing recording, press the "STOP" button (19) until the text on the LCD display (2) stops flashing and returns to "TUNER" mode.
Remark: If the radio reception signal is not strong enough, the system cannot start the encoding process, and the text "NO GOOD" will show on the LCD display (2). The recording quality and performance for radio encoding is not stable due to interference of radio reception. This is not a malfunction of the system.
D) AUX-IN Encoding:
Connect another audio device, e.g., (portable) CD player, MP3 player, (portable) cassette player, iPod, etc., to this system via a cord with 3.5mm dia jack plugs (not supplied). Connect one end of this cord to the 3.5mm dia. headphone jack on the external device and the other end to the 3.5mm AUX-IN jack (5) on the side of the unit. When connected in this way, it is possible to:
- Select "PHONO/AUX" mode. Once a 3.5mm plug is plugged into the AUX-IN jack, the channel will change to AUX-IN automatically.
- Play back the music already on the connected device.
- Encode and convert the music files from the connected device to USB/SD into MP3 format. Follow the same procedure as described in this manual.
Track Separation (by Remote Handset)
You can divide the recording music from phono or radio to USB/SD track by track during encoding. Every time the "TS" (Track Separation) button on the remote handset is pressed once during encoding from phono, tape, or radio to USB/SD, the system will generate a new track and continue the recording. The text "PHONO" or "TUNER" at LCD display (2) will flash once, meaning the unit is creating a new track successfully.
Encoding Bitrate (by Remote Handset)
You can select the desired bitrate during encoding from CD/Tape/Phono/Radio and AUX-1 IN to USB or SD. The selectable range is from 64/128/192 KBPS.
- Set in "PHONO/AUX" function (12) & remain stop mode.
- Press the "INFO" function, and the LCD display will show the default bitrate (128 KBPS).
- Press skip up or skip down buttons (18/20) to select the desired bitrate for encoding.
- Press again the "INFO" button to confirm the setting, and the LCD display (21) will resume to "PHONO/AUX" mode.
File Delete at USB / SD Card (by Remote Control)
The system is able to erase files stored inside the USB pen drive or SD card by following:
A) Single File Delete (by Remote Handset):
- Preset at "USB" or "SD" mode.
- Press the "DELETE" button, and the LCD display (2) will show (DEL ---001).
- Press skip forward or skip backward button to select the file going to delete.
- Press the "DELETE" button to enter "YES / NO" mode and then press skip forward or skip backward to select "YES" or "NO".
- Press the "DELETE" button again to confirm the setting.
Remark: Press "STOP" button once at remote handset to quit delete mode.
Removing of USB / Memory Card
To remove the USB / memory card, turn off the power or switch the function mode to either CD, phono, or tuner first. For the USB port – unplug it by pulling out the USB socket directly. For the memory card – pull out the SD card smoothly.
Phono
Operation:
- Remove the stylus protector.
- Be sure that the tone arm is detached from the tone arm rest before operating and re-secured afterwards.
- Press the function button (12) to select "PHONO/AUX" mode. The LCD display (2) will show "PHONO/AUX."
- Set the speed selector (32) to the proper position depending on the record to be played.
- Place the record on the platter (use the spindle adaptor if required).
- Set the cueing lever (30) to the up position.
- Lift the tone arm from the rest and slowly move it to the record side. The platter will start to rotate and locate the tone arm over the desired position of the record.
- Pull down the cueing lever (30). The tone arm will come slowly on the recorder and start playback.
- At the end of the record, the tone arm will return to the rest position automatically.
- To stop manually, lift the tone arm from the record and return it to the rest.
Remark: Due to this device being designed with phono and aux in the same channel, when an aux jack is plugged by a 3.5mm plug, the channel will switch to aux function automatically. Please remove the 3.5mm plug from the aux jack (5) during phono playback.
Play Suspension:
Setting the cueing lever (30) to the up position will lift up the tone arm and then stop playback temporarily.
Play Ejection:
Pressing the eject button (16) anytime during playback will return the tone arm to the rest position immediately.
Remark: Due to the length of the record being various, if you find the tone arm cannot return automatically after playback of the record, please press the eject button and return the tone arm back to the rest position. Users should not change to a magnetic cartridge system, otherwise, the unit cannot be connected anymore to an aux-in of a music-center.
Adjustments
Anti-Skating Control:
Set the anti-skating control (29) to the position corresponding to the adjusted stylus working pressure. If the working pressure is 2 grams, the anti-skating control should also be set at 2.
Platter Speed Alignment:
During playback of a record, observe the appropriate strip of strobe calibration dots from the strobe lens. The upper one is for 33 RPM, and the middle one is for 45 RPM.
- If the strobe dots appear to be flowing to the right, it means the platter is revolving slower than the rated speed. Turn the pitch control (33) to the "+" direction.
- If the strobe dots appear to be flowing to the left, it means the platter is revolving faster than the rated speed. Turn the pitch control (33) to the "–" direction.
Adjust the pitch control (33) until the strobe dots appear to be stationary without moving left or right.
Tone Arm Stopping Position Alignment:
The position of the tone arm completing playback and returning to the rest station can be adjusted at the alignment screw (27) as follows:
Before starting the alignment, please take out the hole covering rubber.
A) If the system cannot complete the playback of the record and return earlier:
- Use a cross head screwdriver and turn the alignment screw (34) inside the hole clockwise. The stopping and eject position of the tone arm will move more inward to the center of the record before playback completion.
B) If the system cannot return to rest position automatically after playback of record:
- Use a cross head screwdriver and turn the alignment screw (34) inside the hole anti-clockwise. The stopping and eject position of the tone arm will move more away from the center of the record before playback completion.
Remark: The stopping position is very subjective among different customers. Please select the most suitable position based on your own record collection. The ex-factory setting is based on the most common template. Please check the stopping position time by time during adjustment and avoid over-turning the screw inside.
Line Out Connection
You can connect the system to your whole hi-fi system by connecting the line out socket (35) to the auxiliary input socket with an RCA cable (not provided).
More Features
A. Sleep Setting (by Remote Control):
- Press the "SLEEP" button, and the sleep indicator "ZZZ" will be shown on the LCD display (2).
- Keep pressing the button to adjust the sleep timer in the order of 90 > 75 > 60...15 minutes.
- The system will stop and go to standby mode automatically after the selected timing.
- To cancel the sleep mode, press the "SLEEP" button until it reaches "OFF" mode.
Remark: If the "SLEEP" button is pressed once and the sleep indicator "ZZZ" appears on the LCD display (2), the system will go to standby mode automatically after the selected minutes.
B. Alarm Clock Setting (by Remote Control):
This function allows the system to turn on automatically and wake you up by CD, Tuner, USB, or SD mode, respectively.
First, set the unit at standby mode and then press & hold the "TIMER" button to enter the setting mode. The LCD display will show "SET TIME – SELECT SOURCE":
- Wake Up Source: Press the "FUNCTION" button to select the source form "TUNER FM" – "TUNER MW" – "USB" – "SD" – "CD" repeatedly. Press "TIMER" button again after selecting the source.
- Wake Up Time: Press skip up / down button to set the hour & minutes and press "TIMER" button to store the memory.
Remark: The unit will switch off automatically after setting the alarm. The wake up volume is preset at level 20. If there is no music source being detected (such as USB/SD/CD) when the preset time is reached, the system will default to tuner mode automatically. For tuner wake up, the system will preset at the latest radio frequency being listened to before switching off. Please switch off the system manually during alarm wake up mode as the system will not turn off automatically after alarm on mode.
Active/De-Active Timer Function:
- To activate the alarm, press once the "TIMER" button on the remote handset until the timer indicator "" is shown on the LCD display (2).
- To cancel the alarm function, press once again "TIMER" button until the timer indicator "" disappears.
C. Pre-Set EQ Function (by Remote Control):
This unit provides 4 different sound modes to enhance your listening experience. You can select the desired effect by pressing the "PRESET EQ" button repeatedly in the following sequence: FLAT → CLASSIC → ROCK → POP → JAZZ.
D. Display Function (by Remote Handset):
Press to indicate the current time when the system is operating by any mode of all functions.
Remote Control Transmitter
Button Description:
The infra-red transmitter requires 2 AAA size batteries for operation.
- ON/STANDBY: Press to switch on/standby the system.
- FUNCTION: Press to select the functions (Tuner-CD-USB-SD-Phono/AUX).
- DISPLAY: At power on: press to display current time.
- TUNING SKIP UP/DOWN: In CD/MP3/WMA mode: to select previous / next track. In tuner mode: press to step up/down of frequency.
- BAND / PLAY/PAUSE: In tuner mode: press to select radio band. In CD/USB/SD mode: press once to start playback. Press once again to stop playback temporarily.
- FOLDER/PRE-DN: In MP3/USB/SD mode: press to skip down the album. In tuner mode: press to call down the preset memory in order.
- FOLDER/PRE-UP: In MP3/USB/SD mode: press to skip up the album. In tuner mode: press to call up the preset memory in order.
- STOP: Press to stop CD/MP3 playback or cancel programmed memory.
- SLEEP/TIMER: In power on mode: press to activate sleep function. In standby mode: press and hold to enter alarm set up mode and press once to active/de-active alarm function.
- MEMORY/CLK-ADJ: In CD mode: press to activate CD program function. In tuner mode: press to activate preset station mode. In standby mode: press to adjust clock.
- FM-ST/MONO / PLAY MODE: In tuner mode: press to select FM stereo or FM mono mode. In CD/USB/SD mode: press to activate repeat/random function.
- FIND / TS: In MP3 mode: press to activate MP3 search function. In encoding mode: press to activate track separation function.
- REC: Press to activate encoding/MP3 file copy function.
- DEL/INFO: In USB/SD mode: press to delete the file in the USB/SD memory. In MP3 playback mode: press to activate ID3 function.
- VOLUME -/+: Press to adjust volume level up/down.
- PRESET EQ: Press to select different EQ mode for enjoyment.
Important Notice:
Automatic standby mode: To comply with the ErP2 directive, the unit automatically switches to standby after approximately 15 minutes without a signal (for instance in CD-Stop mode). To switch the unit on again, please follow the instructions mentioned in the instruction manual.