EasyManua.ls Logo

SoundTraxx Tsunami TSU-AT1000 User Manual

SoundTraxx Tsunami TSU-AT1000
6 pages
To Next Page IconTo Next Page
Page #1 background imageLoading...
Page #1 background image
Athearn RTR EMD GP35
Tsunami Digital Sound Decoder Installation Notes
Overview
This application note describes how to install a
TSU-AT1000 into an Athearn HO Ready-To-Roll
EMD GP35.
Skill Level 2: The entire installation can be
completed in one to two hours with no
modification required to the model.
Bill of Materials
P.N. Description
828039 TSU-AT1000 for EMD 567D Turbo
810113 16mm x 35.1mm Oval Speaker
Evergreen P.N.
9030 0.030” Sheet Styrene
For your convenience, Evergreen part numbers have
been listed above. Please visit their website at
www.evergreenscalemodels.com
Tools You Will Need
25 W Soldering Iron
Rosin Core Solder
Wire Strippers
Wire Cutters
X-Acto Knife with #11 Blade
Miniature Screwdriver Set
Metal Straight Edge
Dial Calipers
Aquarium Sealant or Clear Silicone
Liquid Plastic Cement
Insulative Electrical Tape
Double-Sided Foam Tape
Masking Tape
Small Pliers
30-32 Gauge Wire
Question and Answer IconNeed help?

Do you have a question about the SoundTraxx Tsunami TSU-AT1000 and is the answer not in the manual?

SoundTraxx Tsunami TSU-AT1000 Specifications

General IconGeneral
BrandSoundTraxx
ModelTsunami TSU-AT1000
CategoryMedia Converter
LanguageEnglish

Summary

Overview

Installation

Prepare Locomotive Chassis for Decoder Installation

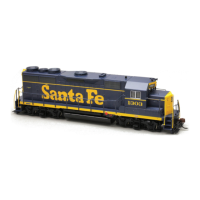
Steps for disassembling the locomotive, including removing couplers, shell, and circuit board.

Modify Motor Positive Lead

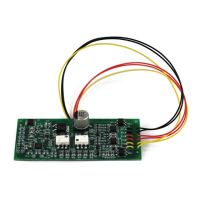
Replacing the motor's positive lead with a wire for decoder connection.

Motor Wiring and Removal from Frame

Soldering wires to the motor clip, remounting it, and removing the motor from the chassis.

Driveline Handling and Motor Insulation

Detaching the driveline, removing the motor, and insulating the motor from the frame.

Install Decoder and Wire Connections

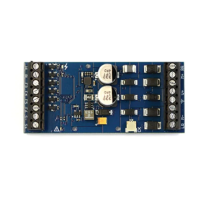
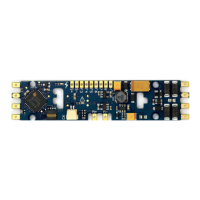
Mounting the decoder, soldering track pickup, motor, and light wires.

Speaker Assembly and Mounting

Creating a styrene baffle, routing speaker wires, and securing the speaker assembly.

Final Wiring and Testing

Connecting headlights, backup lights, speaker wires, capacitor, and performing test runs.

Related product manuals