9
Operation
Continuity Test
1. Set the rotary function switch to
the position.
2. Insert the black test lead into the
negative COM input jack. Insert the
red test lead into the positive Ω input
jack.
3. Touch the test probe tips to the
circuit or wire you wish to check.
4. If the resistance is approximately
30Ω or less, an audible signal will
sound. If the circuit is above 2000Ω,
the display will indicate “1”. The
resistance will be shown on the
display if it is below 2000Ω.
Never test continuity on a live circuit.
WARNING:
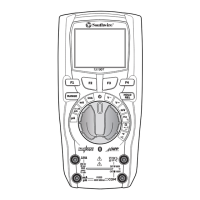
Red
Probe
Red
Probe
Black
Probe
Forward Test Reverse Test
Black
Probe
Wire
µA
mA
20
200
10A
1.5V
9V
2000
2000
200
200
20
k
k
k
BATT.
mA
mA
HOLD
COM
10A
For
30sec.
MAX
every
15 min
FUSED
2000
200
600
OFF
600
200
20V
2000
200
mV
mV
!
!
Diode Test
1. Set the rotary function switch to the
position.
2. Insert the black test lead into the
negative COM input jack and the
red test lead into the positive Ω
input jack.
3. Touch the test probes to the diode
under test. Forward voltage will
indicate 400 to 700. Reverse voltage
will indicate “I”. Shorted devices will
indicate near 0 and an open device
will indicate “I” in both polarities.
Never test diodes in a live circuit.
WARNING:
CAT
III
300V
10
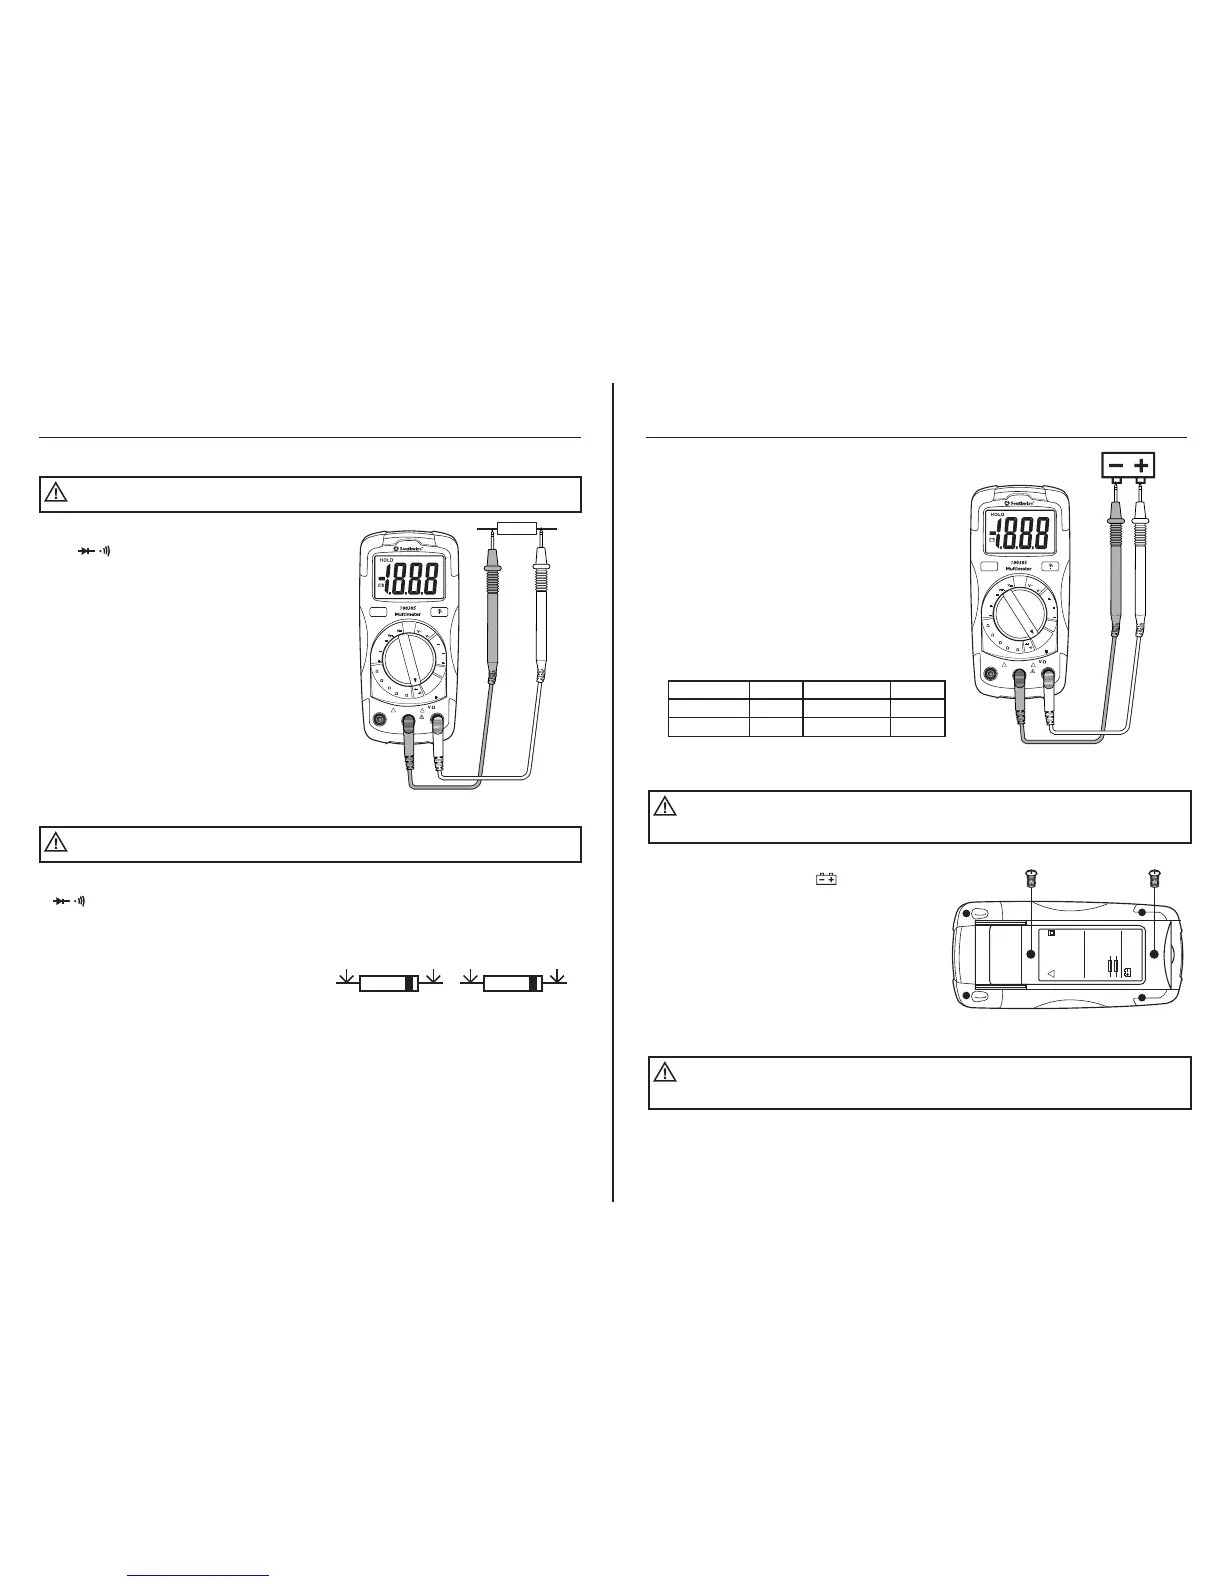
Battery Test
1. Set the rotary function switch to the
1.5V or 9V BATT position.
2. Insert the black test into the negative
COM input jack and the red test lead
into the positive V input jack.
3. Touch the red test probe tip to the
positive side of the 1.5V or 9V battery
and the black test probe tip to the
negative side of the 1.5V or 9V battery.
4. Read the voltage in the display.
Replacing the Battery
To avoid electric shock, remove test leads from the meter
before removing the battery door.
WARNING:
To avoid electric shock, do not operate your meter until the
battery door is in place and fastened securely.
WARNING:
1. When the battery drops below the
operating voltage, the symbol will
appear on the LCD display. The battery
should be replaced immediately.
2. Remove the two Phillips screws from
the battery/fuse door located on the
back of the meter.
3. Remove door.
4. Replace battery with a fresh 9V battery.
5. Install battery door and tighten screws.
GOOD WEAK BAD
9V Battery: >8.2V 7.2 to 8.2V <7.2V
1.5V Battery: >1.35V 1.22 to 1.35V <1.22V
Operation
µA
mA
20
200
10A
1.5V
9V
2000
2000
200
200
20
k
k
k
BATT.
mA
mA
HOLD
COM
10A
For
30sec.
MAX
every
15 min
FUSED
2000
200
600
OFF
600
200
20V
2000
200
mV
mV
!
!
!
WARNING
TO AVOID ELECTRICAL
SHOCK, REMOVE ALL
INPUTS BEFORE
OPENING THE CASE.
TO PREVENT FIRE, INSTALL
FUSE WITH AMP/VOLT
RATING SHOWN:
F200mA/250V
F10A/250V
9V BATTERY
NEDA 1604 IEC 6F22
CAT
III
300V