3
1.
Operation
Selecting the temperature units (
o
F or
o
C).
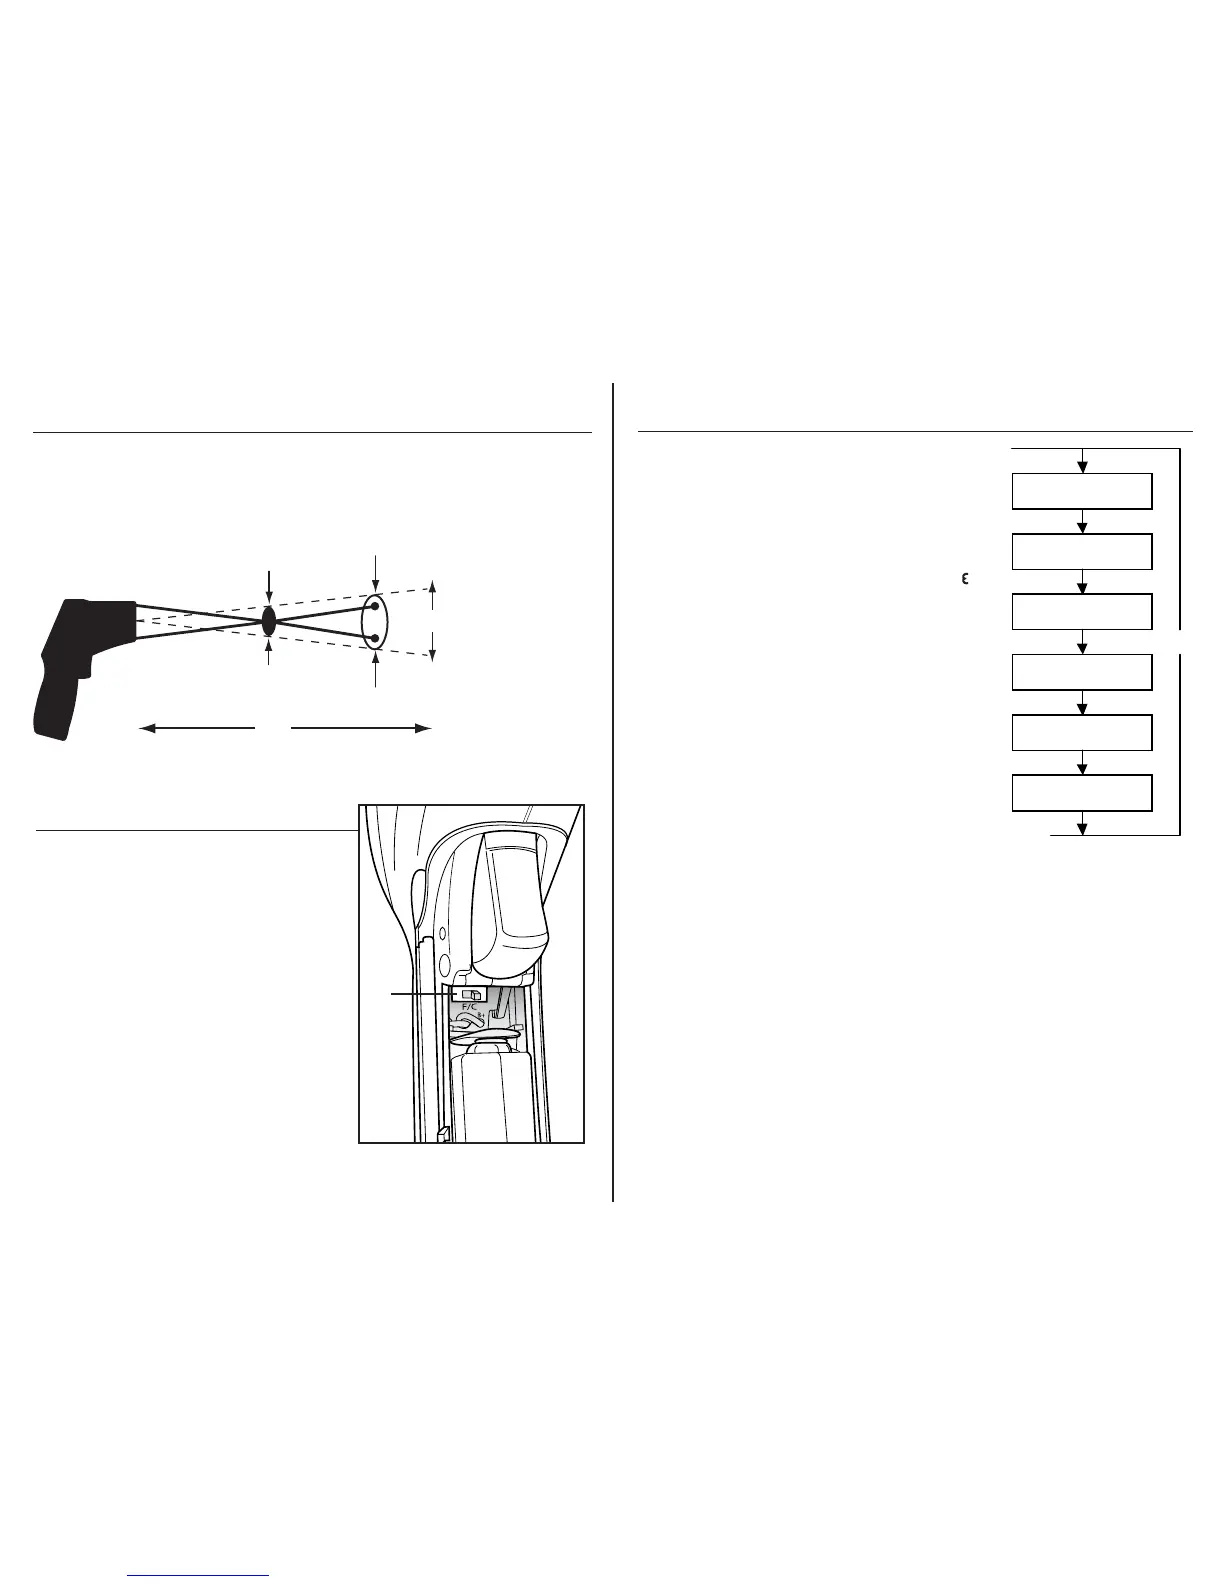
Locate the two depressions on either side
of the meter near the trigger.
Pull down from this spot to open the
battery cover.
The selector slide switch (1.) is located
above the battery.
Gently shift the switch position to change
temperature units.
Distance&SpotSize
As the distance (D) from the object increases, the spot size (S) of the area
measured becomes larger. The meter’s D:S ratio is 20:1, so at 20 inches (508mm),
the diameter of the target being measured must be at least 1” (25.4mm).
The lasers converge at 10” (254mm) to pinpoint the optimized measuring point.
1/2 in@ 10in
1in @20 in
12.7mm@254mm
25.4 mm@508mm
inch
mm
Distance (D): Spot (S) = 20:1
(Typically, the spot size indicates 90% encircled energy)
D
S
(Sensor Beam)
4
Operation cont.
MODE Button
The MODE button is used to access user programmable
functions. Each time the MODE button is pressed, it will
cycle to the next function as shown on the sequence
diagram. Note that the MODE button only operates after
the trigger is released. Each function is decribed below.
EMS (Emissivity) Press the MODE button until the “ ”
symbol starts flashing. Press the Up button to increase
emissivity. Press the Down button to decrease emissivity.
Once the emissivity is set, pull the trigger to return to
normal operation.
LOCK on/off Press the MODE button until the lock
symbol starts flashing. Press the Up button to turn the
LOCK on. Pull the trigger and release. The meter will
stay on continuously until the trigger is pulled again.
HAL on/off (High Alarm Limit on/off) Press the MODE
button until the High alarm symbol starts flashing.
Press the Up button to turn the alarm On. Press the
Down button to turn the alarm OFF.
HAL (High Alarm set point) After turning the alarm on, press the MODE button until the
High alarm set point is displayed on the LCD. Press the Up button to increase the High
alarm set point. Press the Down button to decrease the High alarm set point. Pull the
trigger to return to normal operation. If the temperature exceeds the set point, the alarm
will sound and the High alarm symbol will flash.
LOW on/off (Low Alarm on/off) Press the MODE button until the Low alarm symbol
starts flashing. Press the Up button to turn the alarm On. Press the Down button to turn
the alarm OFF.
LOW (Low Alarm set point) After turning the alarm on, press the MODE button until the
Low alarm set point is displayed on the LCD. Press the Up button to increase the Low
alarm set point. Press the Down button to decrease the Low alarm set point. Pull the
trigger to return to normal operation. If the temperature goes below the set point, the
alarm will sound and the Low alarm symbol will flash.
EMS Adjustment
LOCK On/Off
HAL On/Off
HAL Adjustment
LOW On/Off
LOW Adjustment
MODE