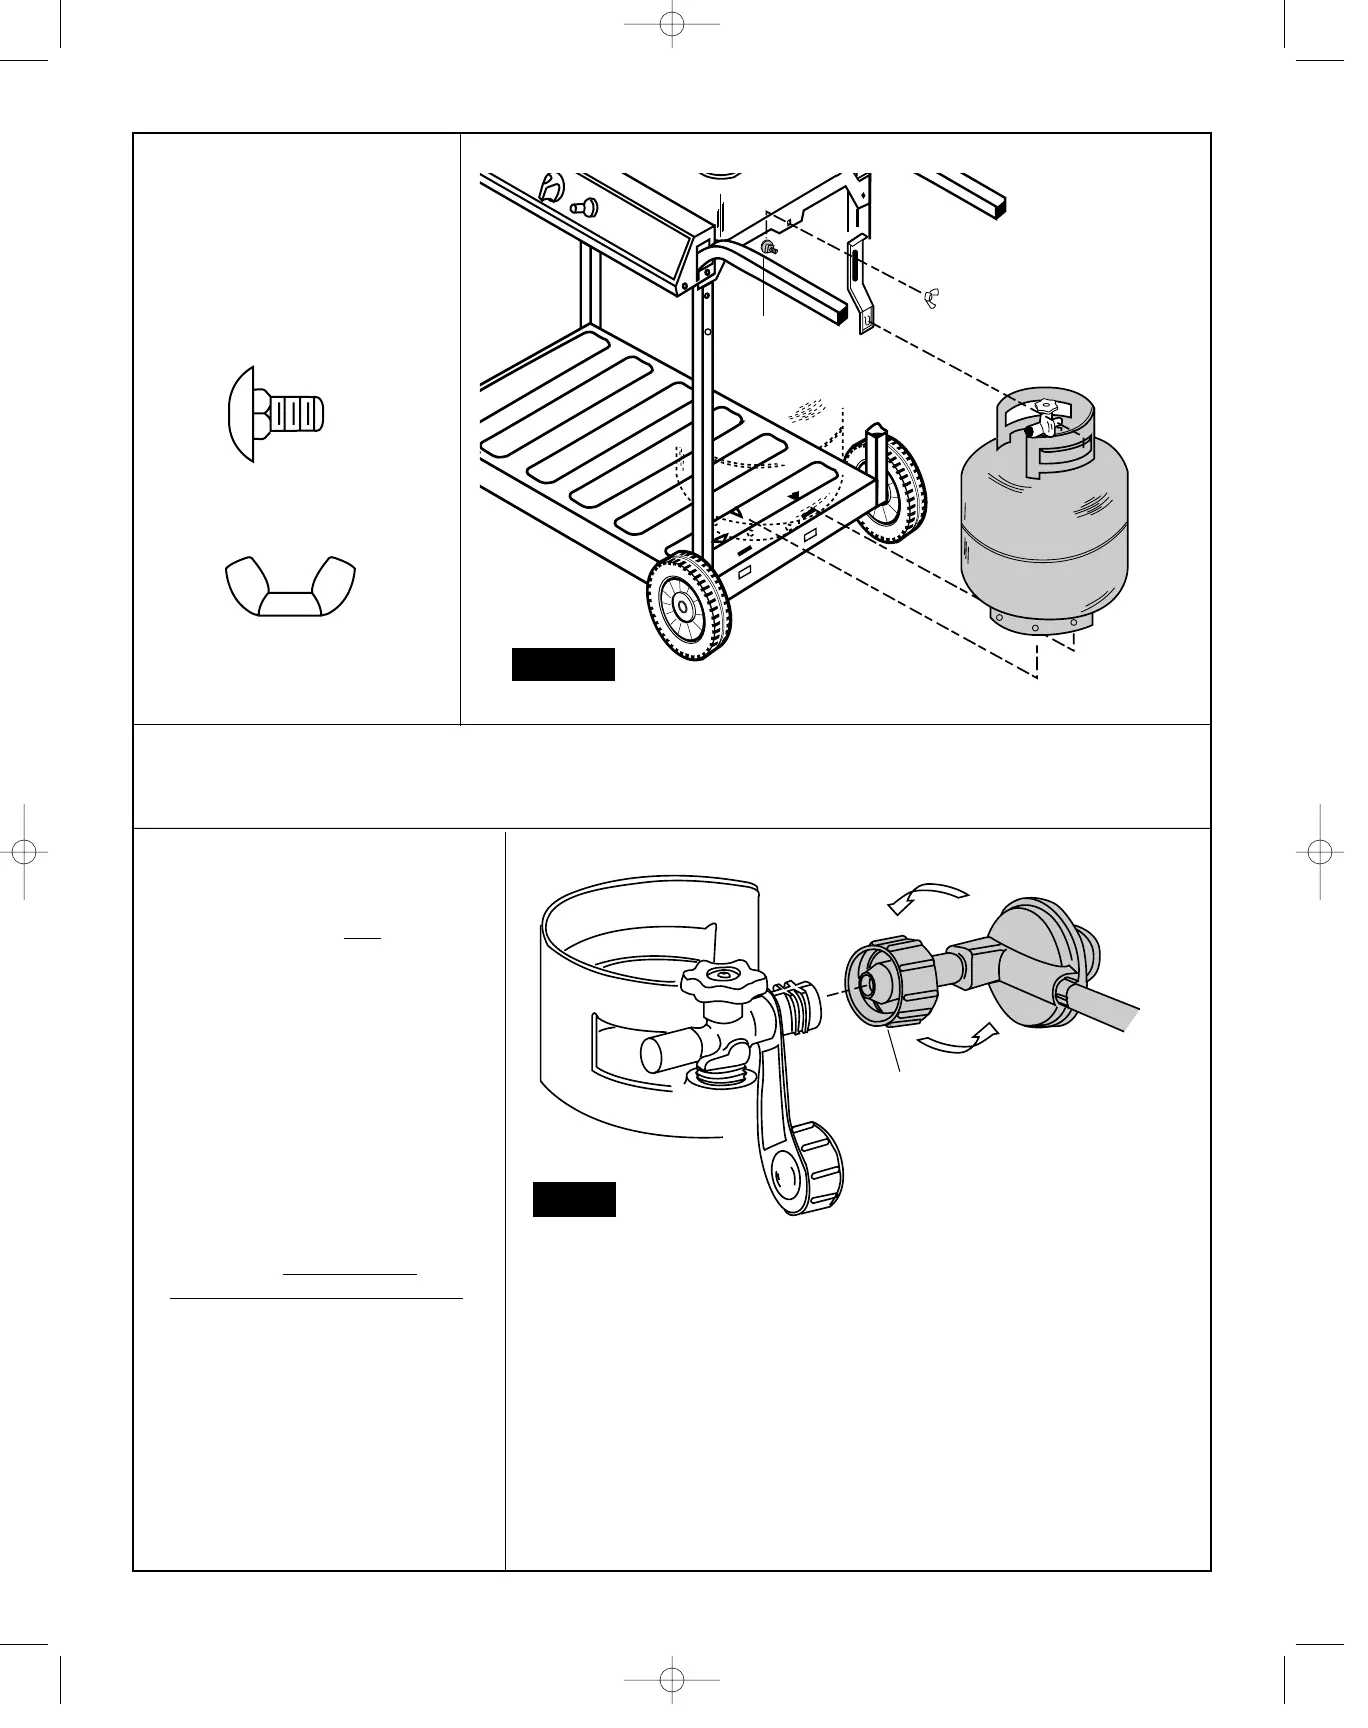
22
FIGURE 11.
Loosely attach tank bracket
using carriage bolt and wing
nut. Position tank on pan
tank locator. Raise tank
bracket and position over
tank ring, tighten wing nut.
CARRIAGE
BOLT
WING
NUT
TANK
Fig. 11
1/4" X 1/2" CARRIAGE BOLT
1/4"-20 WING NUT
FIGURE 12.
Before attaching hose/regulator to
tank, be sure cylinder valve and
appliance valves are OFF. The
Q.C.C.1 cylinder valve has an internal
back check module which will not
allow gas to flow until a connection
has been made. The valve is turned
off by rotating the handwheel
(Fig. 2B, Use and Care) Clockwise (left
to right) until it stops. When attaching
regulator to tank, make sure that the
small probe (Fig. 12) in the nipple is
centered in the mating Q.C.C.1
cylinder valve, turn the right hand
threaded Q.C.C.1 nut onto the valve in
a clockwise motion until there is a
positive stop. DO NOT USE A
WRENCH, HAND TIGHTEN ONLY.
Fig. 12
IMPORTANT: Ensure hose assembly
does not contact the casting, or any other
parts which will get hot.
Q.C.C.I. NUT
TANK
WARNING:
Before proceeding with the following steps, ensure you have read: • L.P. Gas Cylinder • Hose and Regulator
Sections of the USE AND CARE INSTRUCTIONS located at the front of this manual. The L.P. gas cylinder, if supplied with your grill, has been
shipped empty for safety reasons. The cylinder must be purged of air, and filled, prior to use. Follow all directions under "L.P. Gas Cylinder - Filling"
section of the Use and Care Instructions.
HOSE/REGULATOR
TANK NOT
INCLUDED
(BAG SP137-24)
 Loading...