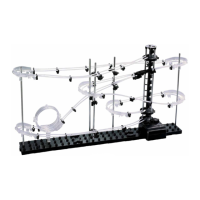
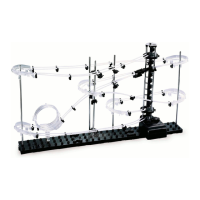
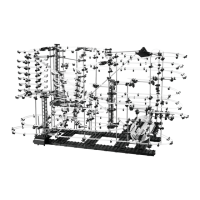
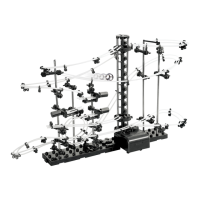
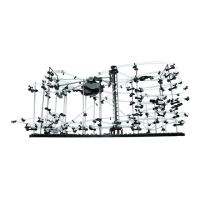
The Spacerail Level 1 - Classic is a DIY marble run kit designed for users over the age of 8. It allows individuals to construct an intricate roller coaster for steel marbles, featuring various loops, turns, and an elevator system.
Function Description:
The primary function of the Spacerail Level 1 - Classic is to provide an engaging and educational construction experience, culminating in a functional marble run. Users assemble a base, support shafts, an elevator, and a network of rails to create a continuous path for steel marbles. The elevator, powered by a single AA battery, lifts the marbles to the highest point of the track, from where gravity propels them through a series of twists, turns, and a loop before returning them to the elevator for another cycle. This process demonstrates principles of physics such as gravity, potential and kinetic energy, and momentum in a hands-on manner. The kit encourages problem-solving, fine motor skills, and spatial reasoning during assembly.
Important Technical Specifications:
Parts Included:
- Arm Components:
- Arm: 5 PCS
- Arm Sheath: 5 PCS
- Arm Holder A: 5 PCS
- Arm Holder B: 5 PCS
- Arm Wrench: 5 PCS
- Base Components:
- Base: 3 PCS
- Base Holder A: 2 PCS
- Base Holder B: 2 PCS
- Loops, Turns, and Split Components:
- Corner A: 3 PCS
- Corner B: 3 PCS
- Rail Splitter: 1 PCS
- Corner Stand: 6 PCS
- Loop: 1 PCS
- Loop Stand: 1 PCS
- Rail Clip: 29 PCS
- Elevator Components:
- Gear Box: 1 PC
- Shaft (300mm): 9 PCS
- Elevator Helix: 12 PCS
- Elevator Ring: 3 PCS
- Elevator Cover: 1 PC
- Elevator Stand: 3 PCS
- Gear Box Stand: 1 PC
- Rail Components:
- Rail Joining: 2 PCS
- Steel Marble: 2 PCS
- Rail: 5000 mm (5 meters)
- Wire Cutters or Utility Scissors
- Pen or Marker
- 1 battery - size AA
- Ruler (in centimeters)
Rail Lengths (Approximate, for cutting):
- a: Front 26mm, Back 26mm
- b: Back 70mm, Front 73mm
- c: Back 73mm, Front 79mm
- d: Back 162mm, Front 157mm
- e: Back 174mm, Front 170mm
- f: Back 275mm, Front 273mm
- g: Back 309mm, Front 313mm
- h: Back 415mm, Front 416mm
- i: Back 415mm, Front 420mm
- j: Back 487mm, Front 487mm
(Note: Illustration of rail lengths is 1:2.84 or approximately 35% of scale.)
Usage Features:
Assembly Process:
The assembly is broken down into several key stages:
-
Prepare the Coaster Components:
- Arms: Attach Arm Holders A and B with an Arm Sheath, then insert an Arm into Arm Holder A. Align the Arm in the Arm Holder with the Arm Wrench and turn counter-clockwise to lock it in place.
- Loop & Turns: Attach 2 Rail Clips to both sides of the Loop and attach the Loop Stand to the bottom. For the Turns (Corner A and Corner B), attach 2 Rail Clips to both sides of each Turn. Corner A and Corner B are distinguished by letters on their bottoms.
- Rail Splitter: Attach 3 Rail Clips to the openings of the Rail Splitter.
- Elevator:
- Attach the shaft to the Gear Box.
- Connect the Elevator Helix pieces along the shaft, ensuring no space between the Gear Box and the Helix for proper operation.
- Attach 3 support shafts to the Gear Box.
- Connect 1 Rail Clip to each Elevator Ring, ensuring brackets are right side up.
- Place the 3 Elevator Rings onto the Shafts.
- Place the Elevator Cap onto the top of the elevator assembly.
- Attach the 3 Elevator Guards to each Elevator Ring.
- Note: The steel marble will fall out if it enters the elevator too fast.
- Base Assembly: Interlock all 3 Base blocks. Attach Base Holder A and Base Holder B to the base blocks for a secure hold.
-
Construct the Coaster:
- Build the Coaster Shafts: Five different shaft configurations (A, B, C, D, E) are illustrated with varying heights (e.g., Shaft A: 63mm, 264mm; Shaft C: 47mm, 101mm, 159mm, 194mm, 261mm).
- Install the Coaster Shafts, Loop, and Elevator:
- Attach the Loop Stand to the bottom of the Loop.
- Attach the Gear Box Stand to the Gear Box.
- Attach the Loop, Gear Box, and all the Shafts (A, B, C, D, E) to the Base according to the provided diagram.
- Cut the Rail to Size:
- Measure each rail section and mark the cutting point with a pen.
- Cut each section at a 90-degree angle according to the specified lengths.
- Tip: Cut longer rails slightly larger to be safe, as they can always be trimmed shorter.
- Connect the Rails (Steps 1-10): The manual provides detailed illustrations and pictures for attaching the rails to the structure in a sequential manner, using specific rail sections (A, G, I, J, H, B, D, E, F, C).
- Steps 1-3: Connect A Rail sections between the Loop and Shaft A, G Rail sections between the loop entrance and the Split, and I Rail sections between the elevator entrance and Shaft A.
- Steps 4-6: Connect J Rail sections between Shaft A and Shaft E, H Rail sections between the elevator exit and Shaft A, and B Rail sections between Shaft E and the Split.
- Steps 7-10: Connect D Rail sections to Shaft B and the Split, E Rail sections between Shaft D and Shaft E, F Rail sections between Shaft C and Shaft E, and C Rail sections between Shaft D and the elevator entrance.
Assembly Tips & Tricks:
- Corner Stability: Place Corner Stands directly below Corners for extra stability.
- Rail and Corner Connections: Cut rails at a 45-degree angle where they meet a Corner to ensure a smooth transition for the marble.
- Rail Joining for Custom Designs: Use Rail Joinings to increase the length of rail sections for custom designs.
- Connecting Rails to Arms: Press rails into the Arm until a click is heard, indicating it's locked in place.
- Angling the Arms: Install Arms at an angle that matches the incline the rails will travel along.
- Railroad Stability: Attach Rail Ties to longer rail segments for stability.
- Smoothing the Elevator Exit: Pull the exit rails close to the Elevator Helix to ensure the marble enters the roller coaster easily.
- Smooth Rails for Efficient Travel: Ensure rails connect smoothly without bumps or kinks.
Maintenance Features:
- Choking Hazard Warning: This product contains small parts and is not intended for children under 3. Keep small parts away from children.
- Age Recommendation: Intended for users over the age of 8.
- Sharp Edges: Use caution as the product contains parts with sharp edges.
- Elevator Use: Only insert steel marbles into the elevator to avoid damage to the product.
- Elevator Functionality: Ensure the Elevator Helix is installed correctly without any space between the Gear Box and the Helix, otherwise, the elevator will not run.
- Rail Cutting: The tip to cut longer rails slightly larger is a maintenance feature, allowing for adjustments and preventing the need to re-cut or run out of rail.
- Smooth Connections: Regularly check rail connections for smoothness to ensure efficient travel of the marbles and prevent jams or falls.
- Stability Checks: Periodically check the stability of arms, corners, and longer rail segments, adjusting Rail Ties or Corner Stands as needed.