It happens to everyone - you write a sketch which successfully compiles and uploads,
but you can't gure out why it's not doing what you want it to. Larger computers
have screens, keyboards, and mice that you can use to debug your code, but tiny
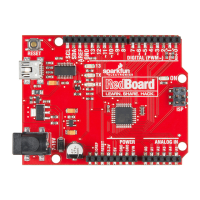
computers like the RedBoard have no such things.
e key to visibility into a microcontroller is output. is can be almost anything,
including LEDs and buzzers, but one of the most useful tools is the serial monitor.
Using Serial.print() and println(), you can easily output human-readable text and
data from the RedBoard to a window back on the host computer. is is great for
your sketch's nal output, but it's also incredibly useful for debugging.
Debugging your sketches using the Serial Monitor:
Component: Image Reference:
i20 i24
Servo
e1 e3e2
e1
Jumper Wire
i19
Jumper Wire
h24
+
Jumper Wire
h24
+
Jumper Wire
h24
+
Jumper Wire
Jumper Wire
Jumper Wire
Jumper Wire
Jumper Wire
e2
Jumper Wire
e3
Jumper Wire
Flex Sensor
h19 h20
10KΩ Resistor
j20
A0
b1
+
a2
+
a3
Pin 9
5V
5V
+
GND
And if you run the code again, you'll see the
output you wanted:
for (x = 1 ; x < 9 ; x++)
{
Serial.print(x);
}
You wanted 1 to 8, but the loop is actually giving you
0 to 7. Whoops! Now you just need to x the loop.
Let's say you wanted a for() loop from 1 to 8,
but your code just doesn't seem to be working
right. Just add Serial.begin(9600); to your
setup() function, and add a Serial.print() or
println() to your loop:
for (x = 0; x < 8; x++)
{
Serial.print(x);
}
Page 55