6
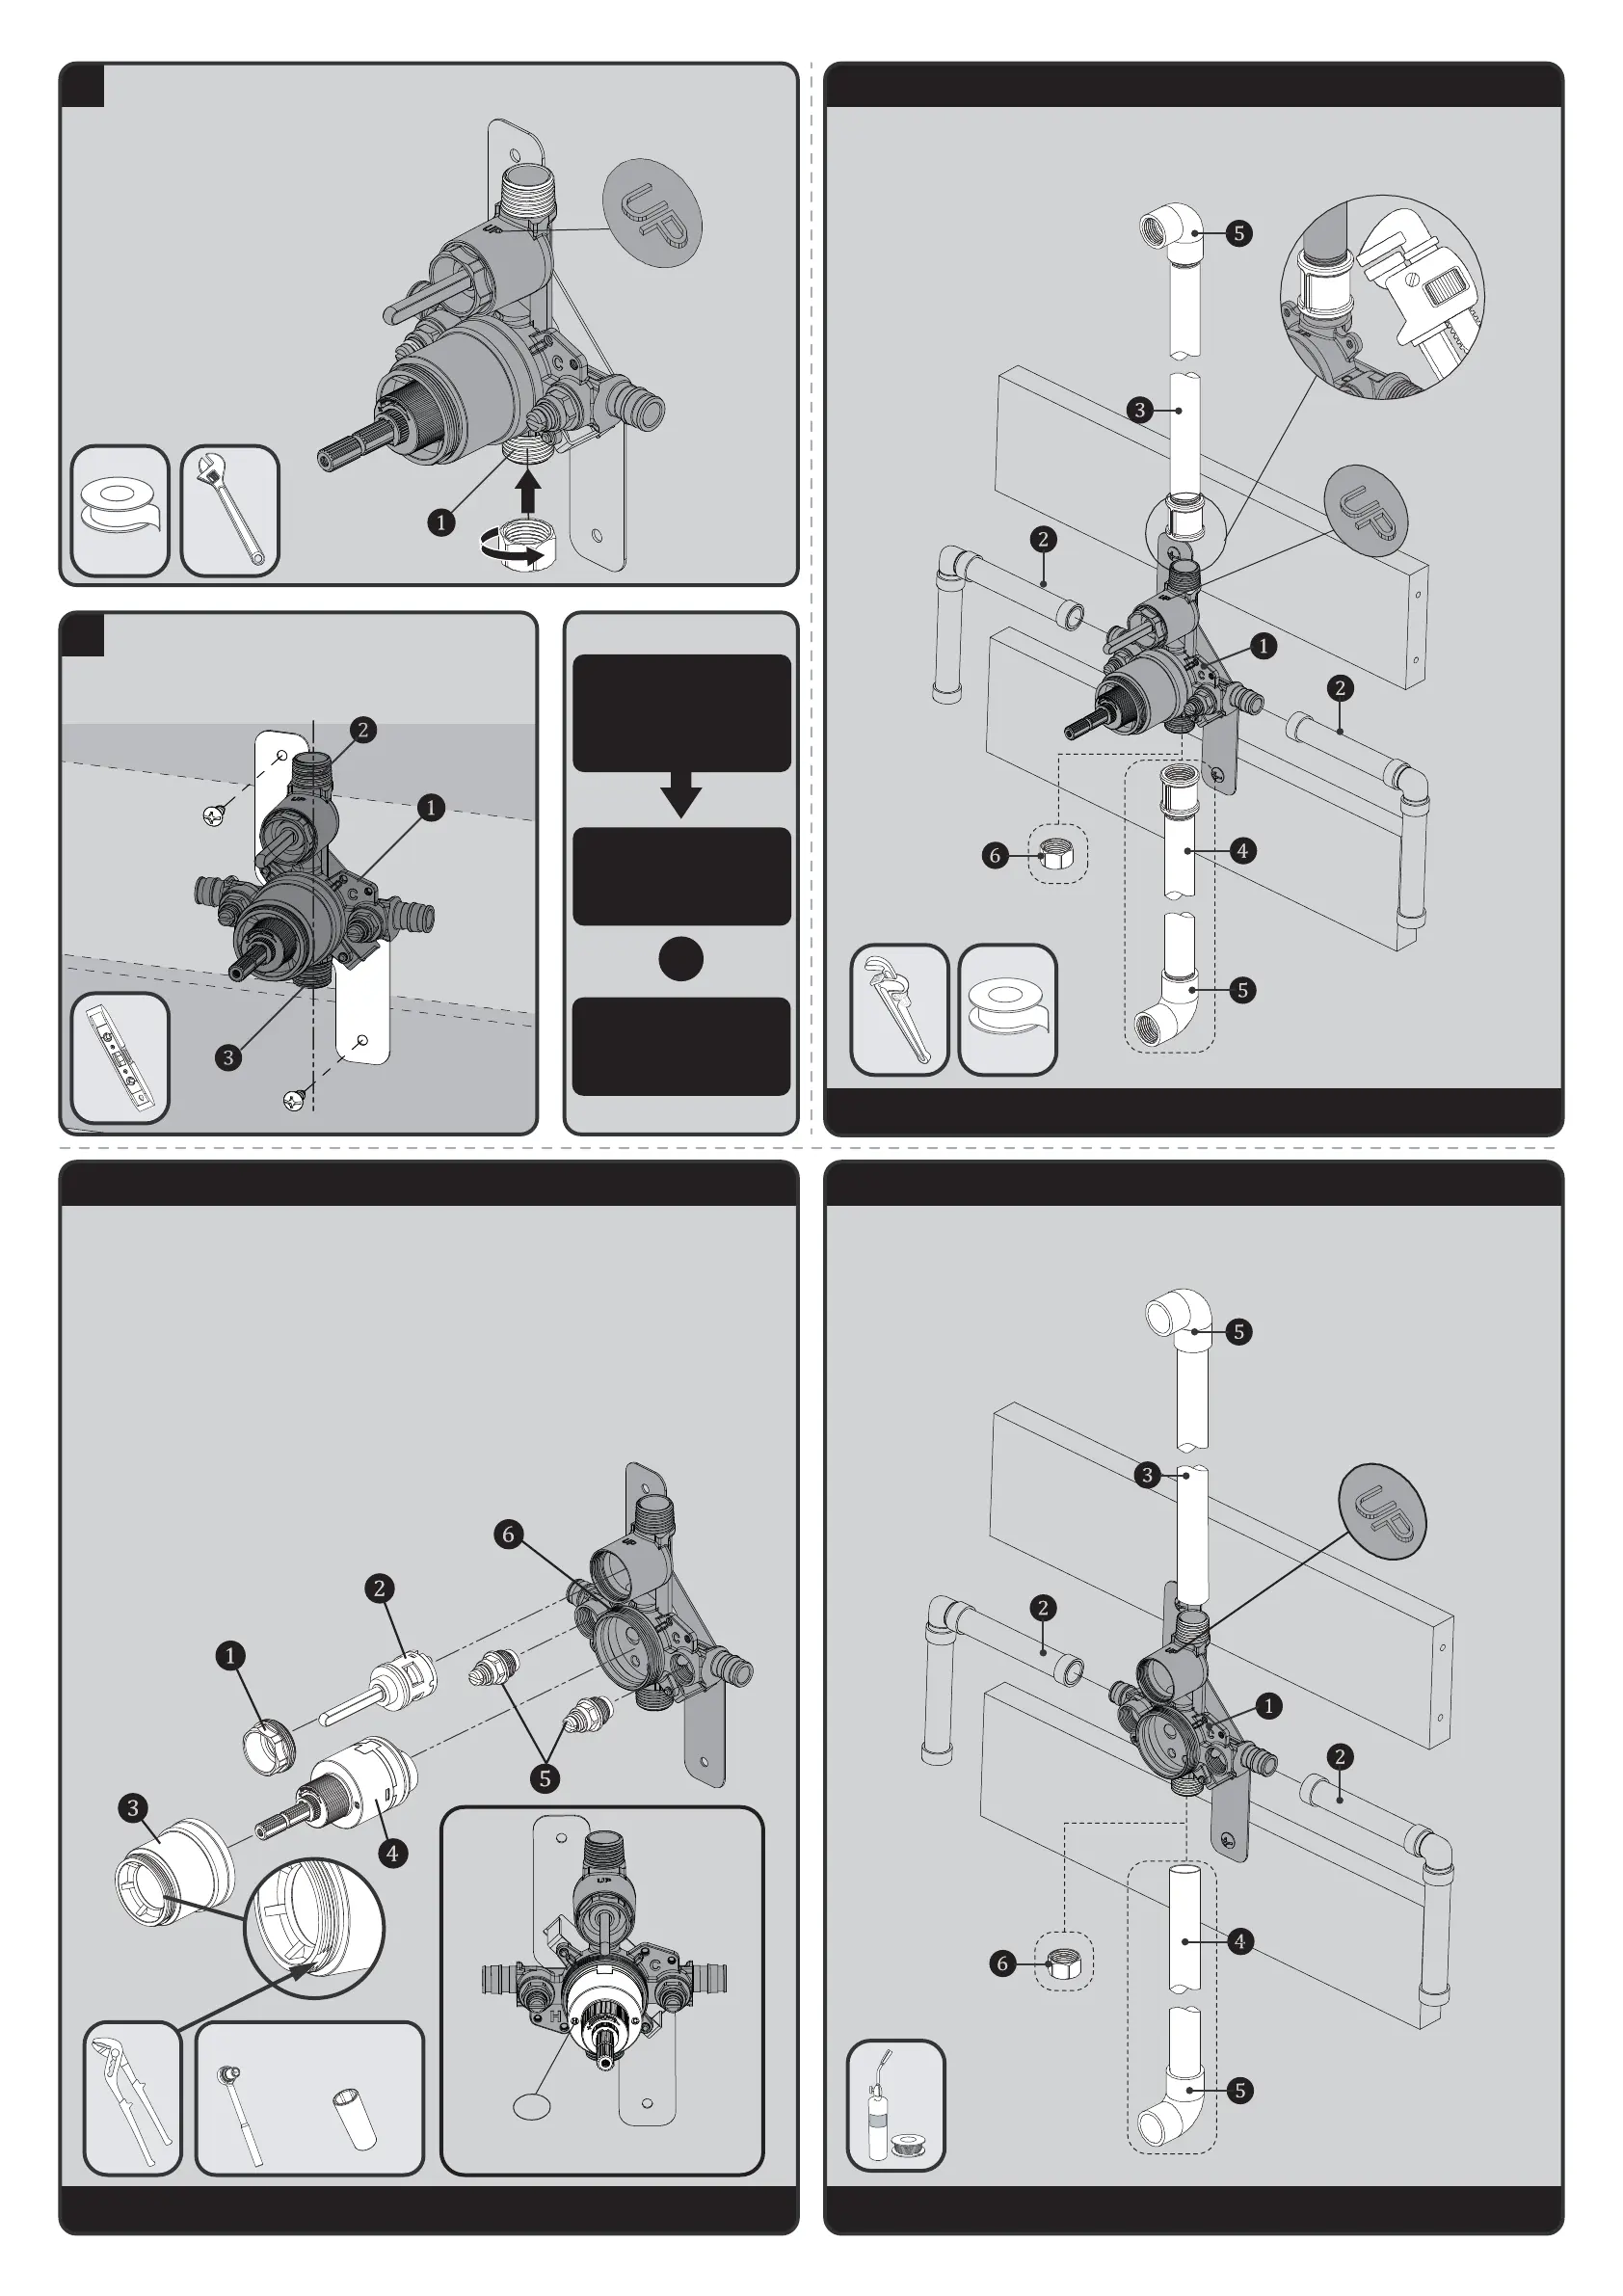
If your installation is for a shower only, apply Thread Seal Tape in a clockwise direction to the Tub Outlet Port ❶
and install the included Plug Cap. Wrench tighten. If you are performing a pipe fitting installation, apply Thread
Seal Tape around the pipe threads in a clockwise direction.
7
Referencing the Rough-In Drawing, mount the Valve Assembly ❶ to
structure within the wall. Ensuring the Shower Outlet ❷ and Tub
Outlet ❸ are positioned perfectly vertical. Mounting Hardware and
Mounting Structure must be capable of supporting the Valve in use.
Mounting hardware is not included.
If you are performing a
Pipe Fitting Outlet
Installation, please
proceed to Step 8.
OR
If you are performing a
Copper Sweat Outlet
Installation, please
proceed to Step 9.
IMPORTANT:
Install all outlet connections
(Pipe or Copper Sweat)
PRIOR to installing PEX
inlet connections.
8 PIPE FITTING INSTALLATION
Connect the Shower Outlet Pipe ❸ (not included), and Tub Outlet Pipe ❹ (not included), by threading them into
the Valve Body ❶ in a clockwise direction. Tighten the pipes to the Valve Body ❶ with a Pipe Wrench. Connect
the Pipe Elbows ❺ (not included), to the end of the shower outlet and tub outlet pipes. If performing a shower
only installation, install Plug Cap ❻ in place of tub outlet piping, as shown in STEP 6.
NOTE: The HOT water supply lines go into the H inlet, and the COLD water supply lines
go into the C inlet. Do not use PEX or CPVC between the valve and spout.
SHOWER ONLY
TUB + SHOWER
COLD
HOT
9 COPPER SWEAT INSTALLATION
When performing a Copper Sweat installation, it is recommended that you remove the Valve Cartridge ❹, Integral Stops
❺, and Diverter Cartridge ❷ (where applicable) to prevent damage during soldering. Use a Slip Joint Wrench to
unthread and remove the Bonnet ❸. Then remove Valve Cartridge ❹, from Valve Body ❻. Unthread and remove the
Integral Stops ❺ using a Socket Wrench equipped with a 9/16” (14mm) Deep Well Socket. If your Shower Valve is
equipped with an Integral Diverter, remove the Diverter Retaining Nut ❶ using an Adjustable Wrench. Remove Diverter
Cartridge ❷ to prevent damage during soldering.
After soldering (STEP 10) is completed, reinstall the Valve Cartridge ❹, making sure that the mounting posts are aligned
and engaged to the corresponding holes in the Valve Body ❻, with the “H” marking to the left side as shown below.
Slide Bonnet ❸ over the Valve Cartridge ❹ and thread onto the Valve Body ❻. Tighten securely with Slip Joint Wrench
on the machined flats of the Bonnet ❸. Final torque should be 88-106 in*lb. Take care to not over tighten connection or
damage may occur. Reinstall the Integral Stops ❺ using a Socket Wrench equipped with a 9/16” (14mm) Deep Well
Socket. Final torque should be 70-106 in*lb. If your Shower Valve is equipped with an Integral Diverter, reinstall the
Diverter Cartridge ❷ taking care to align mounting posts of Cartridge with the corresponding holes in the Diverter Valve
Body. Install Diverter Retaining Nut ❶ and tighten with an Adjustable Wrench. Final torque should be 35-53 in*lb. Take
care to not over-tighten connections.
NOTE: Never install the valve body upside down!
Socket
Wrench
9/16” (14mm) Deep
Well Socket
+
Normal Installation
(shown without Bonnet)
H
10 COPPER SWEAT FITTING INSTALLATION
Connect the Shower Outlet Pipe ❸ (not included), and Tub Outlet Pipe ❹ (not included), by soldering them into
the Valve Vody ❶. Connect the Pipe Elbows ❺ (not included), to the end of the shower outlet and tub outlet
pipes. If performing a shower only installation, install Plug Cap ❻ in place of tub outlet piping, as shown in
STEP 6. Verify that all connections are soldered. Reassemble Valve components as outlined in STEP 9.
NOTE: The HOT water supply lines go into the H inlet, and the COLD water supply lines
go into the C inlet. Do not use PEX or CPVC between the valve and spout.
SHOWER ONLY
TUB + SHOWER
COLD
HOT
 Loading...