PEX (COLD EXPANSION) INSTALLATION INSTRUCTIONS
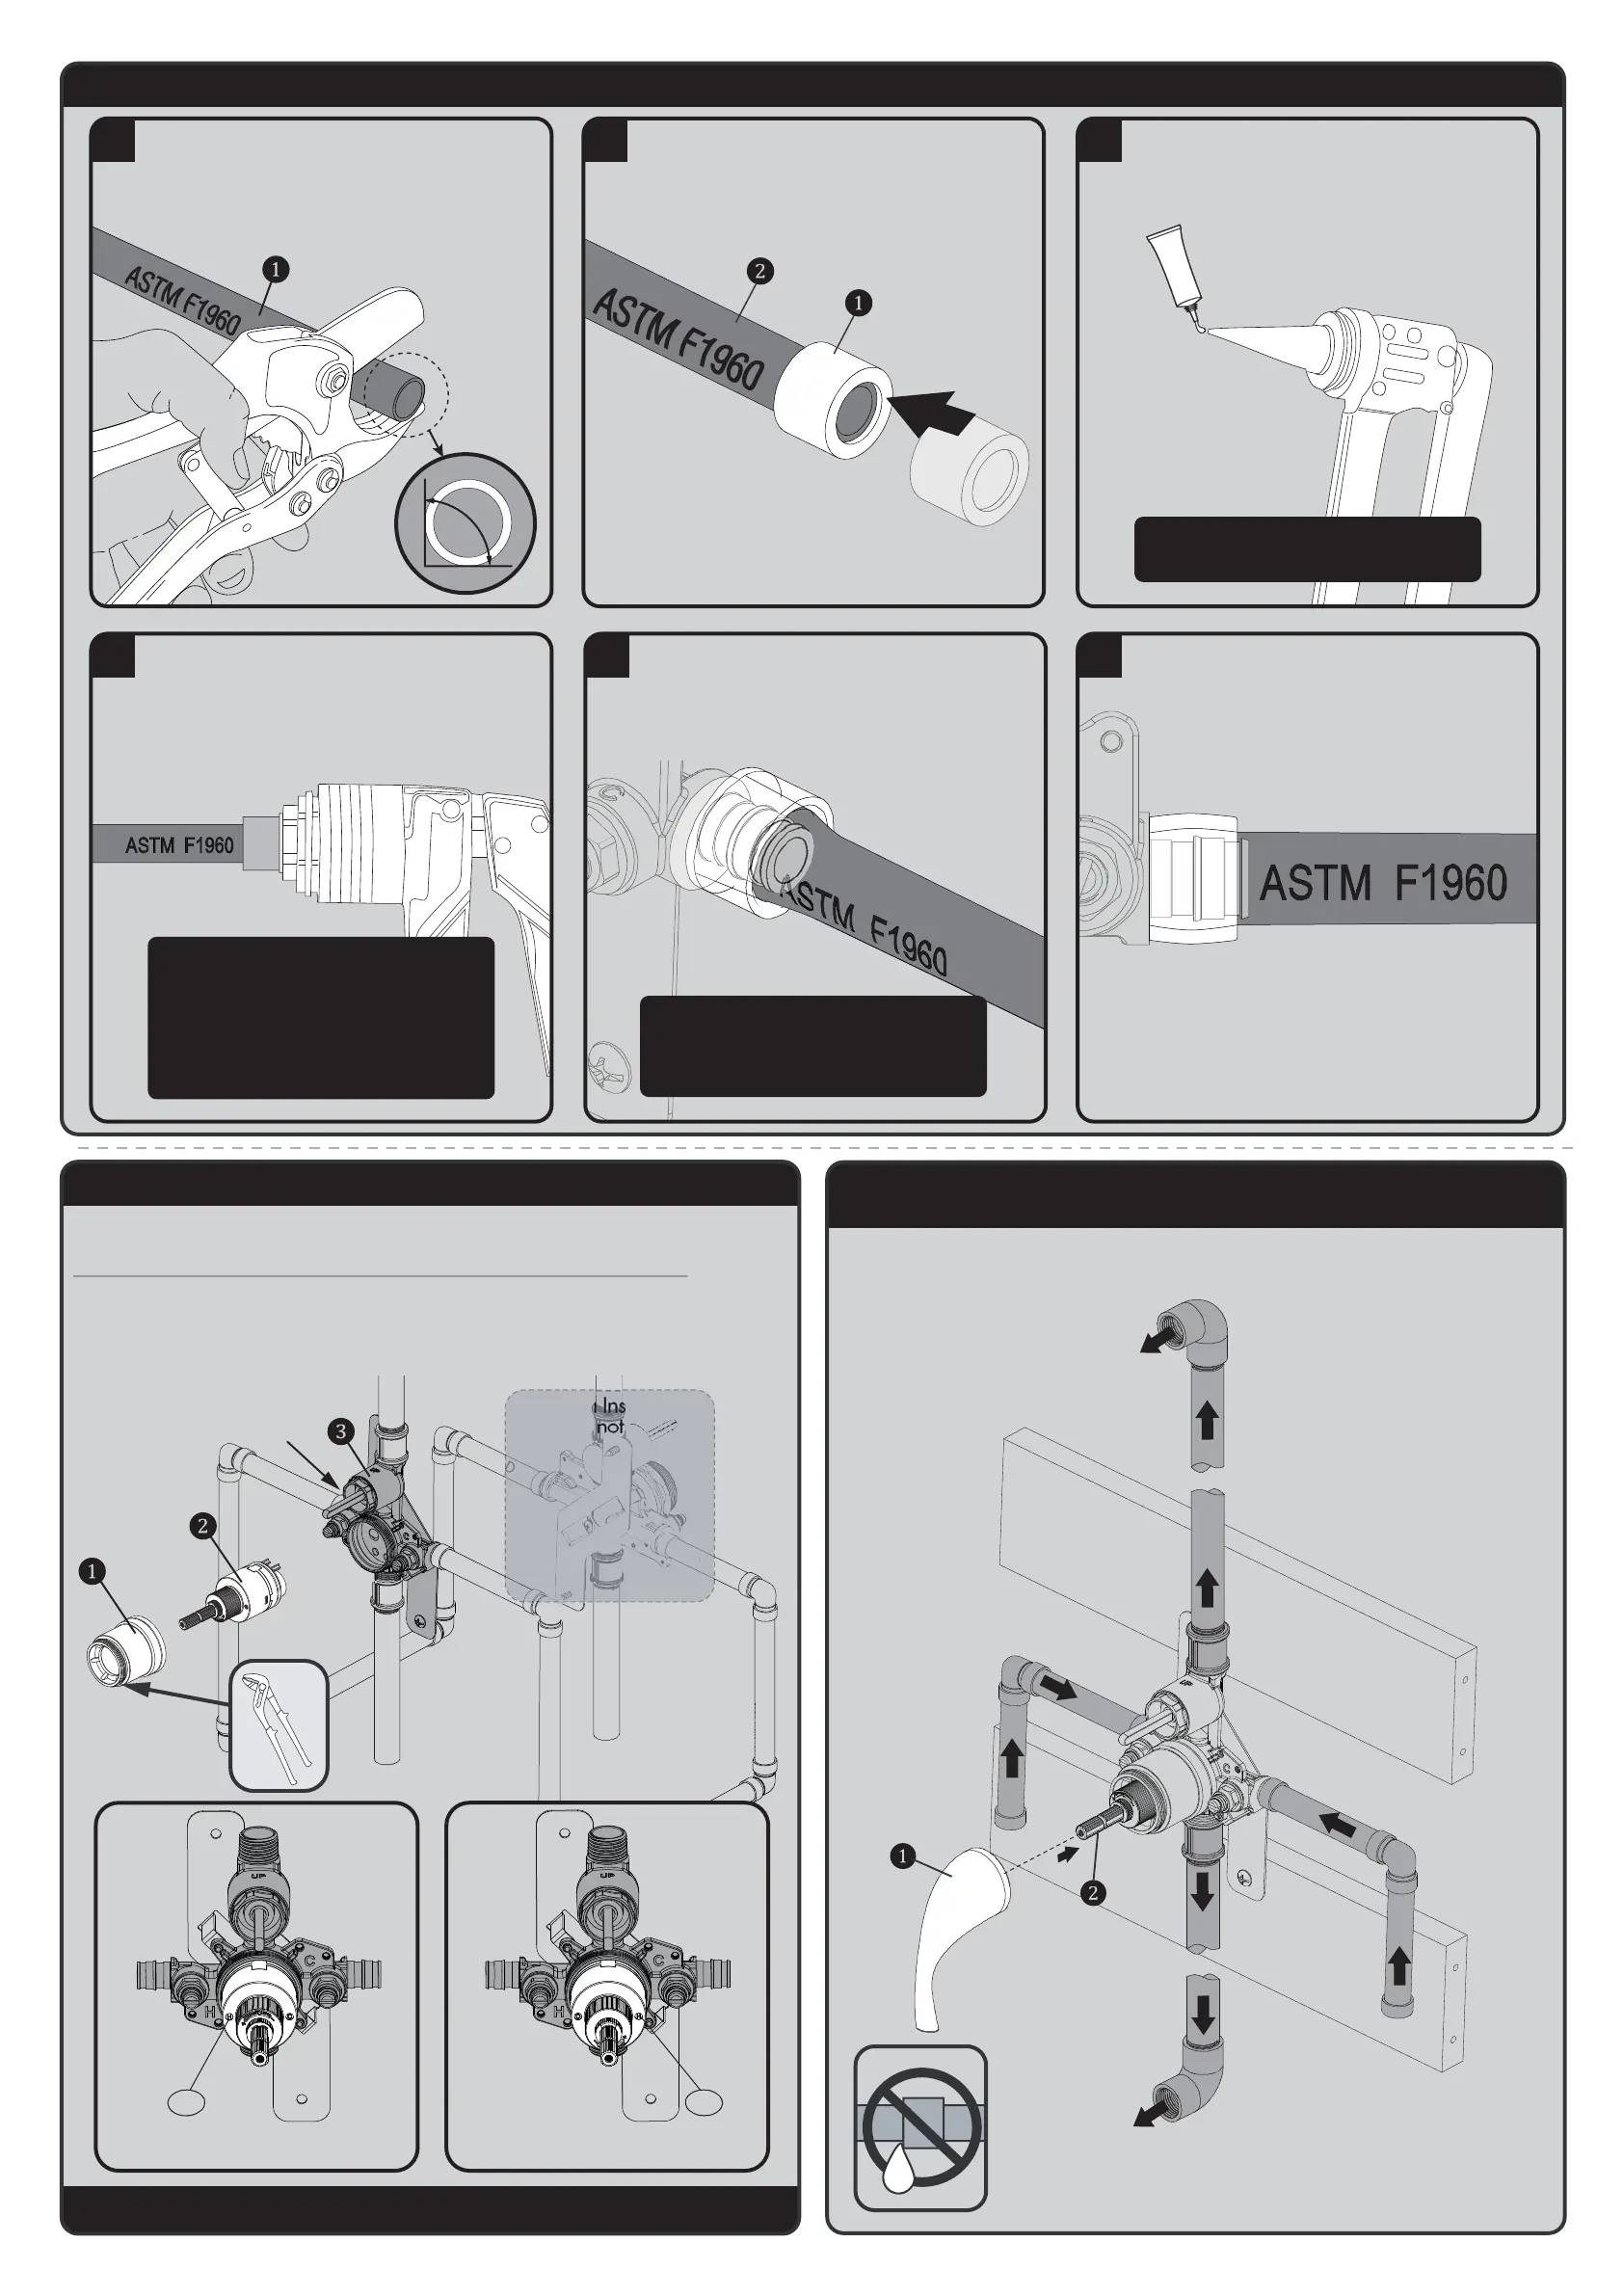
F
Verify that the connection is complete and is secure.
E
After the final expansion, immediately remove the tool and insert
the expanded tube and sleeve onto the PEX barb of the Valve until
it touches the shoulder. Assure proper expansion so that PEX barb
is touching the inside diameter of tube and sleeve. Hold the Valve
in place until tube and sleeve memory constrict annularly around
the PEX barb.
NOTE: Some resistance may be felt as the PEX barb
slides into the expanded tube and sleeve. If no
resistance is felt, then the tube and sleeve may have
been over expanded and will require additional time
to shrink over the PEX barb.
D
Slide the tube and sleeve onto the tapered end of the expansion
head as far as possible without forcing. Expand the tube and
sleeve by closing the handles of the tube expander tool. Release
the handles and allow the head to contract. Repeat expansions
by removing the head from the tubing, rotating expander
1/8-turn, and sliding the head back into the tubing. Failure to
rotate the tool between expansions may cause uneven
expansion of the tube and sleeve and can create a leak path.
NOTE: The number of expansion cycles will
vary with the size of the connection and
installation temperature. To limit the amount of
time for tube and sleeve compression onto PEX
barb in cold environments, expand the tube and
sleeve slowly and only enough to fully insert the
PEX barb. Keeping sleeves warm will speed
retraction and inhibit unequal expansion.
C
Use ASTM F1960 Grip Expansion Tool for expanding PEX tube
and sleeve together. Before installing the appropriate size
expansion head on the tube expander tool, add lubricant lightly
to the cone of the tool if needed. Do not allow lubricant to coat
the inside of the pipe.
NOTE: Lubrication between the expanding cone of
the tool and the expansion head is necessary to
prevent excessive wear.
B
Slide the correct size i.e., ½” ASTM F1960 compliant PEX Sleeve
❶ (not included) on to the Outside Diameter of ½” PEX Tubing ❷
(not included), until it reaches the stop edge. If the Sleeve is
without a stop edge, then extend the Sleeve over the end of the
tubing no more than 1/16”.
A
Use Plastic Tubing Cutters (not included), to cut the ASTM F1960
compliant PEX Tubing ❶ to length. Ensure that a good square (90°)
cut is obtained. A rough or uneven cut will result in a weakened
joint. Do not crush Outer Diameter of tubing with cutters.
Note: Slightly rotate cutter during blade engagement.A rough or
uneven cut will result in a weakened joint.
90°
11 BACK-TO-BACK INSTALLATION
Your Shower Valve has the ability to be mounted back-to-back with another Valve in a shared space. This means the HOT
and COLD inlets may be reversed. Please see the following steps to adapt your valve for back-to-back mounting or
reversed inlet supplies.
If you are NOT making a reverse or back-to-back installation, skip this step, and continue with STEP 12. If the HOT and
COLD water supplies are reversed (HOT on right and COLD on left), disassemble Valve Cartridge as outlined in STEP 9.
Rotate Valve Cartridge ❷ 180° so “H” appears on the right. Install the Valve Cartridge ❷ making sure that the
mounting posts are aligned and engaged to the corresponding holes in the Valve Body ❸. Slide Bonnet ❶ over the
Cartridge and thread onto the body. Tighten securely with Slip Joint Wrench on the machined flats of the Bonnet ❶. Final
torque should be 88-106 in*lb. Take care to not over tighten connection or damage may occur.
NOTE: Never install the valve body upside down!
Reverse
Installation
COLD
COLD
COLD
COLD
COLD
HOT
HOT
HOT
HOT
Normal Installation
(changes not required)
Normal Installation
(shown without Bonnet)
H
Reverse Installation
(shown without Bonnet)
H
12
FLUSHING THE WATER OUTLETS
AND CHECKING FOR LEAKS
Place the Handle ❶ on the Valve Cartridge Spindle ❷ and turn the Handle ❶ clockwise to the full on mixed position.
Turn on the HOT and COLD water supply lines and allow the water to flow from the outlets for one minute, or until all
foreign matter has been flushed out. Check for leaks. Shut off the water at the Valve and supply lines. Remove the
Handle ❶.
 Loading...