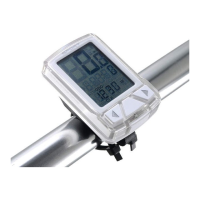
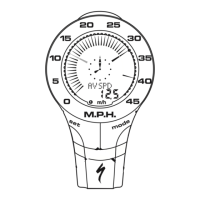
Data Field 1
Battery indicator
1
Speed comparator
3
Data Field 2
6
Mode (Data Field 2)
7
Speed units
4
Clock
5
Left Button Right Button
8
2
9
1. DISPLAY FEATURES
ENGLISH
GENERAL INFO
CLEANING/CARE:
• Do not expose the display to intense heat or sunlight for a prolonged period of time. This can damage the
display and/or battery.
• Only use a damp or dry soft cloth to clean the display. Do not use harsh cleaning products.
• Do not disassemble or drop the display.
• Make sure the display and mount are firmly installed on the handlebar before riding.
DISPOSAL:
Batteries and chargers must not be disposed of in your household trash! All batteries
and chargers must be disposed of in an environmentally friendly manner, in
accordance with the battery disposal regulations in your country or state. Ask your
Authorized Specialized Retailer for information about how to dispose of a battery or
charger and any applicable take-back program.
REGULATORY STATEMENTS
RoHS: Specialized Bicycle Components, Inc. certifies that this product and its packaging are in compliance
with European Union Directive 2011/65/EU on the Restriction of the Use of Certain Hazardous Substances in
Electrical and Electronics Equipment, commonly known as RoHS.
FCC Statement: This device complies with part 15 of the FCC Rules. Caution: If any changes or modifications
not expressly approved by the party responsible for compliance could void the user’s authority to operate
the equipment. Operation is subject to the following two conditions: (1) This device may not cause harmful
interference and (2) it must accept any interference received, including interference that may cause undesired
operation. This grantee is not responsible for any changes or modifications not expressly approved by the party
responsible for compliance. Such modifications could void the user’s authority to operate the equipment. The RF
Exposure Compliance distance is 20 millimeters.
NOTE: This equipment has been tested and found to comply with limits for a Class B digital device, pursuant to
Part 15 of the FCC rules. These limits are designed to provide reasonable protection against harmful interference
in residential installations. This equipment generates, uses, and can radiate radio frequency energy, and if not
installed and used in accordance with the instructions, may cause harmful interference to radio communications.
However, there is no guarantee that interference will not occur in a particular installation. If this equipment does
cause interference to radio or television equipment reception, which can be determined by turning the equipment
off and on, the user is encouraged to try to correct the interference by one or more of the following measures:
• Reorient or relocate the receiving antenna.
• Increase the separation between the equipment and receiver.
• Connect the equipment into an outlet on a circuit different from that to which the receiver is connected.
• Consult the dealer or an experienced radio/TV technician for help.
ISED Canada Statement: This device complies with Industry Canada license-exempt RSS standard(s).
Operation is subject to the following two conditions: (1) this device may not cause interference, and (2) this
device must accept any interference, including interference that may cause undesired operation of the device.
CAN ICES-3(B)/NMB-3(B).
The device meets the exemption from the routine evaluation limits in section 2.5 of RSS 102 and compliance with
RSS-102 RF exposure, users can obtain Canadian information on RF exposure and compliance.
This transmitter must not be co-located or operating in conjunction with any other antenna or transmitter. This equip-
ment should be installed and operated with a minimum distance of 20 millimeters between the radiator and your body.
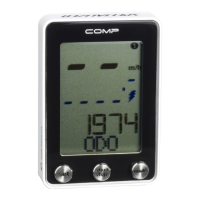
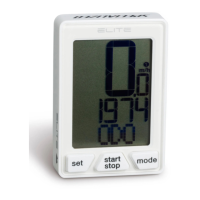
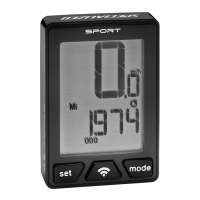
FUNCTION OPTIONS / SPECIFICATIONS
DATA FIELD 1 & 2
KPH/MPH
Speed 0.0 - 99.9 kph / mph
AVG
Average Speed 0.0 - 99.9 kph / mph
DIST
Distance 0.0 - 999.9 km/mi
TIMER
Trip Time
0:00” - 59:59” (second)
01:00’ - 99.59’ (minute)
MAX
Max Speed 0.0 - 99.9 kph / mph
ODO
Odometer 0.0 - 9999 km/mi/
DISPLAY
Clock 00:00 - 23:59 (24hr) / 12:00 - 11:59 (12hr)
Auto sleep / Auto wake 30 minutes / < 8 seconds
Battery type Coin Cell 2032
Dimensions 62mm x 46mm x 14mm
Operating temperature -10° C — +60° C / +14° F — +140° F
Water/dust protection IP67 (
<
1 meter for 30 minutes)
Operating Frequency 120 KHz
Max. Power
<
0.1 mW
Change mode / value Press left button quickly
Change mode / value Press right button quickly
Reset function data Press left button for two (2) seconds
Show odometer Press right button for two (2) seconds
Odometer Setup Press right button for four (4) seconds
System Setup Press left and right buttons for four (4) seconds
Change setup screen Press left and right buttons quickly
Quick-scroll down (setup modes) Press left button for more than 1 second
Quick-scroll up (setup modes) Press right button for more than 1 second
3. LEGEND
H
Low battery
I
Sleep Mode
J
Clear data
K
Show odometer
2. MAIN SCREENS
H
Battery icon turns on (coin cell battery low).
I
No Signal or key for 30 min.
Wake from shipping mode: After removing the display from the packaging, press and hold the
left and right buttons for two (2) seconds to wake up the display for the first time.
J
Clear function data (hold left button for 2 seconds).
K
Show odometer data (hold right button for 2 seconds).
FRENCH / FRANÇAIS
INSTALLATION
• Retirez les composants fixés sur le côté du cintre qui pourraient gêner l’installation du support du compteur.
• Fig. 1 : Installez le support du compteur puis orientez-le dans la bonne position
A
.
• Serrez le support suffisamment pour qu’il ne glisse pas
B
. Ne serrez pas de manière excessive. Le couple
de serrage recommandé est de 4,4 lbf/0,5 Nm.
• Afin d’installer le compteur, positionnez-le latéralement
C
puis orientez-le à 90°
D
.
REMPLACEMENT DE LA PILE
• Fig. 2 : À l’aide d’un très petit tournevis plat, soulevez le bord du couvercle de la pile, puis libérez
délicatement la pile de son emplacement.
• Fig. 3 : Remplacez la pile bouton usagée par une nouvelle pile bouton CR 2032, placez la pile neuve
dans le bouchon en plaçant le texte (+) à l’intérieur du bouchon
E
. Assurez-vous que le joint n’est pas
endommagé et insérez le bouchon en vous assurant que sa languette soit alignée avec l’encoche du boîtier
principal du compteur
F
.
• À chaque fois que la pile est remplacée, l’ensemble des informations sauvegardées dans le compteur est
perdu (compteur kilométrique, chronomètre). Si nécessaire, notez vos informations avant de remplacer la
pile.
• Fig. 3 : Le capteur utilise une pile 23A
G
. Pour accéder à la pile, faites tourner le couvercle à l’aide d’une
pièce de monnaie ou d’un tournevis plat.
1. FONCTIONS DU COMPTEUR
1
Champ des données 1
2
Niveau principal de la pile
3
Comparateur de vitesse
4
Unités de vitesse
5
Horloge
6
Champ des données 2
7
Mode (Champ de données 2)
8
Bouton gauche
9
Bouton droit
2. ÉCRANS PRINCIPAUX
H
Batterie faible : le voyant de batterie s’allume (pile bouton faible).
I
Mode veille : Aucun signal ni appui bouton pendant 30 min.
J
Effacer les données : effacer les données de fonction (appuyer et maintenir enfoncé le bouton gauche
pendant 2 secondes).
K
Afficher l’odomètre : afficher les données de l’odomètre (appuyer et maintenir enfoncé le bouton droit
pendant 2 secondes).
Première mise en service du compteur : après avoir retiré le compteur de son emballage, appuyer et
maintenir enfoncé le bouton gauche et le bouton droit pendant 2 secondes pour activer le compteur
pour la première fois.
3. LÉGENDE
Changer de mode/valeur Appuyer brièvement sur le bouton gauche
Changer de mode/valeur Appuyer brièvement sur le bouton droit
Réinitialiser les données de
fonction
Appuyer sur le bouton gauche pendant deux (2) secondes
Afficher l’odomètre Appuyer sur le bouton droit pendant deux (2) secondes
Configuration de l’odomètre Appuyer sur le bouton droit pendant quatre (4) secondes
Configuration du système
Appuyer sur les boutons gauche et droit pendant
quatre (4) secondes
Modifier l’écran de configuration Appuyer brièvement sur les boutons gauche et droit
Défilement rapide vers le bas
(modes de configuration)
Appuyer et maintenir enfoncé le bouton gauche pendant
plus d’1 seconde
Défilement rapide vers le haut
(modes de configuration)
Appuyer et maintenir enfoncé le bouton droit pendant
plus d’1 seconde
4. INSTALLATION DU CAPTEUR DE VITESSE
L
Ajustez la position de l’aimant de manière à ce qu’il soit aligné sur le repère situé au bas du bord inférieur du
capteur. Placez-le à une distance d’1 à 3 mm (1/32 à 1/8 po). NE PAS trop serrer l’aimant.
M
Le capteur doit être monté avec le couvercle du compartiment à piles dirigé vers le sol, sans dépasser la
distance maximale de 600 mm (24 po) entre le capteur et le guidon.
5. NAVIGATION ENTRE PAGES ET RÉGLAGES
• Il y a 4 pages programmées et chacune d’entre elles affiche différentes informations.
• On peut passer d’une page à une autre en utilisant les boutons gauche/droit.
N
Pour effacer les données Distance, Vitesse moyenne, Chronomètre et Vitesse max., appuyez et maintenez
enfoncé le bouton gauche pendant deux (2) secondes.
6. CONFIGURATION DU SYSTÈME
• Sélectionnez le format d’heure souhaité
O
(12 ou 24 heures) et définissez les valeurs d’heure
P
et de
minutes
Q
.
• Définissez les unités
R
(km/h or mph).
• Définissez la taille de la roue
S
et du pneu
T
(valeur prédéfinie ou personnalisée).
• Si la taille de votre roue ou de votre pneu n’est pas répertoriée ou si vous souhaitez garantir la plus grande
précision possible, mesurez la circonférence de votre roue
U
(une rotation complète, en utilisant la valve
V
comme repère).
6. CONFIGURATION DU SYSTÈME (taille de pneu personnalisée)
• Lorsque vous sélectionnez l’option personnalisée (CUST)
W
dans les options de diamètre de roue, le
voyant Champ de données 2 clignote. Saisissez la circonférence du pneu en millimètres. Pour faire défiler
rapidement, appuyez et maintenez enfoncé le bouton gauche pour faire défiler vers le bas ou le bouton droit
pour faire défiler vers le haut.
7. CONFIGURATION DE L’ODOMÈTRE
• Une fois la pile remplacée, l’odomètre peut être réglé manuellement
X
, indépendamment de la
configuration système.
• Appuyez et maintenez enfoncé le bouton droit pendant quatre (4) secondes, définissez le premier chiffre,
puis appuyez simultanément sur les boutons gauche et droit pour passer au chiffre suivant et le définir.
Répétez la procédure pour les quatre chiffres jusqu’à ce que l’odomètre soit réglé.
INFORMATIONS GÉNÉRALES
NETTOYAGE/ENTRETIEN :
• N’exposez jamais le compteur à des sources de chaleur excessive ou aux rayons du soleil pendant une
longue période. Cela pourrait endommager le compteur et/ou la pile.
• Pour nettoyer le compteur, utilisez uniquement un chiffon en tissu doux humide ou sec. N’utilisez pas de
détergents agressifs.
• Ne démontez et ne faites jamais tomber le compteur.
• Vérifiez que le compteur et son support sont parfaitement fixés sur le cintre de votre vélo avant de l’utiliser.
RECYCLAGE :
Ne jetez pas les batteries et chargeurs avec les ordures ménagères ! Les batteries et
chargeurs doivent être éliminés d’une manière respectueuse pour l’environnement,
conformément à la réglementation sur l’élimination des batteries en vigueur dans votre
pays. Demandez à votre revendeur Specialized agréé des informations sur la mise au
rebut d’une batterie ou d’un chargeur et tout programme de reprise en vigueur.
DISPOSITIONS RÉGLEMENTAIRES
RoHS: Specialized Bicycle Components, Inc. certifie que ce produit et son emballage sont conformes à la
directive de l’Union européenne 2011/65/EU relative à la limitation de l’utilisation de certaines substances
dangereuses dans les équipements électriques et électroniques, communément appelée directive RoHS.
Déclaration ISDE Canada: Cet appareil respecte la ou les normes RSS non soumises à licence d’Industrie
Canada. Son fonctionnement est soumis aux deux conditions suivantes : (1) cet appareil ne doit pas causer
d’interférences et (2) cet appareil doit accepter toute interférence, y compris les interférences pouvant entraîner
un fonctionnement non désiré de l’appareil. CAN ICES-3(B)/NMB-3(B).
Ce dispositif respecte l’exemption d’évaluation de routine des limitations de la section 2.5 de la RSS 102 et la
conformité à l’exposition aux RF de la RSS-102. Les utilisateurs peuvent obtenir des informations canadiennes
relatives à l’exposition et la conformité aux RF.
Cet émetteur ne doit pas être installé ou utilisé en conjonction avec d’autres antennes ou autres émetteurs.
Cet appareil ne doit pas être installé et fonctionner à moins de 20 millimètres de distance entre le radiateur et
votre corps.
OPTIONS/CARACTÉRISTIQUES DES FONCTIONNALITÉS
CHAMP DES DONNÉES 1 ET 2
KM/H OU MI/H
Vitesse 0,0 – 99,9 km/h ou mi/h
AVG
Vitesse moyenne 0,0 – 99,9 km/h ou mi/h
DIST
Distance 0,0 – 999,9 km/mile
CHRONOMÈTRE
Temps de déplacement
0:00” - 59:59” (seconde)
01:00’ - 99.59’ (minute)
MAX
Vitesse maximale 0,0 – 99,9 km/h ou mi/h
ODO
Odomètre 0,0 – 9 999 km/mile
AFFICHAGE
Horloge 00:00 - 23:59 (24 h) / 1:00 - 12:59 (12 h)
Veille automatique / Fin de veille automatique 30 minutes / < 8 secondes
Type de pile Pile bouton 2032
Dimensions 62 mm x 46 mm x 14 mm
Température de fonctionnement -10° C — +60° C / +14° F — +140° F
Protection contre l’humidité/la poussière
IP67 (immersion < 1 mètre pendant
30 minutes)
Nous pouvons ponctuellement publier des mises à jour et des compléments à ce document. Veuillez consulter régulière-
ment www.specialized.com ou contacter notre service Rider Care pour être assuré d’avoir les dernières informations.
Info: ridercare@specialized.com / 877-808-8154
• Fig 2: Use a very small flat head screwdriver to lift
up the edge of the battery cap, then gently lift the
battery out of the cap.
• Fig 3: Replace the display unit battery with a new
CR 2032 coin cell battery, place the new battery into
the cap with the text facing inside the cap
E
. Make
sure the seal is not damaged and press the cap back
in, making sure the tab of the lid is first aligned with
the recess on the display
F
.
• When the battery is replaced, all information stored on the display (odometer, timer) is erased. If desired,
take note of the information before replacing the battery.
• Fig 3: The sensor uses a 23A battery
G
. To access the battery, rotate the cap using a coin or flat head screwdriver.
• Remove the components from the side of the handlebar
intended for the installation of the display mount.
• Fig. 1: Install the display mount and rotate into position
A
.
• Tighten until the mount does not slip easily
B
. Do not
overtighten. Recommended torque is 4.4 in-lbf / 0.5 N .
• To install the display, position sideways
C
then rotate 90°
D
.
BATTERY REPLACEMENTINSTALLATION
SPEEDZONE II
GERMAN / DEUTSCH
INSTALLATION
• Entfernen Sie die Komponenten von der Seite des Lenkers, an der die Display-Halterung installiert werden soll.
• Abb. 1: Installieren Sie die Display-Halterung und drehen Sie sie in die richtige Position
A
.
• Ziehen Sie die Halterung fest, bis sie nicht mehr leicht verschoben werden kann
B
. Die Halterung nicht zu
fest anziehen. Das empfohlene Drehmoment beträgt 0,5 Nm (4,4 in-lbf).
• Um das Display anzubringen, setzen Sie es seitlich
C
auf und drehen Sie es dann um 90°
D
.
AUSTAUSCH DER BATTERIE
• Abb. 2: Heben Sie die Kante der Batterieabdeckung mit einem kleinen Schlitzschraubendreher an und
nehmen Sie die Batterie vorsichtig aus der Abdeckung heraus.
• Abb. 3: Ersetzen Sie die Batterie der Display-Einheit durch eine neue Knopfzellenbatterie CR 2032, legen
Sie die neue Batterie so in die Kappe, dass der Text auf der Batterie zur Kappe weist
E
. Stellen Sie sicher,
dass die Dichtung nicht beschädigt ist, und drücken Sie die Kappe wieder hinein. Achten Sie dabei darauf,
dass die Lasche des Deckels auf die Aussparung im Display ausgerichtet ist
F
.
• Beim Austausch der Batterie werden alle im Display gespeicherten Informationen (Kilometerstand, Timer)
gelöscht. Zeichnen Sie diese Informationen falls gewünscht auf, bevor Sie die Batterie ersetzen.
• Abb. 3: Der Sensor wird mit einer 23A-Batterie betrieben
G
. Um Zugang zur Batterie zu erhalten, drehen
Sie den Deckel mit einer Münze oder einem Schlitzschraubendreher.
1. DISPLAY-FUNKTIONEN
1
Datenfeld 1
2
Ladestand der Hauptbatterie
3
Geschwindigkeitsvergleich
4
Geschwindigkeitseinheiten
5
Uhr
6
Datenfeld 2
7
Modus (Datenfeld 2)
8
Linke Taste
9
Rechte Taste
2. HAUPTANZEIGEN
H
Batterie schwach: Batteriesymbol leuchtet auf (niedriger Knopfzellen-Ladestand).
I
Ruhemodus: Kein Signal oder Tastendruck für 30 Minuten.
J
Daten löschen: Zum Löschen der Funktionsdaten linke Taste 2 Sekunden lang drücken.
K
Kilometerzähler anzeigen: Zum Anzeigen des Kilometerzählerstands rechte Taste 2 Sekunden lang drücken.
Das Aufwachen aus dem Versand-Modus: Nachdem Sie das Display aus der Verpackung genommen ha-
ben, drücken und halten Sie die rechte und linke Taste für (2) Sekunden, um die Elektronik aufzuwachen.
3. LEGENDE
Modus / Wert ändern Linke Taste kurz drücken
Modus / Wert ändern Rechte Taste kurz drücken
Funktionsdaten zurücksetzen Linke Taste zwei (2) Sekunden lang drücken
Kilometerzähler anzeigen Rechte Taste zwei (2) Sekunden lang drücken
Kilometerzählereinrichtung Rechte Taste vier (4) Sekunden lang drücken
Systemeinrichtung Linke und rechte Taste vier (4) Sekunden lang drücken
Einrichtungsbildschirm ändern Linke und rechte Taste kurz drücken
Schnell nach unten scrollen
(Einrichtungsmodi)
Linke Taste länger als eine (1) Sekunde lang drücken
Schnell nach oben scrollen
(Einrichtungsmodi)
Rechte Taste länger als eine (1) Sekunde lang drücken
4. INSTALLATION DES GESCHWINDIGKEITSSENSORS
L
Positionieren Sie den Magneten so, dass er mit der Linie an der unteren Kante des Sensors fluchtet. Der
Abstand sollte 1-3 mm (1/32-1/8 in) betragen. Ziehen Sie den Magneten NICHT zu fest an.
M
Der Sensor sollte so angebracht werden, dass der Batteriefachdeckel zum Boden weist und der Abstand
zwischen Sensor und Lenker nicht mehr als 600 mm (24 in) beträgt.
5. STANDARDEINSTELLUNG/NAVIGATION DER SEITEN
• Es sind 4 Seiten voreingestellt, von denen jede eine unterschiedliche Kombination von Informationen anzeigt.
• Die Seiten können mit der linken/rechten Taste durchlaufen werden.
N
Um die Daten für Entfernung, Durchschnittsgeschwindigkeit, Fahrzeit und Höchstgeschwindigkeit zu
löschen, drücken Sie die linke Taste zwei (2) Sekunden lang.
6. SYSTEMEINRICHTUNG
• Wählen Sie das gewünschte Anzeigeformat
O
(12- oder 24-Stundenanzeige) und stellen Sie Stunden
P
und Minuten
Q
ein .
• Stellen Sie die Einheiten
R
(km/h oder mph) ein.
• Stellen Sie die Rad-
S
und Reifengröße
T
(voreingestellter oder benutzerdefinierter Wert) ein.
• Falls Ihre Rad-/Reifengröße nicht aufgeführt ist oder Sie höchste Genauigkeit gewährleisten möchten,
messen Sie den Radumfang
U
(eine volle Umdrehung eines Rads; verwenden Sie den Ventilschaft
V
als Markierung).
6. SYSTEMEINRICHTUNG (Benutzerdefinierte Reifengröße)
• Wenn Sie die Option „CUST“
W
(benutzerdefiniert) aus den Raddurchmesseroptionen auswählen, beginnt
das Datenfeld 2 zu blinken. Geben Sie den gemessenen Reifenumfang in Millimeter ein. Zum schnellen
Scrollen, halten Sie die linke Taste gedrückt, um nach unten zu scrollen, oder die rechte Taste, um nach
oben zu scrollen.
7. KILOMETERZÄHLEREINRICHTUNG
• Nach dem Wechsel der Batterie kann der Kilometerzähler manuell
X
, unabhängig von der
Systemeinrichtung, eingestellt werden.
• Drücken Sie die rechte Taste vier (4) Sekunden lang, stellen Sie die erste Ziffer ein, drücken Sie dann die
linke und rechte Taste gleichzeitig, um zur nächsten Ziffer zu wechseln und stellen Sie diese Ziffer ein.
Wiederholen Sie diesen Vorgang bis alle vier Ziffern des Kilometerzählers eingestellt sind.
ALLGEMEINE INFORMATIONEN
REINIGUNG/PFLEGE:
• Das Display nicht für längere Zeit starker Hitze oder Sonneneinstrahlung aussetzen. Dadurch können das
Display und/oder die Batterie beschädigt werden.
• Zum Reinigen des Displays ausschließlich ein feuchtes oder trockenes weiches Tuch verwenden. Keine
aggressiven Reinigungsmittel verwenden.
• Das Display nicht zerlegen oder fallen lassen.
• Vor Beginn der Fahrt sicherstellen, dass das Display und die Halterung fest am Lenker installiert sind.
ENTSORGUNG:
Batterien und Ladegeräte dürfen nicht im Hausmüll entsorgt werden. Alle Batterien und
Ladegeräte müssen auf eine umweltverträgliche Art und Weise und in Übereinstimmung mit
den geltenden gesetzlichen Bestimmungen entsorgt werden. Fragen Sie Ihren autorisierten
Specialized-Fachhändler über die fachgerechte Entsorgung und eine Rücknahme-Möglich-
keit.
GESETZLICHE VORGABEN
RoHS: Specialized Bicycle Components, Inc. versichert, dass dieses Produkt und seine Verpackung die
Anforderungen der Richtlinie 2011/65/EU zur Beschränkung der Verwendung bestimmter gefährlicher Stoffe in
Elektro- und Elektronikgeräten, gemeinhin als RoHS bezeichnet, erfüllt.
FUNKTIONSOPTIONEN/TECHNISCHE DATEN
DATENFELD 1 UND 2
KPH/MPH
Fahrgeschwindigkeit 0,0–99,9 km/h / mph
AVG
Durchschnittsgeschwindigkeit 0,0–99,9 km/h / mph
DIST
Entfernung 0,0–999,9 km / meile
TIMER
Fahrtzeit
0:00” - 59:59” (Sekunde)
01:00’ - 99.59’ (minute)
MAX
Höchstgeschwindigkeit 0,0–99,9 km/h / mph
ODO
Kilometerstand 0,0 - 9999 km / meile
DISPLAY
Uhr 00:00–23:59 (24 Std.) / 1:00–12:59 (12 Std.)
Auto-Ruhemodus / -Aktivmodus 30 Minuten / < 8 Sekunden
Batterietyp Knopfzelle 2032
Abmessungen 62 mm x 46 mm x 14 mm
Betriebstemperatur -10° C – +60° C / +14° F – +140° F
Gehäuseschutzart IP67 ( < 1 Meter für 30 Minuten)
Wir veröffentlich möglicherweise gelegentlich Aktualisierungen oder Ergänzungen zu diesem Dokument. Bitte
besuchen Sie regelmäßig www.specialized.com oder wenden Sie sich an Rider Care, um sicherzustellen, dass Sie auf
dem neusten Stand sind.
Info: ridercare@specialized.com / 877-808-8154
21 3
4. SPEED SENSOR INSTALLATION
L
Adjust the magnet position so the magnet is aligned with the line on the bottom of the edge of the sensor.
Position with 1/32 - 1/8 in (1-3mm) of separation. DO NOT overtighten the magnet.
M
The sensor should be mounted with the battery door cap toward the ground, with no more than 24” (in) /
600mm distance between the sensor and the handlebar.
L
M
5. DEFAULT PAGE SETTINGS/NAVIGATION
• There are 4 preset pages, each of which displays a different combination of information.
• The pages can be navigated using the left / right buttons.
N
To clear the Distance, Average speed, Timer and Max speed data, press the left button for two (2) seconds.
Distance Average speed Timer Max speed
N
6. SYSTEM SETUP
TIME 12/24
UNITS
HOUR
MINUTE
TIRE SIZE
DIAMETER
O P
R
S
T
Q
6. SYSTEM SETUP
• Choose the desired time
O
(12 or 24 hour), hour
P
and minute
Q
.
• Set the units
R
(km/h or mph).
• Set the wheel
S
and tire
T
size (preset or custom).
• If your wheel/tire size is not listed or you want to guarantee the closest accuracy, measure your wheel
circumference
U
(one full rotation of a wheel, using the valve stem
V
as a marker).
VALVE
STEM
VALVE
STEM
1x
CIRCUMFERENCE (mm)
U
V
7. ODOMETER SETUP
• After replacing the battery, the odometer can be set manually
X
,
separately from the system setup.
• Press the right button for four (4) seconds, set the first digit, then
press the left and right buttons together to move to the next digit
and set it. Repeat for all four digits until the odometer is set.
X
W
6. SYSTEM SETUP (custom tire size)
• When selecting the custom (CUST)
W
option from the wheel
diameter options, Data Field 2 will flash. Enter the tire circumference
size in millimeters. To scroll quickly, press and hold the left button to
scroll down or the right button to scroll up.
W
We may occasionally issue updates and addendums to this document. Please periodically check www.specialized.com
or contact Rider Care to make sure you have the latest information.
Info: ridercare@specialized.com / 877-808-8154
SPECIALIZED BICYCLE COMPONENTS
15130 Concord Circle, Morgan Hill, CA 95037 (408) 779-6229
0000133769_UM_R4, 09/19
E
F
G
A
B
D
C
ประเทศไทย: เครื่องโทรคมนาคมและอุปกรณ์นี้ มีความสอดคล้องตามข้อกำาหนดของ กสทช.
ITALIAN / ITALIANO
INSTALLAZIONE
• Rimuovere i componenti dal lato del manubrio destinato all’installazione del supporto del display.
• Fig. 1: Installare il supporto del display e ruotarlo in posizione
A
.
• Serrare fino a quando il supporto non scivola facilmente
B
. No serrare eccessivamente. La coppia di
serraggio consigliata è 4,4 in-lbf/0,5 Nm.
• Per installare il display, posizionarlo lateralmente
C
e ruotarlo di 90°
D
.
SOSTITUZIONE DELLA BATTERIA
• Fig. 2: Utilizzare un cacciavite a testa piatta molto piccolo per sollevare il bordo del coperchio della batteria,
quindi sollevare delicatamente la batteria dal coperchio.
• Fig. 3: Sostituire la batteria dell’unità display con una nuova batteria a bottone CR 2032, inserire la nuova
batteria nel coperchio con il testo rivolto verso l’interno del coperchio
E
. Accertarsi che la guarnizione non
sia danneggiata e premere nuovamente il coperchio, accertandosi che la linguetta del coperchio sia prima
allineata con l’incavo sul display
F
.
• Quando la batteria viene sostituita, tutte le informazioni memorizzate sul display (contachilometri, timer)
vengono cancellate. Se lo si desidera, prendere nota delle informazioni prima di sostituire la batteria.
• Fig. 3:
Il sensore utilizza una batteria da 23A
G
. Per accedere alla batteria, ruotare il coperchio con un
cacciavite a testa piatta o una moneta.
1. FUNZIONI DEL DISPLAY
1
Campo dati 1
2
Livello batteria principale
3
Comparatore di velocità
4
Unità di velocità
5
Orologio
6
Campo dati 2
7
Modalità (Campo dati 2)
8
Pulsante sinistro
9
Pulsante destro
2. SCHERMATE PRINCIPALI
H
Modalità (Campo dati 2) (batteria a bottone in esaurimento).
I
Modalità Sleep: Nessun segnale o chiave per 30 min.
J
Cancella dati: Cancella i dati funzione (tenere premuto il tasto sinistro per 2 secondi).
K
Mostra contachilometri: Mostra i dati del contachilometri (tenere premuto il pulsante destro per 2 secondi).
Riattivazione dalla modalità di spedizione: dopo aver rimosso il display dalla confezione, tenere
premuti i pulsanti sinistro e destro per due (2) secondi per riattivare il display per la prima volta.
3. LEGENDA
Cambia modalità/valore Premere il pulsante sinistro rapidamente
Cambia modalità/valore Premere il pulsante destro rapidamente
Resetta i dati della funzione Premere il pulsante sinistro per due (2) secondi
Mostra contachilometri Premere il pulsante destro per due (2) secondi
Imposta contachilometri Premere il pulsante destro per quattro (4) secondi
Configurazione del sistema Premere i pulsanti destro e sinistro per quattro (4) secondi
Schermata di modifica delle
impostazioni
Premere i pulsanti sinistro e destro rapidamente
Scorrimento rapido verso il basso
(modalità di configurazione)
Premere il pulsante sinistro per più di (1) secondo
Scorrimento rapido verso l'alto
(modalità di configurazione)
Premere il pulsante destro per più di (1) secondo
4. INSTALLAZIONE DEL SENSORE DI VELOCITÀ
L
Regolare la posizione del magnete in modo che il magnete sia allineato con la linea sul bordo inferiore del
sensore. Posizionarlo con 1/32 - 1/8 in (1-3 mm) di separazione. NON serrare eccessivamente il magnete.
M
Il sensore deve essere montato con il coperchio dello sportello della batteria verso terra, con una distanza
massima di 24” (pollici)/600 mm tra il sensore e il manubrio.
5. IMPOSTAZIONI DI PAGINA PREDEFINITE/ESPLORAZIONE
• Ci sono 4 pagine prefissate, ciascuna delle quali mostra una diversa combinazione di informazioni.
• Le pagine possono essere esplorate utilizzando i pulsanti sinistro/destro.
N
Per cancellare i dati relativi a Distanza, Velocità media, Timer e Velocità massima, premere il tasto sinistro per
due (2) secondi.
6. CONFIGURAZIONE DEL SISTEMA
• Selezionare la modalità di visualizzazione delle ore
O
(12 o 24 ore), l’ora
P
e i minuti
Q
desiderati.
• Impostare le unità di misura
R
(km/h o mph).
• Impostare le dimensioni delle ruote
S
e degli pneumatici
T
(preimpostate o personalizzate).
• Se le dimensioni della ruota/pneumatico non sono elencate o se si desidera garantire la massima
precisione, misurare la circonferenza della ruota
U
(un giro completo di una ruota, utilizzando come
marcatore lo stelo della valvola
V
).
6. CONFIGURAZIONE DEL SISTEMA (Dimensione pneumatico personalizzata)
• Quando si seleziona l’opzione personalizzata (CUST)
W
dalle opzioni del diametro della ruota, il campo
dati 2 lampeggia. Immettere le dimensioni della circonferenza dello pneumatico in millimetri. Per scorrere
rapidamente, tenere premuto il tasto sinistro per scorrere verso il basso o il tasto destro per scorrere verso l’alto.
7. IMPOSTAZIONE DEL CONTACHILOMETRI
• Dopo aver sostituito la batteria, il contachilometri può essere impostato manualmente
X
, separatamente
dalla configurazione del sistema.
• Premere il pulsante destro per quattro (4) secondi, impostare la prima cifra, quindi premere insieme i pulsanti
sinistro e destro per passare alla cifra successiva e impostarla. Ripetere per tutte e quattro le cifre fino a
quando il contachilometri non è impostato.
INFO GENERALI
PULIZIA/CURA:
• Non esporre il display a intenso calore o alla luce diretta del sole per un periodo di tempo prolungato. Questo
può danneggiare il display e/o la batteria.
• Utilizzare esclusivamente un panno morbido bagnato o asciutto per pulire il display. Non utilizzare prodotti
detergenti aggressivi.
• Non smontare o far cadere il display.
• Assicurarsi che il display e il supporto siano saldamente installati sul manubrio prima di mettersi alla guida.
SMALTIMENTO:
Batteria e caricabatterie non devono essere gettati nei rifiuti domestici! Tutte le
batterie difettose o usate ed i caricabatterie devono essere raccolti separatamente e
smaltiti in modo ecologico, in accordo con le normative di smaltimento delle batterie
nel vostro paese o stato. Chiedete al vostro Rivenditore Autorizzato Specialized
informazioni su come smaltire batterie o caricabatterie.
DICHIARAZIONI DI CONFORMITÀ ALLE NORME
RoHS: Specialized Bicycle Components, Inc. certifica che questo prodotto e la relativa confezione sono con-
formi alla Direttiva dell’Unione Europea 2011/65/UE sulla Restrizione dell’uso di determinate sostanze pericolose
nelle apparecchiature elettriche ed elettroniche, comunemente nota come RoHS.
OPZIONI DELLE FUNZIONI/SPECIFICHE
CAMPO DATI 1 E 2
KPH/MPH
Velocità 0,0 - 99,9 kph/mph
AVG
Velocità media 0,0 - 99,9 kph/mph
DIST
Distanza 0,0 - 999,9 km/miglia
TIMER
Tempo di percorrenza
0:00” - 59:59” (secondo)
01:00’ - 99.59’ (minuto)
MAX
Velocità max 0,0 - 99,9 kph/mph
ODO
Contachilometri 0,0 - 9999 km/miglia
DISPLAY
Orologio
00:00 - 23:59 (24 ore) /
1:00 - 12:59 (12 ore)
Auto sleep/Auto wake 30 minuti / < 8 secondi
Tipo di batteria Pile a bottone 2032
Dimensioni 62 mm x 46 mm x 14 mm
Temperatura di esercizio -10 °C — +60 °C / +14 °F — +140 °F
Protezione da acqua/polvere IP67 (< 1 metro per 30 minuti)
Occasionalmente potremmo pubblicare aggiornamenti e aggiunte a questo documento. Controllare periodicamente il
sito www.specialized.com o contattare Rider Care per essere sicuri di avere le informazioni più recenti.
Info: ridercare@specialized.com / 877-808-8154
SPANISH / ESPAÑOL
INSTALACIÓN
• Retire los componentes del lado del manillar donde vaya a instalar el soporte de pantalla.
• Fig. 1: Instale el soporte de pantalla y gírelo a su posición
A
.
• Apriete hasta que resulte difícil deslizar el soporte
B
. No apriete en exceso. El par recomendado es
4,4 in-lbf / 0,5 Nm.
• Para instalar la pantalla, colóquela de lado
C
y, a continuación, gírela 90°
D
.
SUSTITUCIÓN DE LA BATERÍA
• Fig. 2: Con un destornillador de cabeza plana muy pequeño, levante el borde de la tapa de la batería. A
continuación, saque con cuidado la batería de la tapa.
• Fig. 3: Sustituya la batería de la pantalla por una nueva batería de botón CR 2032, coloque la nueva batería
en la tapa con el texto hacia el interior de la tapa
E
. Asegúrese de no dañar la junta y presione la tapa para
volver a insertarla, asegurándose de que la pestaña de la tapa quede alineada con el rebaje de la pantalla
F
.
• Al sustituir la batería, se borra toda la información almacenada en la pantalla (odómetro, temporizador). Si lo
desea, anote la información antes de sustituir la batería.
• Fig. 3:
El sensor utiliza una batería de 23 A
G
. Para acceder a la batería, gire la tapa con ayuda de una
moneda o un destornillador de punta plana.
1. CARACTERÍSTICAS DE LA PANTALLA
1
Campo de datos 1
2
Nivel de batería principal
3
Comparador de velocidad
4
Unidades de velocidad
5
Reloj
6
Campo de datos 2
7
Modo (campo de datos 2)
8
Botón izquierdo
9
Botón derecho
2. PANTALLAS PRINCIPALES
H
Batería baja: El icono de batería se enciende (carga baja de la batería de botón).
I
Modo de espera: sin señal o pulsación de botón en 30 min.
J
Borrar datos : Borrar los datos de función (mantenga pulsado el botón izquierdo durante 2 segundos).
K
Mostrar odómetro : Mostrar los datos de función (mantenga pulsado el botón derecho durante 2 segundos).
Despertar del modo transporte: Después de sacar el dispositivo del embalaje, presione y mantenga
presionado los botones izquierdo y derecho durante dos (2) segundos para despertar el dispositivo
por primera vez.
3. LEYENDA
Cambiar modo/valor Pulse el botón izquierdo rápidamente
Cambiar modo/valor Pulse el botón derecho rápidamente
Establecer datos de función Pulse el botón izquierdo durante dos (2) segundos
Mostrar odómetro Pulse el botón derecho durante dos (2) segundos
Configuración de odómetro Pulse el botón derecho durante cuatro (4) segundos
Configuración del sistema
Pulse los botones izquierdo y derecho durante cuatro (4)
segundos
Cambiar pantalla de configuración Pulse los botones izquierdo y derecho rápidamente
Desplazar rápido hacia abajo
(modos de configuración)
Pulse el botón izquierdo durante más de 1 segundo
Desplazar rápido hacia arriba
(modos de configuración)
Pulse el botón derecho durante más de 1 segundo
4. INSTALACIÓN DEL SENSOR DE VELOCIDAD
L
Ajuste la posición del imán para que este quede alineado con la línea de la parte inferior del borde del
sensor. Colóquelo a una separación de entre 1-3 mm (1/32-1/8 in). NO apriete en exceso el imán.
M
El sensor se debe montar con la tapa de la puerta de la batería hacia el suelo, con una distancia no superior
a 600 mm (24 in) entre el sensor y el manillar.
5. AJUSTE DE PÁGINA PREDETERMINADA / NAVEGACIÓN
• Hay 4 páginas predefinidas, cada una de las cuales muestra una combinación de información diferente.
• Puede navegar por las páginas mediante los botones izquierdo / derecho.
N
Para borrar los datos de Distancia, Velocidad media, Duración del recorrido y Velocidad máxima, pulse el
botón izquierdo durante dos (2) segundos.
6. CONFIGURACIÓN DEL SISTEMA
• Elija el sistema de tiempo deseado
O
(12 o 24 horas), la hora
P
y el minuto
Q
.
• Establezca las unidades
R
(km/h o mph).
• Establezca el tamaño de rueda
S
y neumático
T
(predefinido o personalizado).
• Si el tamaño de la rueda/el neumático no aparece o si desea garantizar la máxima precisión, mida la
circunferencia de la rueda
U
(una rotación de rueda completa, utilizando el vástago de la válvula
V
como
marcador).
6. CONFIGURACIÓN DEL SISTEMA (tamaño de neumático personalizado)
• Al seleccionar la opción personalizada (CUST)
W
a partir de las opciones de diámetro de la rueda, el
campo de datos 2 se mostrará intermitente. Introduzca el tamaño de circunferencia del neumático en
milímetros. Para desplazarse rápidamente, mantenga pulsado el botón izquierdo para desplazarse hacia
abajo o el botón derecho para hacerlo hacia arriba.
7. CONFIGURACIÓN DE ODÓMETRO
• Tras sustituir la batería, el odómetro se puede configurar manualmente
X
, por separado de la configuración
del sistema.
• Pulse el botón derecho durante cuatro (4) segundos, establezca el primer dígito. A continuación, pulse los
botones izquierdo y derecho para pasar al siguiente dígito y configurarlo. Repita la operación para los cuatro
dígitos hasta que el odómetro esté configurado.
INFORMACIÓN GENERAL
LIMPIEZA / CUIDADO:
• No exponga la pantalla a un calor intenso ni a la luz solar durante un período de tiempo prolongado. Esto
puede dañar la pantalla y/o la batería.
• Utilice únicamente un paño suave húmedo o seco para limpiar la pantalla. No use productos de limpieza
agresivos.
• No desmonte ni deje caer la pantalla.
• Asegúrese de que la pantalla y el soporte estén firmemente sujetos en el manillar antes de montar.
ELIMINACIÓN:
Las baterías y los cargadores no deben tirarse a la basura doméstica!. Deben
desecharse de manera cuidadosa con el medio ambiente, siguiendo la normativa de
cada país. Debe consultarse en una tienda distribuidora oficial de Specialized por la
normativa específica para desechar baterías y cargadores o por si allí se pueden hacer
cargo de su desecho.
DECLARACIONES NORMATIVAS
RoHS: Specialized Bicycle Components, Inc. certifica que este producto y su envase cumplen la Directiva
2011/65/UE de la Unión Europea sobre restricciones a la utilización de determinadas sustancias peligrosas en
aparatos eléctricos y electrónicos, comúnmente conocida como RoHS.
La operación de este equipo está sujeta a las siguientes dos condiciones: (1) es posible que este equipo o
dispositivo no cause interferencia perjudicial y (2) este equipo o dispositivo debe aceptar cualquier interferencia,
incluyendo la que pueda causar su operación no deseada.
OPCIONES DE FUNCIÓN / ESPECIFICACIONES
CAMPO DE DATOS 1 Y 2
KPH/MPH
Velocidad 0.0 - 99.9 kph / mph
AVG
Velocidad media 0.0 - 99.9 kph / mph
DIST
Distancia 0,0 - 999,9 km/milla
TIMER
Duración del recorrido
0:00” - 59:59” (segundo)
01:00’ - 99.59’ (minuto)
MAX
Velocidad máxima 0.0 - 99.9 kph / mph
ODO
Odómetro 0,0 - 9999 km/milla
PANTALLA
Reloj 00:00 - 23:59 (24 h) / 1:00 - 12:59 (12 h)
Reposo automático/activación automática 30 minutos / <8 segundos
Tipo de batería Batería de botón 2032
Dimensiones 62 mm x 46 mm x 14 mm
Temperatura de funcionamiento -10 °C — +60 °C / +14 °F — +140 °F
Protección contra agua / polvo IP67 (<1 metro durante 30 minutos)
De forma ocasional, podemos emitir actualizaciones y adiciones a este documento. Compruebe periódicamente www.
specialized.com o póngase en contacto con Rider Care para asegurarse de contar con la información más reciente.
Info: ridercare@specialized.com / 877-808-8154
PORTUGUESE / PORTUGUÊS
INSTALAÇÃO
• Remova os componentes da lateral do guidão escolhida para a instalação do suporte do ciclo computador.
• Fig. 1: Instale o suporte do ciclo computador e gire até a posição
A
.
• Aperte até que o suporte não deslize com facilidade
B
. Não aperte em excesso. O torque recomendado é
de 4,4 pol.-lbf/0,5 Nm.
• Para instalar o ciclo computador, posicione lateralmente
C
e, em seguida, gire 90°
D
.
SUBSTITUIÇÃO DA BATERIA
• Fig. 2: Use uma chave de fenda bem pequena para levantar a borda da tampa da bateria e, em seguida, tire
a bateria da tampa com delicadeza.
• Fig. 3: Substitua a pilha do ciclo computador por uma pilha nova CR 2032 do tipo moeda, coloque a nova
pilha na tampa com o texto voltado para o interior da tampa
E
. Certifique-se de que o vedante não esteja
danificado e pressione a tampa de volta, certificando-se primeiro de que a aba da tampa esteja alinhada
com a reentrância no ciclo computador
F
.
• Quando a bateria é substituída, todas as informações armazenadas no ciclo computador (odômetro,
cronômetro) são apagadas. Se você desejar, anote as informações antes de substituir a bateria.
• Fig. 3:
O sensor usa uma pilha do tipo 23A
G
. Para acessar a pilha, gire a tampa usando uma moeda ou
uma chave de fenda de ponta reta.
1. RECURSOS DO CICLO COMPUTADOR
1
Campo de dados 1
2
Nível da bateria principal
3
Comparador de velocidades
4
Unidades de velocidade
5
Relógio
6
Campo de dados 2
7
Modo (Campo de Dados 2)
8
Botão esquerdo
9
Botão direito
2. TELAS PRINCIPAIS
H
Bateria descarregada: O ícone de bateria acende (carga baixa na pilha tipo botão).
I
Modo inativo: nenhum sinal ou chave por 30 min.
J
Limpar dados: Limpar dados de função (pressione o botão esquerdo durante 2 segundos).
K
Mostrar o odômetro: Mostrar dados do odômetro (pressione o botão esquerdo durante 2 segundos).
Para ligar o computador do modo viagem: após a remoção do computador de sua embalagem,
mantenha os botões esquerdo e direito por dois (2) segundos para que o sistema seja ligado pela
primeira vez.
3. LEGENDA
Mudar modo/valor Pressionar o botão esquerdo rapidamente
Mudar modo/valor Pressionar o botão direito rapidamente
Fazer o reset de dados de função Pressione o botão esquerdo durante 2 (dois) segundos
Mostrar o odômetro Pressione o botão direito durante 2 (dois) segundos
Configuração do odômetro Pressione o botão direito durante 4 (quatro) segundos
Configuração do sistema
Pressione os botões esquerdo e direito durante 4 (quatro)
segundos
Mudar ciclo computador de
configuração
Pressionar os botões esquerdo e direito rapidamente
Rolagem rápida para baixo
(modos de configuração)
Pressione o botão esquerdo por mais 1 (um) segundo
Rolagem rápida para cima
(modos de configuração)
Pressione o botão direito por mais 1 (um) segundo
4. INSTALAÇÃO DO SENSOR DE VELOCIDADE
L
Ajuste a posição do ímã para que ele fique alinhado com a linha na parte inferior da borda do sensor.
Posicione com uma separação de 1 a 3 mm (1/32 a 1/8 pol.). NÃO APERTE o ímã excessivamente.
M
O sensor deve ser montado com a tampa do alojamento da pilha voltado para o solo, uma distância máxima
de 600 mm/24” (pol.) entre o sensor e a barra do guidão.
5. PÁGINA PADRÃO DE CONFIGURAÇÃO/NAVEGAÇÃO
• Existem quatro páginas pré-configuradas, cada uma delas exibe uma combinação diferente de informações.
• As páginas podem ser navegadas com os botões esquerdo e direito.
N
Para limpar os dados de Distância, Velocidade média, Temporizador e Velocidade máxima pressione o
botão esquerdo durante 2 (dois) segundos.
6. CONFIGURAÇÃO DO SISTEMA
• Escolha o estilo de tempo desejado
O
(12 ou 24 horas), a hora
P
e os minutos
Q
.
• Configure as unidades
R
(km/h ou mph).
• Configure o tamanho da roda
S
e do pneu
T
(padrão ou personalizado).
• Se o tamanho da sua roda/pneu não estiver na lista ou se quiser garantir uma maior precisão, meça a
circunferência da sua roda
U
(uma rotação completa da roda, usando a haste da válvula
V
como
referência).
6. CONFIGURAÇÃO DO SISTEMA (Tamanho de pneu personalizado)
• Ao selecionar a opção personalizada (CUST)
W
nas opções de diâmetro da roda, o Campo de Dados
2 vai piscar. Digite o tamanho da circunferência do pneu em milímetros. Para rolar o ciclo computador
rapidamente, pressione e mantenha pressionado o botão esquerdo para baixo ou o botão direito para rolar
o ciclo computador para cima.
7. CONFIGURAÇÃO DO ODÔMETRO
• Depois de trocar a pilha, o odômetro pode ser ajustado manualmente
X
, à parte do sistema de
configuração.
• Pressione o botão direito durante 4 segundos, ajuste o primeiro dígito e, em seguida, pressione os botões
esquerdo e direito juntos para passar para o próximo dígito e ajustá-lo. Repita o procedimento para todos os
quatro dígitos até que o odômetro esteja ajustado.
INFORMAÇÕES GERAIS
LIMPEZA/CUIDADOS:
• Não exponha o ciclo computador a calor intenso ou a luz solar por um longo período. Isso pode danificar o
ciclo computador e/ou a bateria.
• Use somente um pano macio úmido ou seco para limpar o ciclo computador. Não use produtos de limpeza
agressivos.
• Não desmonte ou deixe o ciclo computador cair.
• Certifique-se de que
o
ciclo computador e o suporte estejam instalados com firmeza no guidão antes de
andar de bicicleta.
DESCARTE:
Baterias e carregadores não podem ser descartados em seu lixo doméstico! Todas
as baterias e carregadores devem ser descartados de maneira correta, de acordo
com os regulamentos de descarte de bateria em seu país ou estado. Peça mais
informações para seu Revendedor Autorizado sobre como descartar sua bateria ou
carregador, e sobre qualquer programa de recolhimento.
ÂMBITO REGULAMENTAR
RoHS: A Specialized Bicycle Components, Inc. certifica que este produto e a embalagem que o acompanha
estão em conformidade com a Diretiva Europeia 2011/65/UE relativa à restrição do uso de determinadas
substâncias perigosas em equipamentos elétricos e eletrónicos, normalmente referida como RoHS.
Este equipamento não tem direito à proteção contra interferência prejudicial e não pode causar interferência em
sistemas devidamente autorizados.
OPÇÕES/ESPECIFICAÇÕES DE FUNÇÕES
CAMPO DE DADOS 1 E 2
Km/h / MPH
Velocidade 0,0 – 99,9 Km/h /mph
AVG
Velocidade média 0,0 – 99,9 Km/h /mph
DIST
Distância 0,0 – 999,9 Km / milhas
TIMER
Tempo da corrida
0:00” - 59:59” (segundos)
01:00’ - 99.59’ (minutos)
MAX
Velocidade máx. 0,0 – 99,9 Km/h /mph
ODO
Odômetro 0,0 – 9999 Km / milhas
CICLO COMPUTADOR
Relógio 00:00 – 23:59 (24h) / 1:00 – 12:59 (12h)
Auto desligar / Auto despertar 30 minutos / < 8 segundos
Tipo de bateria Pilha do tipo botão 2032
Dimensões 62 mm x 46 mm x 14 mm
Temperatura de operação -10 °C – +60 °C / +14°F – +140 °F
Grau de proteção contra água/poeira IP67 ( < 1 metro durante 30 minutos)
01817-19-11817
Podemos ocasionalmente emitir atualizações e anexos a este documento. Verifique periodicamente o site www.
specialized.com ou fale com o Rider Care para certificar-se de que você tenha as informações mais atualizadas.
Info: ridercare@specialized.com / 877-808-8154
DUTCH / NEDERLANDS
INSTALLATIE
• Verwijder de componenten van de zijkant van het stuur, die bestemd zijn voor de installatie van de displayhouder.
• Fig. 1: Installeer de displayhouder en draai het naar de juiste positie
A
.
• Draai vast totdat de houder niet langer wegschuift
B
. Draai niet te vast aan. Het aanbevolen draaimoment
is 4,4 in-lbf / 0,5 Nm.
• Om het display te installeren, breng het zijdelings aan
C
en draai dan 90°
D
.
DE BATTERIJ VERVANGEN
• Fig. 2: Breng de rand van het batterijdeksel omhoog met behulp van een zeer kleine
platkopschroevendraaier. Verwijder de batterij vervolgens voorzichtig uit het deksel.
• Fig. 3: Vervang de batterij van het display door een nieuwe CR 2032 knoopcelbatterij, plaats de nieuwe
batterij in het deksel met de tekst naar de binnenkant van het deksel gericht
E
. Zorg dat de afsluitring niet
is beschadigd en druk het deksel er weer in, waarbij u ervoor zorgt dat het lipje van het deksel op één lijn ligt
met de uitsparing op het display
F
.
• Als de batterij wordt vervangen, wordt alle informatie die op het display is opgeslagen (odometer, timer)
gewist. Indien gewenst, neem nota van de informatie voordat u de batterij vervangt.
• Fig. 3:
De sensor gebruikt een 23A batterij
G
. Om toegang tot de batterij te krijgen, draai het deksel met
een muntstuk of een platkopschroevendraaier los.
1. BESCHRIJVING VAN HET DISPLAY
1
Gegevensveld 1
2
Voornaamste batterijniveau
3
Snelheidsvergelijking
4
Snelheidseenheden
5
Klok
6
Gegevensveld 2
7
Modus (Gegevensveld 2)
8
Linker knop
9
Rechter knop
2. VOORNAAMSTE SCHERMEN
H
Lege batterij: Batterijpictogram verschijnt (batterijvermogen is laag).
I
Slaapmodus: Geen signaal of toets gedurende 30 min.
J
Gegevens wissen: Functiegegevens wissen (linker knop 2 seconden ingedrukt houden).
K
Odometer weergeven: Odometer-gegevens weergeven (rechter knop 2 seconden ingedrukt houden).
Wekken vanuit verzendmodus: nadat het display uit de verpakking is verwijderd, houdt de linker- en
rechterkop twee (2) seconden ingedrukt om het display voor de eerste keer te activeren.
3. LEGENDE
Modus / waarde wijzigen Druk kort op linker knop
Modus / waarde wijzigen Druk kort op rechter knop
Functiegegevens resetten Druk twee (2) seconden op linker knop
Odometer weergeven Druk twee (2) seconden op rechter knop
Odometer instellen Druk vier (4) seconden op rechter knop
Systeem instellen Druk vier (4) seconden op linker en rechter knop
Installatiescherm wijzigen Druk kort op linker en rechter knop
Snel omlaag scrollen (instelmodi) Druk langer dan 1 seconde op linker knop
Snel omhoog scrollen
(instelmodi)
Druk langer dan 1 seconde op rechter knop
4. SNELHEIDSSENSOR INSTALLEREN
L
Pas de positie van de magneet aan zodat de magneet zich op dezelfde hoogte bevindt als de lijn aan de
onderkant van de sensor. Handhaaf een vrije ruimte tussen 1-3 mm (1/32 - 1/8 in). Draai de magneet NIET te
vast aan.
M
De sensor moet worden gemonteerd met het batterijdeksel naar de grond gericht en met een vrije ruimte
van maximum 600mm (24 in) tussen de sensor en het stuur.
5. STANDAARD PAGINA-INSTELLINGEN/NAVIGATIE
• Er zijn 4 vooringestelde pagina’s. Elke pagina geeft een verschillende combinatie aan informatie weer.
• Navigeer door de pagina’s met de linker / rechter knop.
N
Er zijn 4 vooringestelde pagina’s. Elke pagina geeft een verschillende combinatie aan informatie weer.
6. SYSTEEM INSTELLEN
• Kies de gewenste tijd
O
(12 of 24 uur), uur
P
en minuten
Q
.
• Stel de gewenste eenheid
R
(km/u of mph) in.
• Stel de wiel-
S
en bandenmaat
T
in (vooringesteld of aangepast).
• Als uw wiel-/bandenmaat niet in de lijst is vermeld of u wilt een zo nauwkeurig mogelijke waarde, meet de
omtrek van uw wiel
U
(één volledige omwenteling van een wiel, gebruik de ventielsteel
V
als start- en
eindpunt).
6. SYSTEEM INSTELLEN (aangepaste bandenmaat)
• Als de aangepaste (CUST)
W
optie uit de wieldiameteropties wordt geselecteerd, knippert Gegevensveld
2. Voer de afmeting van de bandenomtrek in millimeter in. Om snel door de waarden te scrollen, druk en
houd de linker knop ingedrukt om omlaag te scrollen of druk en houd de rechter knop ingedrukt om omhoog
te scrollen.
7. ODOMETER INSTELLEN
• Na het vervangen van de batterij kan de odometer, afzonderlijk van de systeeminstallatie
X
, handmatig
worden ingesteld.
• Druk vier (4) seconden op de rechter knop en stel het eerste cijfer in. Druk dan tegelijkertijd op de linker en
rechter knop om naar het volgend cijfer te gaan en het in te stellen. Doe dit voor alle vier de cijfers totdat de
odometer is ingesteld.
ALGEMENE INFO
REINIGING/ONDERHOUD:
• Stel het display niet langdurig bloot aan intense hitte of zonlicht. Dit kan het display en/of de batterij
beschadigen.
• Maak het display alleen schoon met een vochtige of droge, zachte doek. Gebruik geen agressieve of
schurende schoonmaakmiddelen.
• Haal het display niet uit elkaar en laat het niet vallen.
• Zorg dat het display en de houder stevig op het stuur zijn vastgemaakt alvorens te fietsen.
VERWIJDERING:
Batterijen en opladers mogen niet van worden afgevoerd met uw huisvuil! Alle
batterijen en opladers moeten op een milieuvriendelijke wijze worden afgevoerd,
in overeenstemming met de afval-regelgeving in uw land of staat. Vraag uw
geauthoriseerde Specialized retailer voor meer informatie over wat u met een batterij
of de lader moet doen en een eventueel terugname-programma.
NALEVINGSVERKLARING
RoHS: Specialized Bicycle Components, Inc. verklaart dat dit product en de bijbehorende verpakking in overeen-
stemming zijn met de EU-richtlijn 2011/65/EU ter beperking van het gebruik van bepaalde gevaarlijke stoffen in
elektrische en elektronische apparatuur, ook wel bekend als RoHS.
FUNCTIE-OPTIES / SPECIFICATIES
GEGEVENSVELD 1 & 2
KPH/MPH
Snelheid 0,0 – 99,9 km/u / m/u
AVG
Gemiddelde snelheid 0,0 – 99,9 km/u / m/u
DIST
Afstand 0,0 – 999,9 km / mi
TIMER
Rittijd
0:00” - 59:59” (seconden)
01:00’ - 99.59’ (minuten)
MAX
Max snelheid 0,0 – 99,9 km/u / m/u
ODO
Odometer 0,0 – 9999 km / mi
DISPLAY
Klok 00:00 - 23:59 (24u) / 1:00 - 12:59 (12u)
Automatische slaap-/wekstand 30 minuten / < 8 seconden
Type batterij Knoopcel 2032
Afmetingen 62mm x 46mm x 14mm
Bedrijfstemperatuur -10° C — +60° C / +14° F — +140° F
Water-/stofbescherming IP67 (< 1 meter gedurende 30 minuten)
Dit document kan nu en dan worden bijgewerkt of aangevuld. Ga regelmatig naar www.specialized.com of neem
contact op met Rider Care voor de meest actuele informatie.
Info: ridercare@specialized.com / 877-808-8154