EasyManua.ls Logo

Spectrum 37135 - User Manual

Spectrum 37135
2 pages
Print Icon
To Next Page IconTo Next Page
Loading...
Assembly Instructions
0190574 Page 1 of 2
Assembly Instructions
Important
Before you begin, read and comply with all safety and operating instructions,
and ensure all parts and correct quantities are included.
Any parts damaged during shipment must be reported within 5 days of receipt.
To report information regarding missing parts or damage, to purchase parts
or accessories, or if you have any questions, please contact us.
www.spectrumfurniture.com
800-235-1262, 715-723-6750
Thank you for purchasing Spectrum products!
Locking Cabinet for 3D2GO
Printer Cart
37135
1. Assemble cabinet
1. Attach the side panels to the rear panel with
(4) #8 x 3/8” PHSM screws. Figure 1.1.
Figure 1.1
Tools
Required
Phillips
Screwdriver
Note: The Locking Cabinet is not compatible
with the 37136 Adjustable Shelf.
#8 x 3/8” PHSM screws
(4 required)
Figure 1.2
2” Grommet
(4) 026064
1/4-20 x 5/8” PHM
(4) 026073
#8 x 3/4” PHSM
(14) 0190174
#8 x 3/8” PHSM
(2) 059984
2” Grommet
(2) 0119468
Recessed bumper
with washer
(2) 0135232
Side bin
(1) 0134837
Internal shelf
(1) 0135328
Door assembly
(2) 013250
Side panel
(1) 0134807
Back panel
Side panel
Side panel
Back panel
2. Install (2) 2” grommets in the back panel.
Figure 1.2.
Question and Answer IconNeed help?

Do you have a question about the Spectrum 37135 and is the answer not in the manual?

Spectrum 37135 Specifications

General IconGeneral
BrandSpectrum
Model37135
CategoryIndoor Furnishing
LanguageEnglish

Summary

Assemble Cabinet

Attach Side Panels to Back Panel

Attach side panels to the back panel using four #8 x 3/8" PHSM screws.

Install Grommets in Back Panel

Install two 2" grommets into the back panel.

Install Cabinet to Cart

Secure Cabinet to Cart Underside

Flip cart, align cabinet, and secure to worksurface underside with four #8 x 3/4" PHSM screws.

Attach Recessed Bumpers

Attach two recessed bumpers with washers to the cabinet side.

Install Bottom Panel

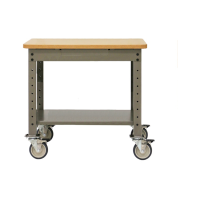
Install the bottom panel to the cart legs using previously removed screws.

Install Internal Adjustable Shelf

Insert and align the internal adjustable shelf, securing it with four 1/4-20 x 5/8" PHM screws.

Install Door and Bins

Attach Door Assembly

Align the door assembly hinge and attach to the cabinet with four #8 x 3/8" PHSM screws.

Install External Bins

Install external bins at the desired height.

Related product manuals