operation before being returned to
service. Only parts manufactured by
Emerson should be used for repairing
this pilot.
Due to normal wear or damage that may
occur from external sources, this pilot
should be inspected and maintained
periodically. The frequency of inspection
and replacement of parts depends upon
the severity of service conditions or the
requirement of local, state and federal
rules and regulations.
Disassembly
1. Release adjusting spring (key 4) compression by
loosening adjusting nuts (key 1). Remove nuts,
yoke (key 2), adjusting spring and spring button
(key 5).
2. Remove diaphragm nuts (key 15) and lift off cowl
(key 6). Lift out diaphragm assembly (keys 7, 16
and 17).
3. Disassemble diaphragm assembly by removing
diaphragm screw (key 7) from pressure plate
(key 16).
Note
This step is not necessary if installing
a new diaphragm assembly (included in
repair kit).
4. Remove blind flange bolts (key 23) and take off
blind flange (key 14). Remove screen (key 20) and
gasket (key 13).
5. Hold the pusher plate (key 8) and remove stem
nuts (key 22). Lift out stem assembly (keys 8 and
19) and valve spring (key 9). The disk (key 21)
will drop off. If the disk is not easily removed from
the stem, or the stem does not easily move in the
bushing (key 10) is difficult to remove, inspect
stem, seat ring (key 11) and disk carefully for
notches, scratches or bending.
6. Remove the seat ring (key 11) from the pilot body
(key 12) using a socket wrench. Do not remove
the seat ring unless replacing the stem assembly
(keys 8 and 19) and disk (key 21).
Inspection
1. Examine the seat ring (key 11) and disk (key 21)
sealing surfaces for nicks or other signs of
damage by pipeline debris. Slight imperfections
may be removed by lapping the surfaces.
Otherwise, replace the seat ring and disk.
2. Examine the stem (key 19) for a build-up of
pipeline contaminants or erosion. Remove any
build-up with a wire brush and polish with a very
fine crocus cloth. Work carefully to avoid bending
the stem.
3. Inspect the pilot body (key 12) and its ports for
corrosion. Some rust is normal, but if corrosion
debris is readily separated from the body, clean
body with wire brush and remove debris.
Lapping Operations
Lap sparingly using 500 grit lapping compound and
light pressure. Heavy grinding may cause galling, wide
sealing surfaces and a groove disk, all of which tend to
produce leakage.
Lapping may be done using a socket wrench to rotate
the stem and disk assembly back and forth against the
seat for 30 seconds or so. After the sealing surfaces
are lapped in, disassemble and clean all parts.
Seat, Disk and Stem Replacement
1. Clean the body threads of old sealing compound
using a wire brush.
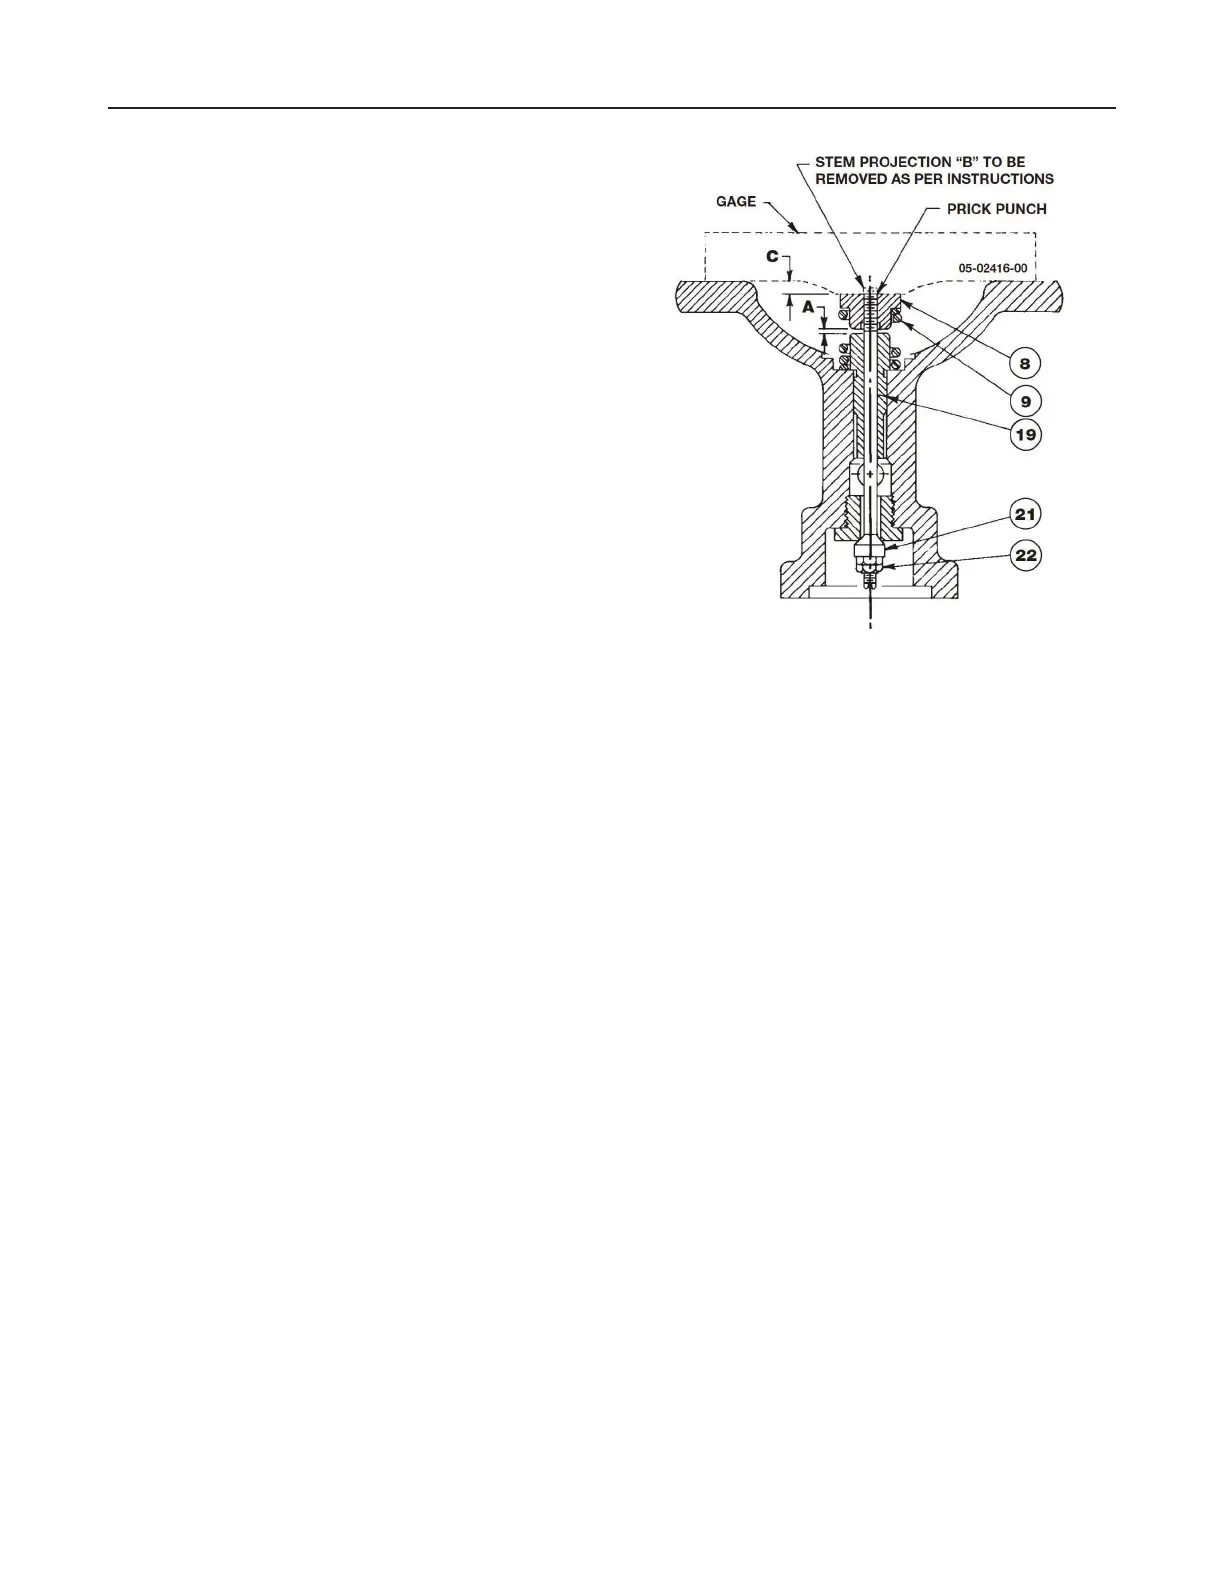
Figure 3. Travel Setting
5
D Series
 Loading...