Document
ma-mswg-en1817
Page 4 of 7
Assembly Instructions
MSW from M72 to M140
©Spieth
Proprietary
notice
ISO 16016
Previous document: ma-mswg-en1604
See
www.spieth-me.de/english/service-download/catalogue-instructions/
For any questions, requests or suggestions, please contact
info@spieth-me.de
2 Description of Spieth Locknuts
2.1 Structure
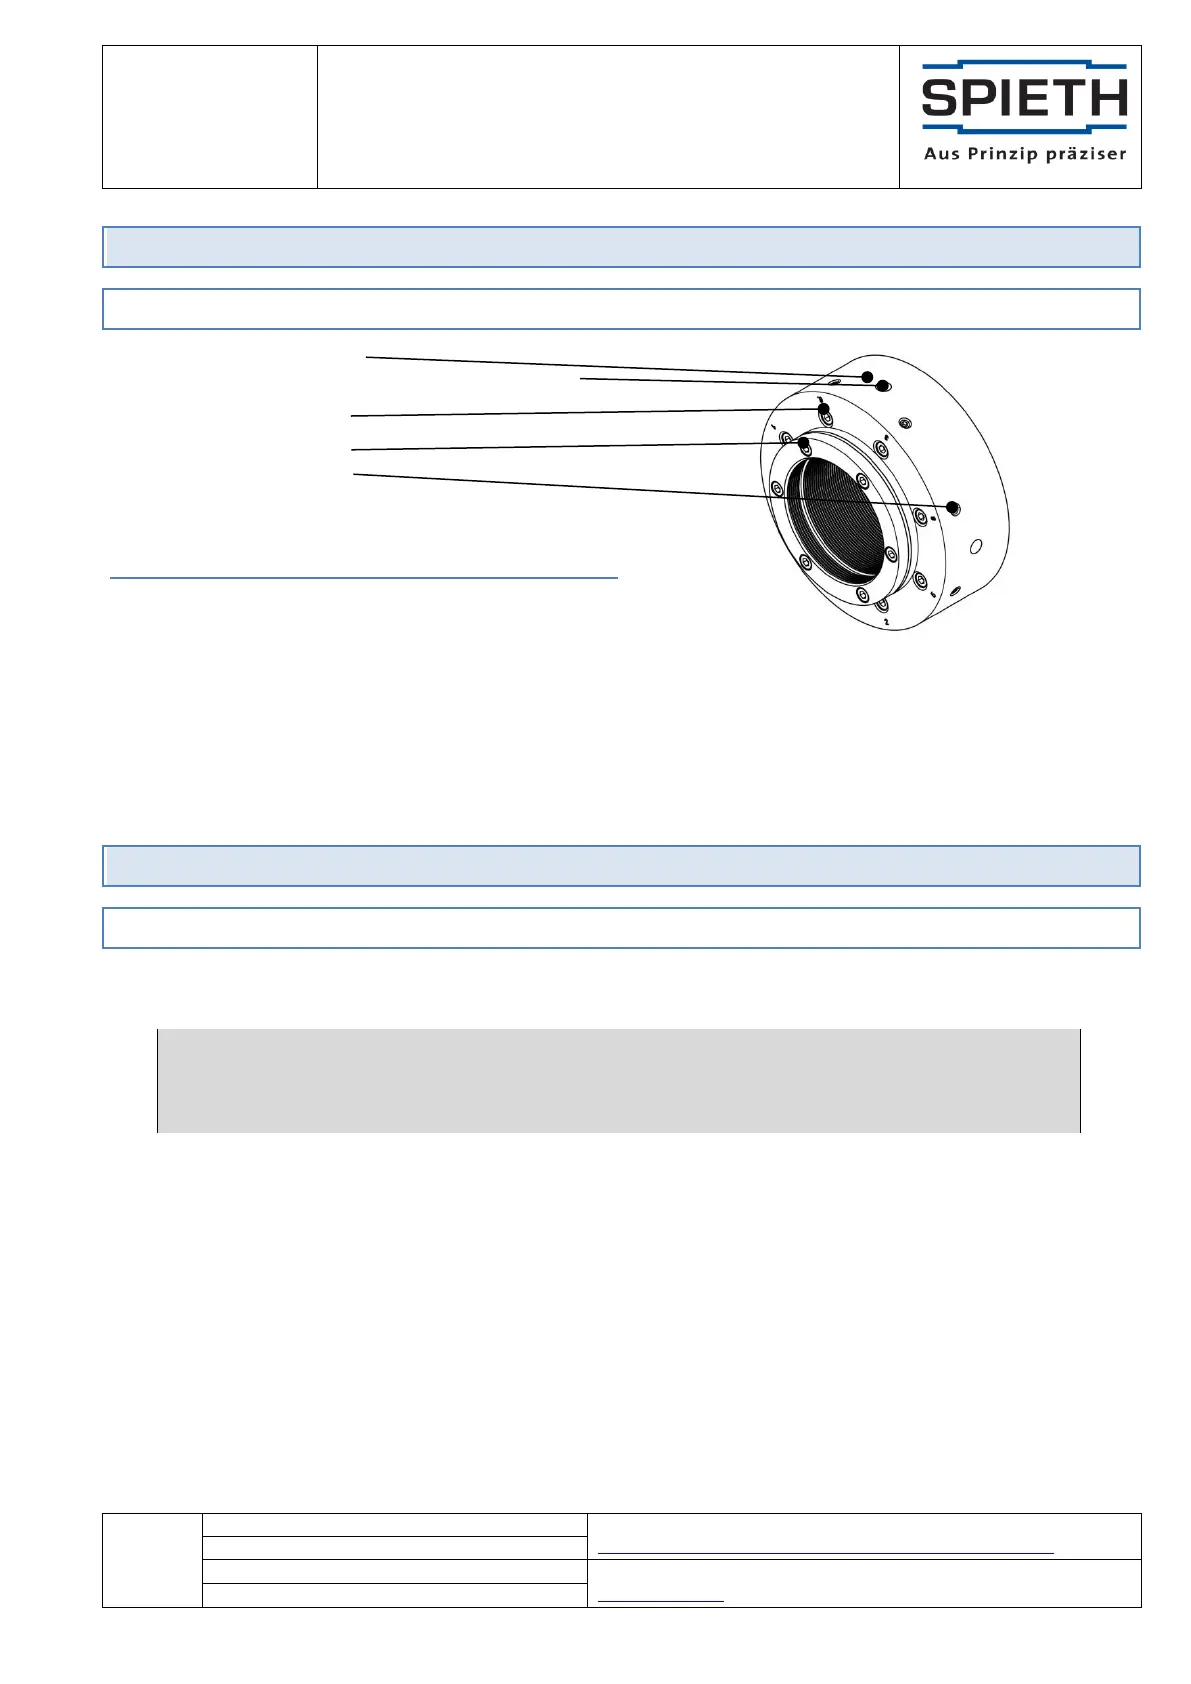
Fig 1: Schematic representation similar to
Spieth MSW series locknuts
Radial boreholes for pin spanner DIN 1810 - B
Spieth pretensioning bolts
Identifying feautures (for original Spieth locknuts)
Locking torque M
S
for clamping screws
The Spieth MSW series locknuts are assemblies consisting of locknut bodies and clamping screws. The thread
inside the locknut body is interrupted by a groove, separating the locknut body into a load and a locking part. A
diaphragm connects load and locking part.
3 Assembling Spieth Locknuts
3.1 Preparing for assembly
Remove Spieth locknuts from their packaging right before assembly. As hand perspiration can cause corrosion,
ensure to keep your hands dry and clean and/or to always wear protective gloves for assembly.
Please note:
For environmental reasons, please comply with applicable statutory regulations and guidelines when
disposing of packaging materials.
In case of damage to packaging components, check the locknuts for damage and remove any contamination.
The preservative used is compatible with all conventional machine oils. If in doubt, check the preservative's
compatibility.
For an optimum mode of action of Spieth locknuts, remove the thin wax-like film of preservative from the contact
surfaces using a lint-free cloth. Directly afterwards, use machine oil without friction-reducing additives to lightly
oil the component and protect it from corrosion.