AA
B
B
INSTRUCTION GUIDE
CAUTION:
HAIR ENTANGLEMENT
—
Tie back and cover hair and secure
loose clothing prior to play.
a
INDOOR USE ONLY
1.5 V
2
Not Included
x
AAA
(
LR03
)
CONTENTS
8+
YRS
THROTTLE
STICK
POWER BUTTON
+
POWER LED
MODE SELECT
(BEGINNER
+
ADVANCED)
B
C
A
STUNT
BUTTON
DIRECTION
STICK
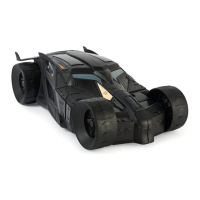
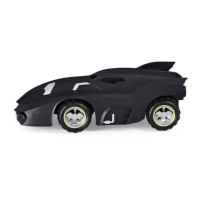
1 FLIGHT RIDER™
1 Controller
1 Rotor
Removal Tool
4 x Spare
Rotors
1 USB charging
cable
1 Instruction
guide
2 x
Precision Sticks
For in-depth video instructions go to
1.
Press down on release button (A) to
slide down battery cover (B). If used
batteries are present, remove these
batteries from the unit by pulling up on
one end of each battery.
HOW TO
INSTALL
BATTERIES
2.
DO NOT remove or install batteries
using sharp or metal tools. Install new
batteries as shown in the polarity diagram
(+/-) inside the battery compartment.
3.
Replace battery door securely.
NOTE: Check your local laws and
regulations for correct recycling and/or
battery disposal. NOTE: HEADLIGHTS ON BIKE
WILL FLASH WHEN BATTERY IS LOW.
STEP 1
1. Move the power swtich on the FLIGHT
RIDER™ to the OFF position.
CHARGING
2. Plug one end of the micro USB into a
computer or wall adapter. Plug the other
end into the charge port on the back of the
rider. Only connect USB charging cable to
a computer or other 5VDC rated power
source.
STEP 2
The charge port for the
FLIGHT RIDER™
is located on the
back of the rider.
APPROXIMATE FULL CHARGE TIME:
45 Minutes.
APPROXIMATE DRIVE TIME: 4.5
Minutes.
THINGS TO REMEMBER:
BEFORE YOU RECHARGE THE BATTERY, WAIT 10-15 MINUTES TO LET THE BATTERY COOL DOWN.
1 2 3
2
FLIGHT RIDER
™
A
LEFT/RIGHT
ANTI–DRIFT
ADJUSTER
FORWARD/REVERSE
ANTI–DRIFT
ADJUSTER
AUTO LAUNCH &
LAND BUTTON
B C
START UP
AND
BALANCE
MODE
1. Turn on the
FLIGHT RIDER™
by sliding the power switch to the
ON position.
STEP 3
4. You are now ready to play.
3. FLIGHT RIDER™ headlights will
flash when the bike is pairing with
the controller. Headlights are solid
when paired.
2. Turn on the controller by
pressing the POWER BUTTON.
2 3 4
NORTH AMERICA – 1-800-622-8339,
1-800-622-8339, customercare@spinmaster.com
UK – 0800 206 1191, serviceuk@spinmaster.com
IRELAND – 1800 992 249
AUSTRALIA –1800 316 982, customercare@spinmaster.com
AIRHOGS.COM/FLIGHTRIDER
2 x Landing
Skis
REPLACING ROTORS
a
CAUTION: Rotor to be replaced by adult only.
NOTE: If hair or debris gets caught in rotor and prevents
rotor from turning, remove and clean.
NOTE: pay special attention to replace rotors
with identical shaped rotors. There are 2
different shaped rotors (identified with a circle
or square) and their shape and placement can
directly affect flight performance.
For Video Tutorial go to:
AIRHOGS.COM/FLIGHTRIDER
a
CAUTION: Rotor to be replaced by adult only.
NOTE: If hair or debris gets caught in rotor and prevents
rotor from turning, remove and clean.
NOTE: pay special attention to replace rotors with identi-
cal shaped rotors. There are 2 different shaped rotors
(identified with a circle or square) and their shape and
placement can directly affect flight performance.
CHARGE PORT
ATTACHING
LANDING SKIS
POWER SWITCH
ONOFF / Charge
1
1
3. Vehicle charging when USB charging
LED is BLINKING.
4. Vehicle charged when USB charging
LED is SOLID ON.
43