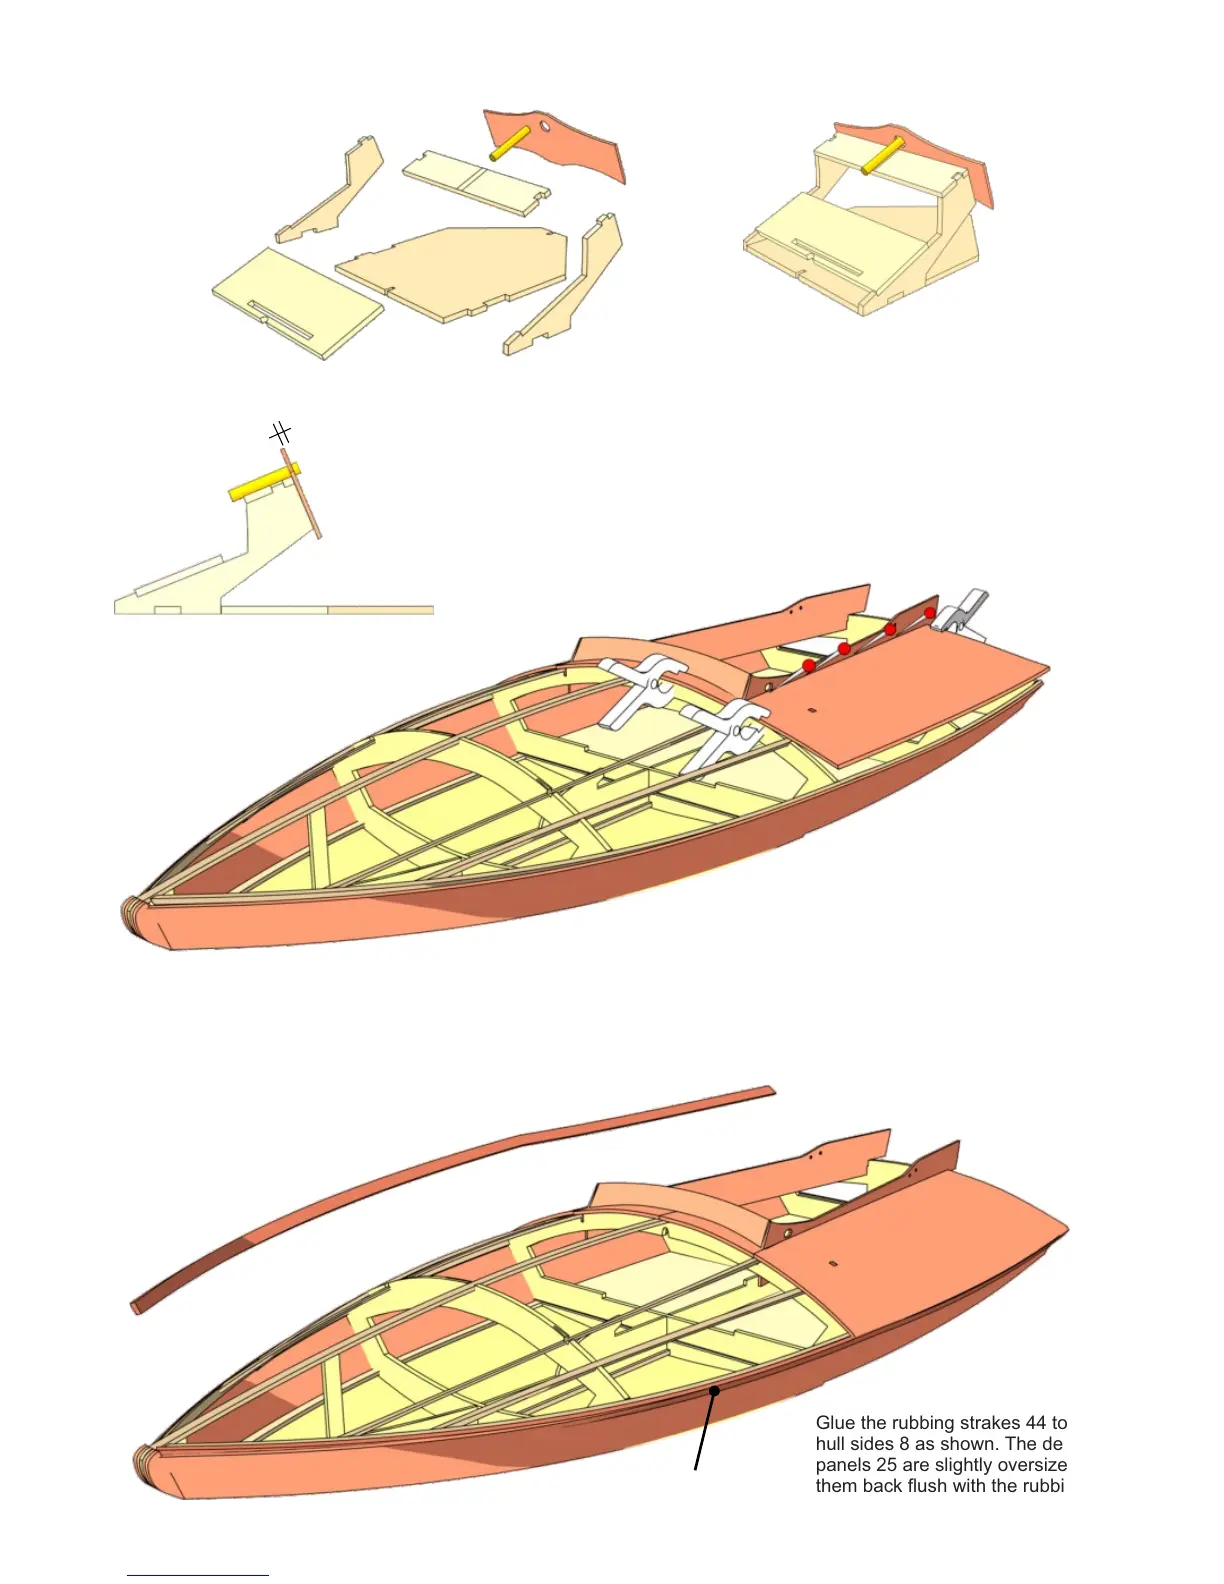
Assemble the control stand, which supports the steering
wheel and servo, from parts 18 to 23. Note that parts 18
and 19 must be at right-angles to each other. The brass
bush 22 should project out of the instrument panel 23 by 1
mm. Place the completed control stand in the hull, but do
not glue it in place; it needs to be detachable.
18
19
19
20
21
22
23
25
8
3
Glue the rubbing strakes 44 to the
hull sides 8 as shown. The deck
panels 25 are slightly oversize; sand
them back flush with the rubbing
strakes when the glue has set hard.
44
44
25
11
12
13
The right and left aft deck panels 25 can now be glued
to the frames and stringers: start by gluing them only to
the area bounded by the stringers 13 and 14, and
secure the panels with spring clips and pins as shown.
Allow the glue to dry out for at least twelve hours, as
the next stage places the glued joints under stress.
Now glue the aft deck panels 25 to the frames and the
hull sides 8, securing them with strips of adhesive tape.
23
22
1 mm